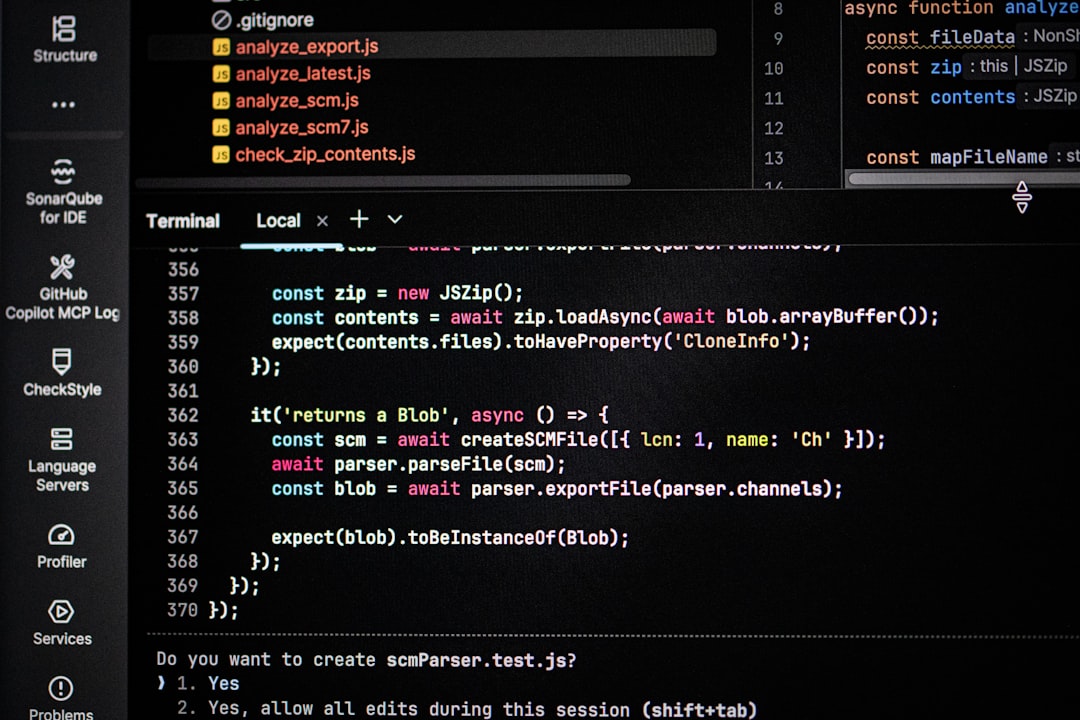
Category: AI Web Design

  • 8 Design Patterns Every AI Tool Website Needs in 2026

    8 Design Patterns Every AI Tool Website Needs in 2026

    AI tool websites live or die by their first impression. Users arrive skeptical, scan for proof that the product actually works, and leave within seconds if the design fails to reassure them. Getting the layout and interaction patterns right in 2026 is no longer optional: it is the difference between a free trial and a closed tab.

    Key Takeaways

    • AI tool websites need specific trust and demonstration patterns that generic SaaS templates do not provide out of the box.
    • Live demo embeds and animated output previews convert better than static screenshots because they let users experience the value before signing up.
    • Accessibility and performance are non-negotiable: slow, inaccessible AI product pages lose credibility before the copy is even read.
    • Using a structured HTML template like the Canvas HTML Template gives you a proven Bootstrap 5 foundation to implement every pattern on this list without rebuilding from scratch.

    1. The Live Demo Hero Section

    The single most effective pattern for an AI tool website in 2026 is a hero section that lets visitors interact with the product immediately, before they have read a single bullet point. Static taglines and placeholder screenshots no longer communicate what the tool actually does. A live input-output demo embedded directly in the hero collapses the gap between “what is this?” and “I want to try this.”

    A practical implementation uses a simple textarea, a button wired to your API, and a pre-formatted output pane. The markup below is Bootstrap 5 compatible and works inside any Canvas section:

    <section class="py-5 bg-light">
      <div class="container">
        <div class="row align-items-center gy-4">
          <div class="col-lg-6">
            <h2 class="display-5 fw-bold">See it work — right now</h2>
            <p class="lead text-muted">Type anything below and watch the AI respond in seconds.</p>
            <textarea id="demo-input" class="form-control mb-3" rows="3" placeholder="Enter your text here..."></textarea>
            <button id="demo-btn" class="btn btn-primary px-4">Generate</button>
          </div>
          <div class="col-lg-6">
            <div id="demo-output" class="p-4 border rounded bg-white text-muted fst-italic">
              Your result will appear here...
            </div>
          </div>
        </div>
      </div>
    </section>

    For deeper guidance on hero section composition, the post on how to design hero sections that grab attention instantly covers hierarchy and visual weight in detail.

    8 Design Patterns Every AI Tool Website Needs in 2026, abstract concept illustration

    2. Trust Architecture Above the Fold

    AI products face a specific trust barrier that generic SaaS products do not. Users worry about data privacy, hallucinations, and whether the tool is actually powered by what it claims. Trust architecture means placing verifiable social proof (real logos, named user quotes, published accuracy metrics) in the first viewport, not buried in a footer.

    The pattern that performs consistently well: a logo strip of enterprise customers or press mentions placed immediately below the hero CTA, followed by a single bold stat (for example, “4.2 million outputs generated this week”) that refreshes via a lightweight fetch call. Static vanity numbers read as fiction. Dynamic figures read as evidence.

    3. Feature-Proof Sections Instead of Feature Lists

    A three-column icon grid listing “Fast”, “Accurate”, and “Secure” is the laziest pattern in SaaS web design and the least convincing on an AI tool site. Replace it with feature-proof sections: each feature demonstrated rather than described. A side-by-side comparison (before/after, input/output, manual versus AI-assisted) makes the benefit concrete.

    Bootstrap 5’s grid makes this straightforward. Use the Bootstrap Grid calculator to plan column breakpoints if your comparison panels need to reflow gracefully on mobile.

    <div class="row g-4 align-items-stretch">
      <div class="col-md-6">
        <div class="p-4 border rounded h-100">
          <span class="badge bg-secondary mb-2">Without AI</span>
          <p class="text-muted small">Manually reviewing 200 survey responses takes 4 hours and introduces inconsistency.</p>
        </div>
      </div>
      <div class="col-md-6">
        <div class="p-4 border rounded h-100 border-primary">
          <span class="badge bg-primary mb-2">With AI</span>
          <p class="small">Same 200 responses categorised, summarised, and ranked by sentiment in 90 seconds.</p>
        </div>
      </div>
    </div>

    ai website patterns, abstract technical diagram

    4. Transparent Pricing with Usage Context

    AI tools are almost universally priced on usage: tokens, API calls, seats, or outputs per month. Visitors who cannot quickly map their own workflow to a pricing tier will not convert. The pattern that works is a pricing table with usage context built in. Rather than listing “10,000 credits”, explain what that means (“roughly 400 blog posts” or “2,500 image generations”).

    For the full conversion blueprint for SaaS pricing pages, the SaaS landing page design guide is worth reading alongside this post. The pricing hierarchy and CTA placement principles apply directly to AI products.

    Keep the toggle between monthly and annual billing visible without scrolling, and highlight the recommended tier with a visually distinct card, not just a “Most Popular” badge that blends into the surrounding layout.

    5. Specificity in Social Proof

    Generic testimonials (“This tool changed our workflow!”) are worthless on an AI product page in 2026. Users have seen too many fabricated reviews. The pattern that builds genuine credibility is outcome-specific social proof: the testimonial names a measurable result, a job title, and a company category.

    Format testimonials as structured cards that include a bolded quoted outcome, attribution with role and company type, and optionally a before/after metric. Avoid carousel auto-rotation. It hides content from scanners and reduces perceived credibility. A static grid of three to five cards outperforms a spinning carousel in almost every A/B test on record.

    6. Accessibility and Performance as Design Patterns

    AI tool websites routinely score poorly on accessibility audits because developers prioritise animation and interactive demos over semantic markup. In 2026, with WCAG 2.2 adoption accelerating and Google’s Core Web Vitals still influencing rankings, treating accessibility and performance as afterthoughts is a commercial mistake.

    Three patterns matter most for AI tool sites specifically:

    • Keyboard navigability for demo inputs: every interactive element in your live demo must be reachable and operable without a mouse. Use tabindex correctly and add visible focus styles.
    • Sufficient colour contrast for output panes: AI-generated text displayed in muted grey on white fails WCAG AA contrast ratios. Use a minimum 4.5:1 ratio for body text. The post on contrast and accessibility in HTML templates shows how to audit and fix contrast failures systematically.
    • Deferred loading of heavy demo scripts: load your API integration JavaScript only after the above-the-fold content is painted. Use defer or dynamic import to keep your Largest Contentful Paint (LCP) under 2.5 seconds.
    <!-- Load demo script only after page content is ready -->
    <script>
      window.addEventListener('load', function () {
        var script = document.createElement('script');
        script.src = 'js/ai-demo.min.js';
        script.defer = true;
        document.body.appendChild(script);
      });
    </script>

    Canvas pages load js/plugins.min.js and js/functions.bundle.js by default. Any additional AI demo scripts should be appended after these files so they do not block Canvas’s own initialisation sequence.

    7. Theming and Visual Identity via CSS Variables

    AI tool branding in 2026 tends toward dark backgrounds, accent gradients, and a technical-but-approachable aesthetic. When building on the Canvas HTML Template, apply your brand colours through the correct Canvas CSS variables rather than overriding Bootstrap classes directly. This keeps your customisation upgrade-safe and consistent across all Canvas components.

    :root {
      --cnvs-themecolor: #6C47FF;          / primary brand purple /
      --cnvs-themecolor-rgb: 108, 71, 255;
      --cnvs-primary-font: 'Inter', sans-serif;
      --cnvs-secondary-font: 'Fira Code', monospace; / for output panes /
      --cnvs-header-bg: #0D0D14;
      --cnvs-header-sticky-bg: rgba(13, 13, 20, 0.95);
      --cnvs-primary-menu-color: #E0E0E0;
      --cnvs-primary-menu-hover-color: #6C47FF;
    }

    Setting --cnvs-secondary-font to a monospace typeface for output panes reinforces the “machine output” aesthetic that users associate with credible AI tools. Never hard-code colour values inside component styles when a Canvas variable is available.

    8. A Frictionless Conversion Flow

    The final pattern is structural rather than visual. The path from first visit to signed-up user must contain as few redirects and form fields as possible. The winning pattern for AI tools in 2026 is email-only signup with immediate product access, followed by progressive profile completion inside the app. Offering third-party OAuth (Google, GitHub) as the primary CTA option reduces friction further.

    Place your primary CTA immediately after the live demo section, not only at the top of the page. Users who have just seen the product work are at peak motivation. A secondary CTA (“See pricing”) in the navigation satisfies users who want to evaluate cost before committing. Canvas Builder generates complete Canvas-compatible layouts that implement this flow, including hero, demo placeholder, trust strip, pricing, and CTA sections, without requiring you to code each component individually.

    Frequently Asked Questions

    What makes an AI tool website different from a standard SaaS website?

    AI tool websites need to overcome an additional layer of skepticism around accuracy, data privacy, and whether the product genuinely uses AI. This means live demos, outcome-specific social proof, and transparent usage-based pricing are more critical than they are for conventional SaaS products.

    How do I implement a live demo without slowing down my page?

    Load your demo script dynamically after the main page content has painted. Use the defer attribute or a window.addEventListener('load', ...) wrapper to append the script after Canvas’s own js/plugins.min.js and js/functions.bundle.js have initialised. This keeps your LCP score within Google’s recommended 2.5-second threshold.

    Which Canvas CSS variables should I use to theme an AI tool site?

    Use --cnvs-themecolor for your primary brand colour, --cnvs-header-bg and --cnvs-header-sticky-bg for your navigation, and --cnvs-primary-font plus --cnvs-secondary-font for typography. Never override Bootstrap variables like --bs-primary directly, as this bypasses Canvas’s component system and can break sticky header styles.

    Should AI tool websites use dark mode by default?

    Dark backgrounds perform well for AI and developer tools because they signal technical credibility and reduce eye strain during extended use. However, if your target audience is non-technical (for example, marketing teams or small business owners), a light background with dark accents tends to feel more approachable. Test both with your actual audience rather than assuming dark equals better.

    How many CTAs should an AI tool landing page have?

    A minimum of three placements: one in the hero section (primary action, typically “Start free”), one immediately after the live demo or feature-proof section (peak motivation point), and one in the footer. A secondary “See pricing” CTA in the navigation satisfies cost-conscious visitors without distracting from the primary conversion path.

    If you’re working with the Canvas HTML Template and want to generate production-ready layouts faster, try Canvas Builder free and see how much time you save on every project.


  • The Future of HTML Templates: How AI Is Reshaping Static Design

    The Future of HTML Templates: How AI Is Reshaping Static Design

    Static HTML templates have dominated web design for over two decades, but the workflow of downloading, editing, and manually wiring up layouts is changing faster than most freelancers and agencies realise. AI is not replacing templates; it is fundamentally restructuring how they get built, customised, and shipped to clients.

    Key Takeaways

    • AI HTML generators are shifting the bottleneck from layout assembly to content strategy and design decision-making, saving hours on every project.
    • The best results in 2026 come from combining AI generation with a production-ready base template like the Canvas HTML Template, not treating them as competing approaches.
    • AI tools that understand framework-specific conventions (Bootstrap 5 class names, Canvas CSS variables) produce far more usable output than generic code generators.
    • Understanding what AI cannot do reliably (brand consistency, accessibility auditing, real client data) keeps expectations calibrated and projects on track.

    From Static Files to Dynamic Generation: What Has Actually Changed

    For most of the 2010s, buying an HTML template meant downloading a ZIP, opening fifty files in a code editor, and spending the first afternoon just figuring out which CSS file controlled the header. The template was static in the truest sense: every change was manual, every layout decision had already been made by the original designer.

    The shift that AI brings is not that templates disappear. It is that the assembly layer becomes programmable. Instead of hunting through stylesheets to find where the hero background colour lives, you describe the section you need and a generator produces the marked-up, classed, and (in the best tools) framework-compatible HTML in seconds.

    This is particularly significant for Bootstrap 5-based templates. Because Bootstrap’s grid and utility classes are well-documented and heavily represented in AI training data, generators can produce structurally correct layouts that slot directly into an existing template without major surgery. The gap between “AI prototype” and “production page” has narrowed considerably.

    For a deeper look at how this plays out across a real workflow, the post on AI web design in 2026 covers the agency and freelancer perspective in practical detail.

    text
    Photo by Ferenc Almasi on Unsplash

    What AI HTML Generators Actually Do (and Where They Fall Short)

    It is worth being precise about what “AI HTML generation” means in practice, because the term covers a wide spectrum of capability.

    At the basic end, large language models can produce generic Bootstrap markup when prompted. Ask for a pricing section with three columns and you will get something structurally reasonable. The problem is that generic output ignores the conventions of the template you are working inside. Class names get invented, custom CSS variables are ignored, and the result requires as much editing as starting from scratch.

    At the more capable end, tools built specifically around a known template system understand the framework deeply. When a generator knows that Canvas uses --cnvs-themecolor rather than --bs-primary, and that logo height is controlled by --cnvs-logo-height rather than a rule targeting #logo img, the output is immediately usable. That specificity is the difference between a prototype and a production asset.

    Where AI consistently underperforms today:

    • Brand consistency across pages: AI generates sections in isolation. Ensuring typography scale, colour application, and spacing rhythm stay coherent across a full site still requires a human design eye.
    • Accessibility: Generated markup often passes visual inspection but fails on ARIA roles, focus management, and colour contrast ratios. Always audit before shipping.
    • Real content: Lorem ipsum is fine for layout, but AI-generated copy in design contexts is frequently generic. Clients notice immediately.
    • Complex interactivity: Canvas relies on js/plugins.min.js and js/functions.bundle.js for its interactive components. AI generators rarely account for the initialisation patterns those files expect.

    Combining AI Generation with a Production Template: The Practical Workflow

    The most effective approach in 2026 is not to choose between an AI generator and a premium HTML template. It is to use both in sequence. The template provides the structural foundation, design system, and tested cross-browser behaviour. The AI generator accelerates the section-level assembly work.

    Here is a concrete example. Suppose you need a feature highlight section with an image on the left and a list of benefits on the right. A Canvas-aware generator produces something like this:

    <section class="section">
      <div class="container">
        <div class="row align-items-center col-mb-50">
          <div class="col-md-6">
            <img src="images/feature.jpg" class="img-fluid rounded" alt="Feature overview">
          </div>
          <div class="col-md-6">
            <h2 class="h1 fw-bold mb-3">Why Teams Choose This Platform</h2>
            <ul class="list-unstyled iconlist">
              <li><i class="bi-check-circle-fill text-success me-2"></i>Instant onboarding with zero config</li>
              <li><i class="bi-check-circle-fill text-success me-2"></i>Role-based access for every team size</li>
              <li><i class="bi-check-circle-fill text-success me-2"></i>99.9% uptime with dedicated support</li>
            </ul>
            <a href="#" class="button button-rounded button-large">Get Started</a>
          </div>
        </div>
      </div>
    </section>

    This output uses Bootstrap 5’s grid (bundled inside Canvas, not loaded from CDN), Canvas button classes, and the col-mb-50 spacing helper that Canvas provides. It drops directly into a Canvas page without conflicts.

    For the theme colour, you override at the root level rather than inside individual sections:

    :root {
      --cnvs-themecolor: #2563eb;
      --cnvs-themecolor-rgb: 37, 99, 235;
    }

    That single override propagates through every component that references --cnvs-themecolor, which is the correct Canvas customisation method.

    If you want to understand how this kind of prompt-to-production process runs end to end, the post on a real Canvas Builder workflow walks through the steps with a live project.

    The letters ai made of green grass
    Photo by Zach M on Unsplash

    Hero Sections and the Growing Role of AI Layout Intelligence

    Hero sections are where AI HTML generation delivers the clearest immediate value, because they follow predictable structural patterns but consume disproportionate design time. A well-prompted generator can produce a full-width hero with a headline, subheadline, CTA button pair, and background overlay in under thirty seconds.

    The more interesting development is AI that understands layout intent, not just component names. Rather than generating a generic hero and leaving spacing decisions to the developer, newer approaches infer from the prompt whether the section needs visual breathing room, a tighter CTA cluster, or a split layout with a product image. This kind of contextual generation is what separates useful AI tools from novelty generators.

    For context on what makes hero sections effective before you start generating them, the guide on designing hero sections that grab attention covers the principles that AI tools are increasingly learning to replicate.

    Prompting Skills Are Becoming a Core Design Asset

    The emergence of AI HTML generators has created a new skill premium: the ability to write precise, framework-aware prompts. A vague prompt produces a vague layout. A prompt that specifies the template system, Bootstrap version, section type, colour variable, and content structure produces something immediately deployable.

    This matters for career positioning. Designers who treat prompting as beneath them will spend more time on manual assembly than peers who invest in prompt literacy. For agencies, standardising prompt templates for common section types (hero, pricing, testimonials, FAQ) creates a repeatable efficiency that compounds across every project.

    Practical prompt elements that improve AI HTML output quality:

    1. Name the framework and version explicitly (“Bootstrap 5, Canvas HTML Template”).
    2. Specify the section’s purpose, not just its appearance (“a social proof section with three client quotes, one per column”).
    3. Include layout constraints (“two-column on desktop, stacked on mobile”).
    4. Reference specific Canvas classes or variables where you know them (--cnvs-themecolor, button-rounded, section wrapper class).
    5. State what to avoid (“do not load third-party CDN links, Bootstrap is already included”).

    Where HTML Templates Are Headed in 2026 and Beyond

    The trajectory is clear: HTML templates are becoming AI-composable systems rather than static file collections. The premium template market is bifurcating between generic multipurpose themes (increasingly commoditised and replaceable by AI output alone) and deeply structured, component-rich templates that give AI generation a reliable scaffold to build on.

    Canvas sits firmly in the second category. Its consistent class naming, Bootstrap 5 foundation, and well-defined CSS variable system make it one of the templates most compatible with AI-assisted generation workflows. The tool that knows Canvas can produce output that actually ships; a generic generator producing custom template markup cannot.

    For freelancers and agencies evaluating whether to invest in learning a template system deeply versus relying on AI alone, the honest answer is: both skills compound together. AI without a production template produces demos. A production template without AI generation produces slow delivery. The combination is what creates a competitive workflow in 2026.

    Frequently Asked Questions

    Will AI replace HTML templates entirely?

    Not in the near term. AI generators produce markup, but they do not provide the tested browser compatibility, responsive behaviour, animation libraries, and design consistency that a production template like Canvas delivers out of the box. The more likely outcome is that templates become the structured system AI generation works inside, rather than something AI renders obsolete.

    Can AI correctly generate Canvas HTML Template markup?

    Yes, when the generator is trained on or constrained to Canvas conventions. This means using correct Canvas CSS variables like --cnvs-themecolor, Bootstrap 5 grid classes (bundled with Canvas, not loaded from CDN), and Canvas-specific utility classes. Generic AI tools frequently miss these specifics, which is why purpose-built tools like Canvas Builder produce more deployment-ready output.

    What is the biggest mistake developers make when using AI to generate HTML?

    Accepting the first output without checking framework compatibility. AI tools often invent class names, reference CDN links that conflict with bundled libraries, or use CSS variable names from other frameworks. Always verify that the generated markup matches the conventions of the template you are working with before integrating it into a project.

    How should I customise Canvas theme colours when using AI-generated sections?

    Set the theme colour using the correct Canvas CSS variable at the root level: --cnvs-themecolor: #yourcolor; along with --cnvs-themecolor-rgb for any opacity-dependent uses. Do not rely on Bootstrap’s --bs-primary variable or hardcoded hex values inside individual sections, as these will not propagate consistently across Canvas components.

    Is AI-generated HTML accessible?

    Rarely without review. AI generators typically produce visually correct layouts but frequently omit ARIA labels, skip focus management for interactive elements, and produce colour combinations that fail WCAG contrast requirements. Treat AI output as a structural draft and run a proper accessibility audit before publishing any AI-generated section to a live site.

    If you’re working with the Canvas HTML Template and want to generate production-ready layouts faster, try Canvas Builder free and see how much time you save on every project.

  • From Prompt to Production: A Real Canvas Builder Workflow

    From Prompt to Production: A Real Canvas Builder Workflow

    Most web designers spend more time wrestling with template structure than actually building pages — and that bottleneck is exactly what a well-defined AI workflow is designed to eliminate. This post walks through a real, step-by-step Canvas Builder workflow, from writing your first prompt to deploying production-ready HTML with the Canvas HTML Template.

    Key Takeaways

    • A structured prompt produces layout-ready HTML in Canvas-compatible markup — vague prompts produce generic code that requires heavy rework.
    • Canvas Builder outputs Bootstrap 5 grid HTML that slots directly into Canvas sections, so you never need to load an third-party Bootstrap CDN.
    • The correct Canvas CSS variables (–cnvs-themecolor, –cnvs-primary-font, –cnvs-logo-height) must be used in any custom styling — not Bootstrap equivalents.
    • Reviewing generated output against Canvas’s section types (singlepage, blocksection, fullpagelayout) before adding to your project prevents structural conflicts.

    Why Your Workflow Determines Output Quality

    An AI HTML generator is only as useful as the instructions you give it. Designers who treat AI tools like a vending machine — drop in a keyword, collect a page — routinely get output they cannot use. Designers who treat it like a junior developer they need to brief properly get production-ready components in minutes.

    The difference is almost always prompt specificity. Telling Canvas Builder “make me a hero section” leaves too many decisions to chance. Telling it “generate a Canvas block_section hero with a full-width Bootstrap 5 row, a left-aligned h1, a 48px subtitle, a primary CTA button using –cnvs-themecolor, and a right-column product image” produces something you can paste directly into your project. If you want to sharpen your prompting further, the post on writing AI prompts for web design covers the principles in depth.

    a man standing in front of a white board with sticky notes on it
    Photo by Walls.io on Unsplash

    Step 1: Define the Section Type and Goal Before You Prompt

    Canvas organises output into three section types. Choosing the right one before you prompt prevents wasted generation cycles:

    • single_page — a complete one-page layout including header, hero, content sections, and footer. Use this for landing pages or microsites built from scratch.
    • block_section — a single reusable component (hero, pricing table, testimonials, contact form). Use this when adding to an existing Canvas project.
    • fullpagelayout — a multi-page niche demo structure. Use this for client projects that need a complete site architecture generated upfront.

    For most day-to-day work, block_section is your starting point. It keeps generated HTML modular and easy to slot into any existing Canvas page without disrupting your header or footer structure.

    Step 2: Write a Structured Prompt

    A reliable prompt for Canvas Builder follows this format: section type + layout description + content elements + styling constraints. Here is a real example that produces clean, usable output:

    Generate a Canvas block_section for a SaaS pricing page.
    Layout: Bootstrap 5, three-column row (col-lg-4 each), centered header above.
    Content: Plan name (h3), monthly price (large display text), 5 feature list items (ul), CTA button per card.
    Styling: Use --cnvs-themecolor for the featured card border and button background. 
    Cards should use Bootstrap's shadow-sm utility and 2rem border-radius.

    That level of detail eliminates ambiguity. The generator knows the Bootstrap column structure, the Canvas variable to apply, and the visual hierarchy you expect. Compare this to what makes AI SaaS pages convert — the same structural thinking that drives conversion also drives prompt quality.

    woman in black long sleeve shirt using black laptop computer
    Photo by Maxim Tolchinskiy on Unsplash

    Step 3: Review and Adapt the Generated Output

    Once Canvas Builder returns your HTML, review it against four criteria before adding it to your project:

    1. Bootstrap 5 grid integrity — confirm the row/column structure is intact and no extra wrapper divs have been inserted that break the grid at mobile breakpoints. Use the Bootstrap Grid Calculator to verify column math if you have a complex multi-column layout.
    2. Canvas variable usage — check that any colour references use –cnvs-themecolor or –cnvs-themecolor-rgb, not –bs-primary or hardcoded hex values. Hardcoded values break theme switching.
    3. JS dependency — Canvas requires js/plugins.min.js and js/functions.bundle.js. If your generated section uses any Canvas interactive components (sliders, accordions, counters), confirm these files are already loaded in your base layout.
    4. CSS file scope — Canvas relies on style.css and css/font-icons.css. Any section-level custom styles should be added as overrides in a separate stylesheet, not embedded in style.css directly.

    A typical generated pricing section, after review, looks like this before integration:

    Simple, Transparent Pricing

    No contracts. Cancel any time.

    Starter

    $29/mo

    • 5 Projects
    • 10 GB Storage
    • Email Support
    • Basic Analytics
    • API Access
    Get Started

    Pro Popular

    $79/mo

    • Unlimited Projects
    • 100 GB Storage
    • Priority Support
    • Advanced Analytics
    • Full API Access
    Get Started

    Enterprise

    $199/mo

    • Unlimited Projects
    • 1 TB Storage
    • Dedicated Support
    • Custom Analytics
    • SLA Guarantee
    Contact Sales

    Step 4: Apply Canvas Theme Variables for Consistent Styling

    One of the most common mistakes when integrating AI-generated HTML into Canvas is using Bootstrap’s own colour variables instead of Canvas’s. This breaks consistency the moment someone changes the theme colour in the Canvas settings panel.

    The correct Canvas variables for the sections you are most likely to customise are:

    • –cnvs-themecolor — primary brand colour, used for buttons, borders, highlights
    • –cnvs-themecolor-rgb — RGB version, used for rgba() transparency effects
    • –cnvs-primary-font and –cnvs-secondary-font — font stack overrides
    • –cnvs-header-bg and –cnvs-header-sticky-bg — header background control
    • –cnvs-logo-height and –cnvs-logo-height-sticky — logo sizing (never target #logo img directly)

    A quick override block to drop into your custom stylesheet after generation:

    :root {
      --cnvs-themecolor: #4f46e5;
      --cnvs-themecolor-rgb: 79, 70, 229;
      --cnvs-primary-font: 'Inter', sans-serif;
      --cnvs-logo-height: 36px;
      --cnvs-logo-height-sticky: 28px;
    }

    With these set at the root level, every Canvas component — including anything you generate via Canvas Builder — inherits the correct values automatically. This approach is what separates a maintainable Canvas project from one that requires manual colour updates across dozens of files.

    Step 5: Integrate and Test Before Deployment

    Before pushing to production, run through a short validation checklist. This applies whether you are building a simple landing page or a complex niche site — similar to the process described in the landing page builders vs custom HTML comparison, where the maintenance burden of custom HTML is only justified if the integration is clean from the start.

    • Load the page in a browser with the Canvas JS files present and confirm no console errors from missing plugins.
    • Test at 320px, 768px, and 1440px viewport widths — Bootstrap 5’s grid handles most cases, but check for padding collapses on small screens.
    • Verify that –cnvs-themecolor renders correctly in the featured card and button, confirming the variable is being picked up from your root override.
    • Check that font-icons.css is loaded if your generated section uses any Canvas icon classes.
    • Validate the HTML at validator.w3.org to catch any unclosed tags introduced during generation or manual edits.

    Frequently Asked Questions

    Does Canvas Builder output code that works with Canvas HTML Template out of the box?

    Yes. Canvas Builder generates Bootstrap 5 HTML that matches Canvas’s section structure and uses the correct Canvas CSS variables. You may need to adjust content and apply your own –cnvs-themecolor value, but the structural HTML is designed to integrate without conflict.

    Should I load Bootstrap from a CDN when using Canvas Builder output?

    No. The Canvas HTML Template bundles Bootstrap 5 internally. Loading Bootstrap from a CDN on top of Canvas will create duplicate class definitions and cause styling conflicts. Canvas Builder’s output assumes Bootstrap is already present via Canvas’s own files.

    What is the difference between a blocksection and a singlepage output in Canvas Builder?

    A blocksection is a single reusable component — a hero, pricing table, or testimonial row — designed to be dropped into an existing Canvas page. A singlepage output is a complete one-page layout with header, hero, content sections, and footer, suitable for microsites built from scratch.

    How do I make generated sections match my existing Canvas theme colour?

    Set –cnvs-themecolor in your root CSS override to your brand colour. Any Canvas Builder generated section that correctly references this variable will inherit your colour automatically, without needing to edit individual components.

    Can I use Canvas Builder for multi-page client projects, or only single landing pages?

    Canvas Builder supports fullpagelayout generation for multi-page niche demos, making it practical for full client projects. For complex sites, generate sections individually as block_sections to keep the output modular and easier to maintain across page types.

    If you’re working with the Canvas HTML Template and want to generate production-ready layouts faster, try Canvas Builder free and see how much time you save on every project.

  • AI SaaS Website Examples: What Makes Them Convert

    AI SaaS Website Examples: What Makes Them Convert

    Most AI SaaS homepages look impressive and convert poorly — a stunning hero, a vague value proposition, and a free trial button that nobody clicks. The difference between AI SaaS websites that generate pipeline and those that simply generate compliments comes down to a small set of structural and copy decisions that are entirely replicable.

    Key Takeaways

    • The highest-converting AI SaaS landing pages lead with a specific, measurable outcome — not a feature list or a technology pitch.
    • Social proof placement, hero copy specificity, and CTA friction are the three variables with the biggest measurable impact on AI website conversion rates.
    • Bootstrap 5 layouts built on the Canvas HTML Template can replicate the structural patterns used by top-performing AI SaaS sites without custom development overhead.
    • Conversion lifts on AI landing pages rarely come from visual redesigns — they come from removing ambiguity about who the product is for and what happens next.

    What Actually Drives Conversion on AI SaaS Websites

    The most instructive thing you can do before designing an AI SaaS landing page is study pages that are measurably converting, not just ones that win design awards. Sites like Jasper, Otter.ai, Copy.ai, and Notion AI share a pattern that is easy to miss because it looks simple: the hero section answers three questions in under five seconds. What does this do? Who is it for? What do I do right now?

    Generic AI positioning (“the future of work, powered by AI”) fails because it answers none of these. Specific positioning (“write first drafts 3x faster, built for content teams”) answers all three. This is not a copywriting tip — it is a structural constraint. Every section of the page either reinforces or undermines the answer to those three questions.

    For teams building with Bootstrap 5, that constraint translates directly into layout decisions: the hero row must not compete with navigation for visual attention, the primary CTA must be visible without scrolling on all viewport sizes, and supporting copy must follow the headline, never precede it.

    A security and privacy dashboard with its status.
    Photo by Zulfugar Karimov on Unsplash

    Hero Section Anatomy That AI SaaS Sites Get Right

    The highest-performing AI SaaS heroes in 2025 consistently follow a column structure: outcome-led headline on the left or centre, a supporting subheadline that names the user and the mechanism, a CTA button with zero ambiguity about what happens on click, and a trust signal (logo bar or testimonial snippet) immediately below the fold.

    Here is a production-ready Bootstrap 5 hero structure you can drop into a Canvas single_page layout:

    <section id="hero" class="py-6 bg-light">
      <div class="container">
        <div class="row align-items-center justify-content-center text-center">
          <div class="col-lg-8">
            <p class="text-uppercase fw-semibold ls-2 mb-3" style="color: var(--cnvs-themecolor);">AI Writing Assistant</p>
            <h1 class="display-4 fw-bold mb-4">Write Better Content in Half the Time</h1>
            <p class="lead text-muted mb-5">Built for marketing teams who need first drafts, not more meetings. Connect your brand voice and go live in minutes.</p>
            <div class="d-flex flex-wrap justify-content-center gap-3">
              <a href="/signup" class="btn btn-lg px-5 py-3 fw-semibold" style="background-color: var(--cnvs-themecolor); color: #fff;">Start Free — No Credit Card</a>
              <a href="#demo" class="btn btn-outline-secondary btn-lg px-5 py-3">Watch 2-min Demo</a>
            </div>
            <p class="small text-muted mt-3">Trusted by 4,200+ content teams at Shopify, HubSpot, and Canva</p>
          </div>
        </div>
      </div>
    </section>

    Notice that var(–cnvs-themecolor) is used for brand colour, not --bs-primary. Canvas overrides Bootstrap’s colour system with its own variable layer — mixing the two creates inconsistencies that are difficult to debug. The CTA label “Start Free — No Credit Card” removes the two most common objections in a single phrase, which is standard practice on pages like Loom and Otter.ai.

    For more detail on structuring CTAs that reduce friction, the post on call-to-action button design covers the science behind button copy, colour contrast, and placement.

    Social Proof Placement and the Trust Sequence

    AI SaaS sites face a specific credibility problem that e-commerce and professional services sites do not: visitors are being asked to trust an automated system with business-critical output. The trust sequence matters more than on almost any other product category.

    The pattern used by the best-converting AI SaaS pages is: logo bar immediately after the hero, case study metric mid-page, and a testimonial carousel anchored above the final CTA. This is not arbitrary — it mirrors the psychological sequence of awareness, interest, and decision that a real sales conversation follows.

    A simple, scannable metric row built with Bootstrap 5 grid:

    <section class="py-5 border-top border-bottom">
      <div class="container">
        <div class="row text-center gy-4">
          <div class="col-6 col-md-3">
            <h3 class="display-5 fw-bold" style="color: var(--cnvs-themecolor);">3x</h3>
            <p class="small text-muted mb-0">Faster first drafts</p>
          </div>
          <div class="col-6 col-md-3">
            <h3 class="display-5 fw-bold" style="color: var(--cnvs-themecolor);">4,200+</h3>
            <p class="small text-muted mb-0">Active teams</p>
          </div>
          <div class="col-6 col-md-3">
            <h3 class="display-5 fw-bold" style="color: var(--cnvs-themecolor);">98%</h3>
            <p class="small text-muted mb-0">Customer satisfaction</p>
          </div>
          <div class="col-6 col-md-3">
            <h3 class="display-5 fw-bold" style="color: var(--cnvs-themecolor);">14 min</h3>
            <p class="small text-muted mb-0">Average setup time</p>
          </div>
        </div>
      </div>
    </section>

    Specificity converts. “14 min average setup time” is more credible than “get started in minutes” because it is falsifiable — it implies someone measured it.

    Ai brain inside a lightbulb illustrates an idea.
    Photo by Omar:. Lopez-Rincon on Unsplash

    Pricing Section Patterns That Reduce Drop-Off

    AI SaaS pricing pages have a unique challenge: usage-based pricing models are hard to communicate without triggering anxiety. The sites that handle this best anchor one plan visually, call out the most popular tier explicitly, and reduce the number of feature comparison rows to seven or fewer.

    If you are building a comparison table, keep it scannable. Resist the temptation to list every feature — visitors read the first three rows and then scan for price. Use a highlighted column with a Canvas theme-colour border to direct attention to the recommended plan:

    .pricing-featured {
      border: 2px solid var(--cnvs-themecolor);
      border-radius: 0.75rem;
      position: relative;
    }
    
    .pricing-badge {
      position: absolute;
      top: -14px;
      left: 50%;
      transform: translateX(-50%);
      background-color: var(--cnvs-themecolor);
      color: #fff;
      font-size: 0.75rem;
      font-weight: 600;
      padding: 4px 14px;
      border-radius: 100px;
      white-space: nowrap;
    }

    This approach is equally applicable when building custom HTML landing pages versus using a drag-and-drop builder — the structural logic stays the same, only the implementation differs.

    Whitespace, Hierarchy, and Why Busy AI Pages Lose

    A common failure mode on AI SaaS sites is information density. Founders want to explain how the model works, list every integration, and show the product UI all within the first viewport. This competes with the conversion goal instead of supporting it.

    The pages that convert use whitespace as a layout tool, not a gap to fill. Each section has one job: the hero converts attention into interest, the social proof section converts interest into credibility, the features section converts credibility into desire, and the CTA section converts desire into action. When a section tries to do two jobs, it usually does neither well.

    This is not abstract design theory. For a practical framework on applying whitespace in ways that measurably reduce bounce, see the post on whitespace in web design. The principles map directly to AI SaaS layouts.

    In Canvas, controlling section spacing consistently uses the built-in padding utility classes (py-5, py-6) rather than inline margins. This keeps the layout responsive without per-breakpoint overrides.

    Building AI SaaS Layouts Faster with Canvas Builder

    The structural patterns described above are well-understood by 2025 standards. The bottleneck is execution speed. A typical AI SaaS landing page requires a hero, a logo bar, a metrics row, a features section, a pricing table, a testimonial section, and a footer — at minimum seven distinct layout components, each with mobile-responsive variants.

    Building these from scratch on the Canvas HTML Template is achievable, but it requires assembling the right component combinations from Canvas’s extensive library, setting the correct CSS variable values for brand colours and typography, and validating responsiveness across breakpoints.

    Canvas Builder generates these section combinations from a prompt, pre-wired with the correct Canvas variable names (including –cnvs-themecolor, –cnvs-primary-font, and –cnvs-header-bg), so the output drops directly into a Canvas project without variable mismatches or JS path errors. If you want to experiment with prompt structures that produce tighter layout briefs, the guide on writing AI prompts for web design is worth reading before you start.

    For an AI SaaS page specifically, a prompt that specifies the target persona, the primary conversion action, and the number of pricing tiers produces a layout that requires far less manual restructuring than a generic “SaaS landing page” prompt.

    Frequently Asked Questions

    What is the most important element on an AI SaaS landing page?

    The hero headline is the single highest-leverage element. It determines whether a visitor reads further or bounces. The headline needs to state a specific, measurable outcome for a named type of user — not a category description of the product. Everything else on the page either supports or undermines the promise made in the first five words.

    How many CTAs should an AI SaaS landing page have?

    One primary CTA repeated at logical decision points — typically after the hero, after the features section, and again above the footer. A secondary CTA (such as “Watch Demo”) is acceptable in the hero alongside the primary, but it should be visually subordinate. Adding more than two CTA types causes decision paralysis and measurably reduces click-through on the primary action.

    Should AI SaaS sites show pricing on the landing page?

    Generally yes, for self-serve products targeting SMBs and individual users. Hiding pricing increases bounce rates among high-intent visitors who want to self-qualify before booking a call. For enterprise-focused products with deal sizes above four figures, a “Contact Sales” path alongside a starting price or “from $X/month” anchor is the standard pattern used by Salesforce, Gong, and similar enterprise SaaS sites.

    How does the Canvas HTML Template handle AI SaaS page layouts?

    Canvas is built on Bootstrap 5 and ships with a comprehensive set of pre-built sections covering heroes, feature grids, pricing tables, testimonial carousels, and CTA blocks. Brand colours are controlled via –cnvs-themecolor and related CSS variables, which means global theming requires editing a single variable rather than hunting through stylesheets. Canvas JS is loaded via js/plugins.min.js and js/functions.bundle.js — no additional Bootstrap CDN scripts should be added, as Bootstrap 5 is already bundled.

    What conversion rate should a well-optimised AI SaaS landing page target?

    Industry benchmarks for B2B SaaS free-trial signups typically sit between 2% and 5% on paid traffic. Top-performing pages in competitive AI categories (writing, analytics, customer support) can reach 8-12% when the traffic source is highly qualified and the page-to-ad message match is tight. If your page is converting below 2%, the problem is almost always the hero copy or a mismatch between ad audience and landing page persona — not the visual design.

    If you’re working with the Canvas HTML Template and want to generate production-ready layouts faster, try Canvas Builder free and see how much time you save on every project.
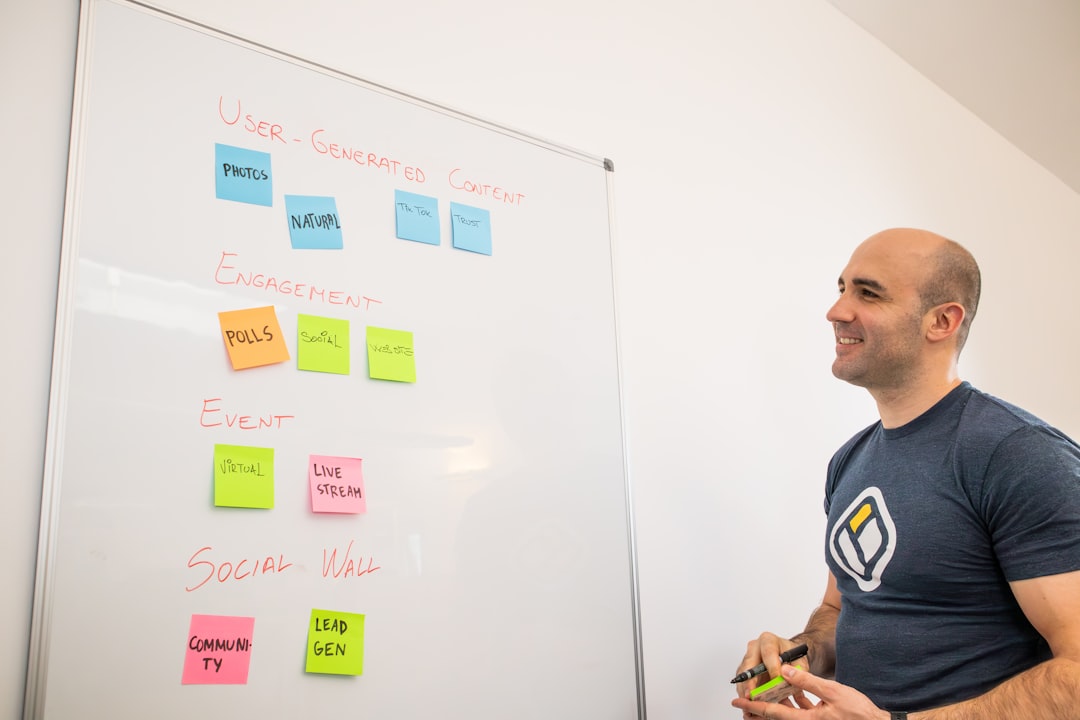
  • Writing AI Prompts for Web Design: Tips to Get Better Layouts Faster

    Writing AI Prompts for Web Design: Tips to Get Better Layouts Faster

    Most AI-generated web layouts disappoint not because the AI is bad at HTML, but because the prompt that drove it was too vague to produce anything useful. The gap between “make me a landing page” and a production-ready section with correct Bootstrap 5 classes, Canvas variables, and real content is entirely closed by how precisely you write your instructions.

    Why Vague Prompts Fail Every Time

    When you ask an AI to “generate a hero section,” it makes a dozen silent assumptions: which framework, which breakpoints, which heading hierarchy, which image ratio, which button style. Each assumption is a coin flip. The result is technically valid HTML that fits nothing in your actual project.

    The root problem is that AI tools optimise for completion, not fit. They will always return something, and that something will look plausible. The only way to steer output toward genuinely usable code is to eliminate those silent assumptions by stating your constraints explicitly.

    In the context of Canvas and Bootstrap 5 projects, this matters even more. Canvas has its own CSS variable layer on top of Bootstrap. If you ask a generic AI tool for a “Bootstrap hero,” it may reference --bs-primary or reach for a Bootstrap CDN link, both of which conflict with Canvas’s bundled setup. Your prompt needs to specify the environment, not just the output shape.

    a cell phone with an advertisement on the back of it
    Photo by Mockup Free on Unsplash

    Anatomy of a Strong AI Prompt for Web Design

    A reliable AI prompt for a web layout has five components, each one narrowing the solution space:

    1. Context: What template, framework, or system the code must work inside (e.g. Canvas HTML Template, Bootstrap 5 bundled, no third-party CDN)
    2. Section type: Whether you need a hero, features grid, testimonials block, pricing table, or footer
    3. Grid specification: Column count, breakpoints, and nesting (e.g. “a 3-column Bootstrap grid that stacks to 1 column on mobile”)
    4. Content placeholders: Real or representative text, image dimensions, icon style (e.g. “3 feature cards, each with a 48×48 SVG icon, an H3 heading of 5-7 words, and 2 sentences of body text”)
    5. Style constraints: Canvas CSS variables to apply, spacing classes, and any component-specific requirements

    Here is an example of a weak prompt versus a strong one for the same section:

    Weak: “Write a features section with Bootstrap.”

    Strong: “Write a Canvas HTML Template features section using Bootstrap 5 (bundled, no CDN). Use a .container with a 3-column .row using col-lg-4 col-md-6. Each column is a card with class card h-100 p-4 border-0 shadow-sm. Include a 48×48 inline SVG placeholder icon, an H3 heading, and a short paragraph. Apply –cnvs-themecolor to the icon fill. No JavaScript required.”

    The second prompt eliminates guesswork about framework version, layout, spacing, and theming in one pass.

    Canvas-Specific Variables and Classes to Include in Your Prompts

    One of the fastest ways to improve AI output quality for Canvas projects is to paste the correct variable names directly into your prompt. When the AI sees real token names, it uses them rather than inventing alternatives.

    The most useful Canvas CSS variables to reference in prompts are:

    • –cnvs-themecolor for primary brand colour fills, borders, and accents
    • –cnvs-themecolor-rgb for rgba() transparency effects on backgrounds and overlays
    • –cnvs-primary-font and –cnvs-secondary-font for typography overrides
    • –cnvs-header-bg and –cnvs-header-sticky-bg when prompting header variants
    • –cnvs-logo-height and –cnvs-logo-height-sticky for logo sizing (never target #logo img directly)

    A practical prompt fragment might read: “Style the section background using rgba(var(--cnvs-themecolor-rgb), 0.08) to create a tinted panel without overriding the theme colour.” That single instruction produces correctly scoped CSS the AI would never guess on its own.

    Here is a working example of a Canvas-compatible feature card that you could ask an AI to extend or replicate across a full section:

    <div class="col-lg-4 col-md-6 mb-4">
      <div class="card h-100 p-4 border-0 shadow-sm">
        <div class="mb-3">
          <svg width="48" height="48" viewBox="0 0 48 48" fill="none"
               xmlns="http://www.w3.org/2000/svg">
            <circle cx="24" cy="24" r="24"
                    fill="rgba(var(--cnvs-themecolor-rgb), 0.12)"/>
            <path d="M16 24l6 6 10-12"
                  stroke="var(--cnvs-themecolor)"
                  stroke-width="2.5"
                  stroke-linecap="round"
                  stroke-linejoin="round"/>
          </svg>
        </div>
        <h3 class="h5 fw-semibold mb-2">Feature Heading Here</h3>
        <p class="text-muted mb-0">
          A concise two-sentence description of this feature
          and its primary benefit to the user.
        </p>
      </div>
    </div>

    When you include a snippet like this as a “template card” in your prompt, you are giving the AI a concrete pattern to replicate rather than asking it to invent one. Output quality improves dramatically because the structural and styling decisions are already made.

    Computer screen displaying code and text
    Photo by Bernd 📷 Dittrich on Unsplash

    Layering Prompts for Complex Layouts

    Complex layouts, like a full landing page for a lead generation campaign or a multi-section product page, should never be requested in one prompt. Instead, use a layered approach across three passes:

    1. Pass 1 – Structure: Ask for the HTML skeleton only, with correct section tags, container/row/col classes, and ID attributes. No inline styles, no content.
    2. Pass 2 – Content: Ask the AI to populate each section with realistic placeholder text, image dimensions, and icon references, referencing the skeleton from Pass 1.
    3. Pass 3 – Style: Ask for a targeted CSS block that applies Canvas variables, custom spacing, and any component-specific overrides. Specify that Bootstrap’s bundled JS (js/functions.bundle.js and js/plugins.min.js) handles interactivity, so no extra script tags are needed.

    This workflow mirrors how an experienced developer actually builds layouts, and it keeps each AI response focused enough to be reviewable in under two minutes. It also makes iteration faster: if the content in Pass 2 is wrong, you fix one pass, not a monolithic blob of mixed HTML and CSS.

    For teams building niche demo pages, such as a newsletter landing page or a service-specific microsite, the layered approach also makes it easier to hand off sections to other team members without context loss.

    Common Prompt Mistakes and How to Fix Them

    Even experienced developers make predictable mistakes when prompting AI for layout code. The most costly ones in 2025 are:

    • Asking for “Bootstrap” without specifying Bootstrap 5: You will often get Bootstrap 4 class names like ml-auto instead of ms-auto, which break silently in Canvas.
    • Not specifying Canvas JS files: The AI may add a CDN script tag for Bootstrap JS. Canvas bundles its JS in js/plugins.min.js and js/functions.bundle.js. Adding a second Bootstrap JS bundle causes conflicts.
    • Omitting responsive behaviour: Always state the breakpoint behaviour explicitly (e.g. “col-lg-3 col-md-6 col-12”) or the AI defaults to desktop-only layouts.
    • Requesting colour values instead of variables: Hardcoding #e84040 instead of var(--cnvs-themecolor) means every global theme change breaks the component.
    • No section context: Saying “write a card” without specifying whether it sits inside a dark background section, a white panel, or a tinted wrapper means the AI cannot make appropriate contrast decisions.

    Fixing these is mostly a matter of building a reusable prompt template you paste at the start of every session. Keep one in a notes app or doc, update it when you discover a new Canvas variable or class pattern, and paste it before every design request.

    Using Canvas Builder to Close the Prompt Gap

    Writing precise prompts is a learnable skill, but it takes time, and even a good prompt still requires you to review, test, and adjust the output manually. Canvas Builder is designed to remove the middle steps: it understands the Canvas template’s structure natively, so it generates layouts using the correct CSS variables, Bootstrap 5 classes, and Canvas JS file references from the start.

    Instead of crafting a 200-word prompt and reviewing whether the AI remembered to use --cnvs-themecolor instead of --bs-primary, you describe the section’s purpose and Canvas Builder handles the environment constraints automatically. For agencies and freelancers managing multiple Canvas-based projects, that consistency across deliverables is worth more than the time saving alone.

    If you are comparing approaches, the detailed breakdown in Landing Page Builders vs Custom HTML is worth reading before committing to a workflow for 2025 and 2026 projects.

    Frequently Asked Questions

    What is the most important thing to include in an AI prompt for web design?

    The framework version and environment context matter most. Specify Bootstrap 5 (bundled), the template system (Canvas HTML Template), and the exact CSS variables you expect the AI to use. Without this, the AI defaults to generic assumptions that produce code requiring extensive fixes.

    Can AI tools generate Canvas-compatible HTML accurately without manual correction?

    General-purpose AI tools can get close if your prompt is detailed enough, but they do not inherently know Canvas’s variable names, JS file paths, or section types. Accuracy improves when you provide a prompt template containing the correct variable names and a reference snippet. Tools purpose-built for Canvas, like Canvas Builder, eliminate this gap entirely.

    How do I stop AI from adding Bootstrap CDN links when using Canvas?

    Explicitly state in your prompt: “Canvas HTML Template bundles Bootstrap 5 internally. Do not add any Bootstrap CDN links or script tags. The only JS files are js/plugins.min.js and js/functions.bundle.js.” Stating the constraint directly is the only reliable way to prevent the AI from adding conflicting dependencies.

    Is layering prompts (structure, content, style) always better than a single prompt?

    For sections with more than two components or any layout requiring responsive behaviour at three breakpoints, yes. Single prompts for complex layouts produce mixed outputs that are harder to review and debug. For simple elements like a single CTA button or a one-column text block, a single focused prompt is usually sufficient.

    What Canvas CSS variable controls the primary brand colour?

    The correct variable is –cnvs-themecolor. For transparency effects, use –cnvs-themecolor-rgb inside an rgba() function. Never reference –bs-primary or –color-primary in Canvas projects, as those variables are not part of Canvas’s theming system and will not respond to global theme changes.

    If you’re working with the Canvas HTML Template and want to generate production-ready layouts faster, try Canvas Builder free and see how much time you save on every project.
  • How to Use Canvas Builder for Agency Demos Without Writing Code

    How to Use Canvas Builder for Agency Demos Without Writing Code

    Agency pitches live and die on how quickly you can show a client something real — and if your demo workflow still means days of manual HTML work before a prospect even sees a layout, you are already losing ground to competitors who move faster.

    The Real Cost of Manual Demo Production

    Most web agencies underestimate how much revenue leaks from the demo stage. A developer spends four to eight hours building a rough layout for a prospect who may never convert. Multiply that across ten pitches a month and you are looking at a substantial chunk of billable time written off before a single contract is signed.

    The traditional workaround — duplicating an existing template and swapping out copy — creates a different problem: every demo looks like a lightly modified version of the last one. Clients notice. The pitch feels generic rather than considered.

    The shift agencies are making in 2025 is using AI-assisted layout generation to produce genuinely tailored demos at the speed of a conversation. That is exactly the workflow Canvas Builder is designed for.

    a computer screen with a bunch of lines on it
    Photo by Bernd 📷 Dittrich on Unsplash

    How Canvas Builder Works for Agency Workflows

    Canvas Builder takes a natural-language prompt describing the layout you need and generates a complete, structured HTML file built on Canvas components and Bootstrap 5. You are not getting a generic template — you are getting a layout assembled from the actual Canvas component library, with correct class names, correct Canvas CSS variable references, and the right script includes.

    The output references js/plugins.min.js and js/functions.bundle.js as Canvas requires, loads style.css and css/font-icons.css, and uses variables like –cnvs-themecolor for brand colour overrides — not generic Bootstrap variables that would break Canvas’s own component logic.

    For agencies, this means a junior team member can describe a client’s industry and goals in plain English and receive a layout that a developer can customise and hand off, rather than build from scratch.

    Building Niche-Specific Demos Without a Developer

    The most immediately valuable use case for agency teams is generating niche demos before a prospect meeting. Consider a pitch to a law firm. Rather than presenting a generic business template, you describe the niche, the required sections — hero with trust signals, practice areas grid, attorney bios, testimonials, contact form — and Canvas Builder assembles a layout structured for that context.

    The same approach applies across verticals. If you are pitching a SaaS client, you might describe a hero with a trial CTA, a feature comparison section, and a pricing table. For a real estate agency, you describe a property search hero, a featured listings grid, and an agent profiles section. Each prompt produces a different, relevant starting point — not the same file renamed.

    If you want to understand what sections different niches genuinely need before you write your prompt, the posts on real estate website design sections and law firm website design give you a solid reference for what clients in those industries expect to see.

    A practical starting prompt structure looks like this:

    <!-- Example Canvas Builder prompt intent translated into a section structure -->
    <section class="section py-5 bg-light">
      <div class="container">
        <div class="row align-items-center">
          <div class="col-lg-6">
            <h2 class="display-5 fw-bold">Trusted Legal Counsel Since 1998</h2>
            <p class="lead mt-3">We handle complex litigation so you can focus on what matters most.</p>
            <a href="#contact" class="btn btn-primary btn-lg mt-4">Book a Free Consultation</a>
          </div>
          <div class="col-lg-6 mt-5 mt-lg-0">
            <img src="images/law-hero.jpg" alt="Law firm consultation" class="img-fluid rounded">
          </div>
        </div>
      </div>
    </section>

    Canvas Builder produces the full page version of this — including Canvas-specific wrappers, header, navigation, and footer — so what you copy into the demo folder is a complete file, not a fragment.

    Applying Client Brand Colours in Minutes

    One of the most common objections to template-based demos is that they look off-brand. Canvas makes this straightforward to address because colour theming is controlled by a single CSS variable override, and Canvas Builder outputs layouts with that variable already in place.

    To apply a client’s brand colour to an entire Canvas demo, you add one override to the <style> block in the <head>:

    :root {
      --cnvs-themecolor: #1a4f8a;
      --cnvs-themecolor-rgb: 26, 79, 138;
    }

    That single change propagates through buttons, links, active states, accent elements, and any Canvas component that references the theme colour. You do not need to hunt through multiple files or override individual component colours. For a demo, this means going from a generic layout to a client-branded one in under two minutes.

    If you want to go deeper on Canvas variable customisation, the HTML template customisation definitive guide covers the full set of Canvas CSS variables and how to use them systematically across a project.

    Structuring a Repeatable Agency Demo Workflow

    The difference between agencies that gain leverage from AI layout generation and those that don’t is process. If every team member invents a different prompt each time, output quality varies. A repeatable workflow standardises results.

    A practical agency demo process using Canvas Builder looks like this:

    1. Brief capture: Before the prompt, document the client’s industry, primary goal (lead generation, e-commerce, brand awareness), key sections required, and one or two competitors they admire.
    2. Prompt construction: Use that brief to write a structured Canvas Builder prompt. Specify the section type (single_page layout), the sections in order, and the tone (professional, bold, minimal).
    3. Output review: The generated file is checked against Canvas’s required file references — style.css, font-icons.css, js/plugins.min.js, js/functions.bundle.js — before the demo folder is packaged.
    4. Brand application: The –cnvs-themecolor override is applied and a logo placeholder is dropped into the correct Canvas logo container.
    5. Demo delivery: The file is either hosted as a static preview or zipped and shared with the prospect before the pitch meeting.

    This workflow is documented, repeatable, and does not require a senior developer at any stage. A junior account manager or designer can run steps one through four independently.

    For teams delivering demos that eventually become live projects, the freelancer’s guide to delivering HTML templates to clients covers handoff expectations, file structure conventions, and how to set client expectations around edits — all relevant whether you are freelancing or running an agency team.

    What Canvas Builder Replaces — and What It Does Not

    It is worth being precise about where Canvas Builder fits in an agency workflow so expectations are calibrated correctly going into a pitch.

    Canvas Builder replaces:

    • Manual assembly of Canvas sections from the documentation for demo purposes
    • Time spent on structural HTML decisions (column layout, section order, component selection)
    • The back-and-forth between a designer’s wireframe and a developer’s first implementation

    Canvas Builder does not replace:

    • Real content strategy — copy, imagery, and messaging still require human input
    • Final development work for production — animations, custom integrations, and CMS connections are built after the demo stage
    • Design judgment — a generated layout is a strong starting point, not a finished product

    The practical outcome is that your agency arrives at client meetings with a credible, structured, brand-coloured demo that took two hours instead of eight, leaving your team more time to focus on strategy, copy, and the parts of the pitch where human expertise actually differentiates you.

    Frequently Asked Questions

    Does Canvas Builder produce code that works with the Canvas HTML Template out of the box?

    Yes. Canvas Builder generates layouts using the correct Canvas class names, CSS variable references, and file paths. The output is structured to work with Canvas’s included Bootstrap 5 build — you do not load Bootstrap separately, and the JS references point to js/plugins.min.js and js/functions.bundle.js as Canvas requires.

    Can non-developers on my agency team use Canvas Builder to generate demos?

    Effectively, yes. The prompt interface accepts plain English descriptions of what you need. You describe the industry, the sections, and the layout intent, and Canvas Builder handles the HTML structure. Basic familiarity with file management and a browser preview setup is all that is needed to review and share the output.

    How do I apply a client’s brand colour to a Canvas demo quickly?

    Override the –cnvs-themecolor and –cnvs-themecolor-rgb variables in a style block in the document head. That single override propagates across all Canvas components that reference the theme colour, giving you a branded demo without editing individual component styles.

    What types of demo layouts can Canvas Builder generate?

    Canvas Builder supports singlepage layouts (a full page with header, hero, content sections, and footer), blocksection outputs (individual reusable components), and fullpagelayout structures for multi-section niche demos. For agency pitches, single_page is typically the most useful output type.

    Is Canvas Builder suitable for agencies pitching multiple different niches?

    Yes — this is one of its strongest use cases. Because each prompt produces a layout tailored to the described niche and section requirements, you can generate distinct demos for a law firm, a SaaS product, and a real estate agency in the same afternoon without any of them looking like copies of each other.

    If you’re working with the Canvas HTML Template and want to generate production-ready layouts faster, try Canvas Builder free and see how much time you save on every project.
  • Speeding Up Client Approvals With AI-Generated Design Concepts

    Speeding Up Client Approvals With AI-Generated Design Concepts

    Client approval rounds are one of the most time-consuming parts of any web design project — and the longer they drag on, the more they erode your margins. AI-generated design concepts change that equation entirely by giving clients something concrete to react to within hours rather than days.

    Why Client Approvals Stall in the First Place

    Most approval delays are not caused by indecisive clients — they are caused by abstract deliverables. When a client receives a written brief or a wireframe with placeholder text, they struggle to project their brand into it. They cannot tell whether the spacing feels right, whether the hierarchy communicates urgency, or whether the colour palette will resonate with their audience. The result is a cycle of vague feedback, re-work, and further rounds that compound the original delay.

    The fix is simple in principle: give clients something that looks and behaves like a real website as early in the process as possible. That is where AI-assisted HTML generation becomes a genuine competitive advantage in 2025. Rather than presenting a concept in Figma that requires translation into code, you present a live HTML file they can open in a browser, scroll through, and click — eliminating the imagination gap entirely. For a deeper look at how this compares to traditional workflows, the post on AI web design vs traditional web design covers the cost, speed, and quality trade-offs in detail.

    Concentric circles with ai logo in center
    Photo by Zach M on Unsplash

    Building an AI Prompt Strategy That Produces Usable Layouts

    The quality of an AI-generated design concept is entirely determined by the quality of the prompt. Generic prompts produce generic output. A prompt that specifies the page type, the audience, the brand tone, the required sections, and the Bootstrap 5 structure will produce a layout you can hand to a client within the same working session.

    When working with Canvas Builder, think of your prompt as a design brief compressed into two to four sentences. Useful elements to include are:

    • The industry and target audience (e.g. “B2B SaaS targeting HR managers”)
    • The primary conversion goal (e.g. “book a demo”, “download a guide”)
    • The sections required in order (hero, features, pricing, testimonials, CTA)
    • The visual tone (minimal, dark, corporate, bold)
    • Any Canvas-specific variables you want applied, such as a custom –cnvs-themecolor

    If you want to refine your prompting approach further, the AI Prompt Helper tool is built specifically for generating structured prompts for Canvas layouts. The post on connecting AI agents to Canvas Builder via the Agent API also shows how to automate this process at scale.

    The Canvas Builder Workflow for Fast Client Concepts

    The practical workflow for AI-assisted client approvals has four stages: generate, review, customise, and share.

    1. Generate: Submit your structured prompt to Canvas Builder. The output is a complete HTML file built on Bootstrap 5, using Canvas components and the correct Canvas JS files (js/plugins.min.js and js/functions.bundle.js) and CSS (style.css, css/font-icons.css).
    2. Review: Open the file locally and check section order, hierarchy, and spacing. At this stage you are validating the concept, not perfecting it.
    3. Customise: Apply the client’s brand colours and fonts by overriding Canvas CSS variables in a <style> block or a separate custom.css file.
    4. Share: Upload the file to a staging URL or a simple file host and send the client a link. They interact with a live, scrollable page — not a screenshot.

    The customisation step is typically no more than ten lines of CSS. Here is a practical example that applies a client’s primary colour, adjusts the font stack, and sets the header background using the correct Canvas variables:

    :root {
      --cnvs-themecolor: #2563eb;
      --cnvs-themecolor-rgb: 37, 99, 235;
      --cnvs-primary-font: 'Inter', sans-serif;
      --cnvs-secondary-font: 'Merriweather', serif;
      --cnvs-header-bg: #ffffff;
      --cnvs-header-sticky-bg: rgba(255, 255, 255, 0.95);
      --cnvs-logo-height: 40px;
      --cnvs-logo-height-sticky: 32px;
    }

    These eight lines replace the default Canvas theme values globally. No hunting through nested class selectors, no specificity conflicts. The client sees their brand applied to the full layout in seconds.

    white paper
    Photo by Hal Gatewood on Unsplash

    Presenting AI Concepts to Clients: What to Show and How

    How you present an AI-generated concept is as important as the concept itself. A raw HTML file sent over email invites confusion. A structured presentation with context converts quickly.

    Consider this format for a concept delivery:

    • A short loom or screen recording walking through the layout and explaining the rationale for each section.
    • A live staging link the client can explore independently on desktop and mobile.
    • A focused feedback form with three to five specific questions — “Does the hero headline capture your value proposition?”, “Is the colour tone aligned with your brand?” — rather than an open “What do you think?”

    Constraining client feedback to specific questions is one of the most effective techniques for reducing revision cycles. Clients who are asked broad questions will generate broad, difficult-to-act-on feedback. Clients who are asked precise questions give precise answers.

    For layouts that require multiple page variations — for example, a pricing page alongside a landing page — Bootstrap 5 utilities make it straightforward to create layout alternatives rapidly. The post on 7 Bootstrap 5 utilities that transform layout design covers the spacing, display, and flex utilities that are most useful for rapid iteration within Canvas.

    Handling Revision Rounds Without Losing Momentum

    Even with a strong first concept, revisions happen. The goal is to process them quickly and without rebuilding from scratch. Because Canvas Builder generates structured HTML with clear section markup, revisions are usually isolated changes rather than architectural rebuilds.

    A typical revision request — “make the hero darker and move the testimonials above the pricing section” — translates into two changes in the HTML: a section attribute update and a cut-and-paste reorder. Here is an example of how a Canvas dark hero section might be toggled using a data attribute, which is a clean approach for showing alternative treatments to a client:

    <section id="hero" class="section bg-dark text-light" data-variant="dark">
      <div class="container">
        <div class="row align-items-center min-vh-75">
          <div class="col-lg-7">
            <h2 class="display-4 fw-bold text-white">
              Build faster. Approve sooner.
            </h2>
            <p class="lead text-white-50 mt-3">
              AI-generated concepts delivered as live HTML — 
              ready for your client in hours.
            </p>
            <a href="#contact" class="button button-large button-rounded ms-0 mt-4"
               style="background-color: var(--cnvs-themecolor); color: #fff;">
              Book a Demo
            </a>
          </div>
        </div>
      </div>
    </section>

    Switching between a light and dark variant for client review is a matter of changing bg-dark text-light to bg-white text-dark and updating the text colour classes — a change that takes under a minute and can produce a meaningfully different visual direction for the client to compare.

    Measuring the Real Impact on Your Approval Timeline

    Designers who adopt an AI-first concept workflow consistently report reducing their first-approval round from five to ten business days down to one to two. The compounding effect across a project is significant: a typical three-round approval cycle that previously took four weeks can complete in under ten days when each round starts from a live HTML prototype rather than a revised static mockup.

    The metrics worth tracking in your own practice are:

    • Time to first concept delivery — how many hours from brief to shareable link.
    • Number of revision rounds — a well-structured AI workflow typically reduces this from four or five rounds to two or three.
    • Client-reported clarity — ask clients after project completion whether the concept phase felt clear; this is qualitative but valuable for refining your process.

    In 2025, clients expect speed. Agencies and freelancers who can deliver a live, branded concept on the day of the kick-off call are setting a new standard for professionalism — and winning repeat business because of it.

    Frequently Asked Questions

    Can I use Canvas Builder to generate multiple design concepts for the same client brief?

    Yes. Canvas Builder accepts distinct prompts and produces separate HTML files for each. A common approach is to generate two to three concepts with different visual tones — for example, minimal, bold, and dark — and present them side by side so the client can indicate a preference before detailed refinement begins.

    Do AI-generated Canvas layouts require manual cleanup before sharing with clients?

    Minimal cleanup is typically needed. The main tasks are replacing placeholder copy with the client’s actual content, applying brand colours via –cnvs-themecolor and related CSS variables, and substituting logo and image assets. The structural HTML and Bootstrap 5 grid are production-ready from the first output.

    What is the best way to share a live HTML concept with a client who is not technical?

    Upload the HTML file and its assets to a subdirectory on a staging server or a platform like Netlify Drop. Share a URL rather than a file attachment. Clients interacting with a live URL in their browser get the full responsive and interactive experience — they do not need to know how to open an HTML file locally.

    How do I ensure the Canvas layout uses my client’s brand font, not the default?

    Add a Google Fonts or self-hosted font import to the <head> of the HTML file, then set –cnvs-primary-font and –cnvs-secondary-font in the :root block of your custom CSS. Canvas applies these variables globally across all typography components, so a single declaration updates the entire layout.

    Is the Canvas HTML Template suitable for client work across multiple industries?

    Canvas is one of the most versatile HTML templates available, with demos and components covering SaaS, professional services, e-commerce, hospitality, fitness, and more. Its Bootstrap 5 foundation and extensive component library make it equally practical for a boutique agency producing bespoke sites and a freelancer working across varied niches.

    If you’re working with the Canvas HTML Template and want to generate production-ready layouts faster, try Canvas Builder free and see how much time you save on every project.

  • Connect Claude, ChatGPT, or Any AI Agent to Canvas Builder: The Agent API

    Connect Claude, ChatGPT, or Any AI Agent to Canvas Builder: The Agent API

    Most website builders are built for humans clicking buttons. Canvas Builder now works just as well when the builder is an AI agent.

    The Canvas Builder Agent API lets Claude, ChatGPT, or any custom AI assistant build, refine, publish, and download real multi-page websites on your behalf — using the same production build engine that powers the Canvas Builder chat. No browser automation, no screen-scraping, no shared passwords.

    Why an Agent API?

    AI assistants are becoming the way people get work done. You tell your assistant “I need a landing page for my coffee subscription startup” — and today, the assistant’s options are bad: it can write you raw HTML you have to host yourself, or walk you through using some website builder’s UI step by step.

    With the Agent API, the assistant just does it:

    • It requests access once. You approve it from your Canvas Builder account — scanning a QR code or clicking a link — and choose exactly what it’s allowed to do.
    • It describes the site in plain language. Our build engine generates a complete, multi-page, responsive website — the same quality you’d get building in the chat yourself.
    • It refines on feedback. “Make the hero darker, add a pricing section” — one sentence per change.
    • It publishes to a live URL on your account, connects your custom domain, or downloads the ZIP — whatever you’ve permitted.

    Security model: scoped, revocable, approved by you

    We designed the access flow so you never paste a password into a chatbot:

    • One-time consent. The agent requests a link code; you open the link signed into your own account and approve the exact scopes requested. Nothing happens without that approval.
    • Scoped tokens. Build-only by default. Publishing and domain management are separate permissions the agent must explicitly request — and you can decline.
    • Revocable anytime. Every connected agent is listed on your Account page with a one-click revoke. Tokens expire automatically after 90 days.
    • Your credits, your limits. Agent builds use your normal credit balance with the same per-build pricing — plus rate limits that stop a runaway agent from draining it.

    How it works (for the technically curious)

    The flow is deliberately simple — four REST calls:

    1. Link: the agent calls POST /api/v1/agents/link/start and shows you a QR code. You approve. The agent polls and receives a bearer token.
    2. Build: POST /api/v1/agents/sites with a plain-language description. Builds run asynchronously; the agent polls for completion.
    3. Refine: POST /api/v1/agents/sites/{id}/changes with the change described in a sentence.
    4. Ship: publish to a live subdomain, attach a custom domain, or download the full ZIP.

    Everything an agent needs to integrate is at agents.canvasbuilder.co — a single page written to be read by AI agents themselves, plus an OpenAPI 3.1 spec for tooling that consumes structured definitions.

    What can you build with it?

    Everything the Canvas Builder chat can build: complete multi-page websites with real navigation, responsive layouts, conversion-focused sections, contact forms, and consistent design systems. Landing pages, portfolios, restaurant sites, SaaS marketing sites, local business sites — described in a sentence, delivered as production-ready HTML/CSS.

    Try it

    If you use Claude, ChatGPT with actions, or build your own agents: point them at agents.canvasbuilder.co. The page contains the full integration guide. Approve the connection from your account, and your assistant can start shipping websites for you today.

    New to Canvas Builder? Sign up free — you get free credits to try your first build, whether you build it yourself or let your agent do it.

  • Canvas Builder vs Competitors: Why It Wins for HTML Templates

    Canvas Builder vs Competitors: Why It Wins for HTML Templates

    Most AI tools that claim to generate HTML give you something generic — unstyled divs, inline styles, and Bootstrap CDN links that clash with your existing setup. If you’re building on the Canvas HTML Template, that generic output creates more cleanup work than it saves — which is exactly the problem Canvas Builder was built to solve.

    Key Takeaways

    • Generic AI HTML generators produce output that conflicts with Canvas’s variable names, JS files, and Bootstrap 5 integration — requiring significant manual correction.
    • Canvas Builder generates layout code that uses correct Canvas CSS variables like –cnvs-themecolor and the proper JS files (js/plugins.min.js and js/functions.bundle.js).
    • Competitor tools lack awareness of Canvas section types — singlepage, blocksection, and fullpagelayout — making their output structurally incompatible without heavy rework.
    • For teams shipping Canvas projects at scale in 2025 and beyond, a purpose-built AI tool eliminates an entire category of debugging that general-purpose tools create.

    What General AI Tools Get Wrong About HTML Generation

    Tools like general-purpose AI coding assistants — and even dedicated HTML generators — share a common flaw: they generate to a lowest common denominator. When you ask for a hero section or a pricing block, they produce something that works in isolation but ignores the template context you’re actually working in.

    The most common failures when using general AI tools with Canvas include:

    • Loading a Bootstrap CDN link separately, which conflicts with the Bootstrap 5 bundle already included in Canvas
    • Referencing –bs-primary or –color-primary instead of Canvas’s actual variable –cnvs-themecolor
    • Pointing to incorrect JS paths instead of js/plugins.min.js and js/functions.bundle.js
    • Targeting #logo img with custom CSS when Canvas controls logo sizing through –cnvs-logo-height and –cnvs-logo-height-sticky
    • Generating layout structures that don’t map to Canvas’s section type conventions

    Each of these mistakes looks minor on its own. Together they produce a layout that either breaks visually or requires 30 minutes of debugging before it resembles a usable Canvas page. If you’re regularly building with Canvas — whether for SaaS homepages or PropTech platforms — that overhead compounds fast.

    Computer screen displaying code and terminal output
    Photo by Bernd 📷 Dittrich on Unsplash

    Canvas Builder’s Variable Accuracy: A Real-World Difference

    The clearest demonstration of how Canvas Builder differs from competitors is in the CSS it produces. Consider a simple theme colour override. A generic AI tool will give you something like this:

    :root {
      --bs-primary: #e74c3c;
      --color-primary: #e74c3c;
    }
    

    Neither variable does anything in a Canvas project. The correct approach — which Canvas Builder applies automatically — uses Canvas’s own custom property:

    :root {
      --cnvs-themecolor: #e74c3c;
      --cnvs-themecolor-rgb: 231, 76, 60;
    }
    

    The same accuracy applies to typography and header styling. Canvas Builder will output variables like –cnvs-primary-font, –cnvs-secondary-font, –cnvs-header-bg, and –cnvs-primary-menu-color where appropriate — not improvised alternatives that require manual replacement before the page renders correctly.

    Section Type Awareness No Competitor Offers

    Canvas’s architecture distinguishes between three layout types: singlepage (a complete page with header, hero, content sections, and footer), blocksection (a single reusable component intended to be dropped into an existing layout), and fullpagelayout (a multi-page niche demo structure). This distinction matters enormously when generating code.

    A general AI tool has no concept of these types. It will generate a full page scaffold when you only needed a block, or produce a fragment when you needed a complete page — and you won’t know which until you try to integrate it. Canvas Builder’s generation is structured around these types from the start, so a block_section output arrives ready to paste into your layout without wrapping it in redundant containers or stripping out duplicate headers.

    Here is an example of a correctly structured Canvas block section for a features row — the kind of clean, paste-ready output Canvas Builder produces:

    <section id="features" class="section">
      <div class="content-wrap">
        <div class="container">
          <div class="row col-mb-50">
            <div class="col-md-4">
              <div class="feature-box fbox-center fbox-light fbox-effect">
                <div class="fbox-icon">
                  <i class="bi-lightning-charge"></i>
                </div>
                <div class="fbox-content">
                  <h3>Fast Delivery</h3>
                  <p>Deploy layouts in minutes, not hours.</p>
                </div>
              </div>
            </div>
            <div class="col-md-4">
              <div class="feature-box fbox-center fbox-light fbox-effect">
                <div class="fbox-icon">
                  <i class="bi-code-slash"></i>
                </div>
                <div class="fbox-content">
                  <h3>Clean Code</h3>
                  <p>Production-ready output, every time.</p>
                </div>
              </div>
            </div>
            <div class="col-md-4">
              <div class="feature-box fbox-center fbox-light fbox-effect">
                <div class="fbox-icon">
                  <i class="bi-grid"></i>
                </div>
                <div class="fbox-content">
                  <h3>Canvas Native</h3>
                  <p>Built for Canvas — not a generic template.</p>
                </div>
              </div>
            </div>
          </div>
        </div>
      </div>
    </section>
    
    text
    Photo by Ferenc Almasi on Unsplash

    Correct Bootstrap 5 Handling Without Duplication

    Canvas bundles Bootstrap 5 internally. Loading it again from a CDN — something almost every competitor tool does by default — introduces version conflicts and style overrides that are notoriously difficult to trace. The symptom is usually subtle: a button that looks slightly wrong, a grid column that breaks at an unexpected Bootstrap breakpoint tester, a modal that fires incorrectly.

    Canvas Builder never outputs a Bootstrap CDN link. It respects the fact that Bootstrap 5 is already present in the template, and generates grid and component markup that relies on that existing inclusion. If you’re building a niche site that uses Canvas’s full Bootstrap grid system, this single distinction saves significant debugging time.

    It also means the generated JS references are always correct. Canvas Builder outputs:

    <script src="js/plugins.min.js"></script>
    <script src="js/functions.bundle.js"></script>
    

    Not a collection of CDN-sourced jQuery plugins, not a reference to bootstrap.bundle.min.js from an third-party URL, and not paths that assume a different folder structure than Canvas uses.

    Speed Advantage for Multi-Niche and Client Projects

    The practical speed difference between Canvas Builder and a general AI HTML generator becomes most visible when you’re building multiple layouts across different industries. A general tool requires the same manual correction pass on every single output — fix the variables, remove the duplicate Bootstrap link, restructure the section, correct the JS paths. Canvas Builder eliminates that correction pass entirely.

    For agencies or freelancers delivering Canvas projects across verticals — whether that’s an EdTech enrollment site or a SaaS demo — the compounded time saving across five or ten projects per month is substantial. Competitor tools charge for generation volume while requiring you to fix their output; Canvas Builder charges for generation that works.

    The AI Prompt Helper tool also accelerates the process by helping you write precise generation prompts — so the output you get on the first pass is closer to what you actually need.

    Honest Limitations to Consider

    Canvas Builder is purpose-built — and that specificity is a feature, not a constraint, if you’re working with Canvas. But it is worth stating clearly: if you are not working with the Canvas HTML Template, Canvas Builder is not the right tool. General-purpose AI HTML generators have their place for teams working across multiple different templates or building from scratch without a template foundation.

    Within the Canvas ecosystem, however, the comparison is not close. No general-purpose tool has knowledge of Canvas’s CSS variables generator naming conventions, its section type architecture, its bundled Bootstrap 5 integration, or its specific JS file structure. Those are not details a generic tool can approximate — they require dedicated implementation, which is what Canvas Builder provides.

    Frequently Asked Questions

    Can I use a general AI coding assistant to generate Canvas HTML layouts?

    You can, but the output will reliably contain errors specific to Canvas — incorrect CSS variable names, duplicate Bootstrap links, wrong JS paths, and structurally incompatible section markup. You will spend more time correcting the output than you saved generating it.

    What CSS variables does Canvas use that other tools get wrong?

    The primary ones are –cnvs-themecolor and –cnvs-themecolor-rgb for colour, –cnvs-primary-font and –cnvs-secondary-font for typography, and –cnvs-logo-height and –cnvs-logo-height-sticky for logo sizing. Generic tools typically substitute Bootstrap or custom variable names that have no effect in a Canvas project.

    Does Canvas Builder work for all Canvas section types?

    Yes. Canvas Builder generates output appropriate to the section type you need — singlepage, blocksection, or fullpagelayout — so the output integrates into your Canvas project without structural rework.

    Why is loading Bootstrap CDN separately a problem in Canvas?

    Canvas already bundles Bootstrap 5 internally. Adding a CDN reference loads Bootstrap twice, which causes version conflicts, style overrides, and unpredictable component behaviour. Canvas Builder never outputs a Bootstrap CDN link.

    Is Canvas Builder suitable for agencies building multiple client sites on Canvas?

    Yes — the per-project time saving is most significant for teams shipping Canvas layouts repeatedly. Eliminating the manual correction pass on every generated output, across multiple projects per month, represents a meaningful reduction in delivery time and debugging overhead.

    If you’re working with the Canvas HTML Template and want to generate production-ready layouts faster, try Canvas Builder free and see how much time you save on every project.

    Where the Alternatives Win

    General-purpose AI coding tools are the better choice when you are not building on the Canvas HTML Template at all — their output is framework-agnostic and works cleanly with custom setups, other commercial themes, or projects that manage their own Bootstrap CDN inclusion. If your team needs to generate HTML across multiple unrelated template systems, locking into a purpose-built tool like Canvas Builder adds workflow friction rather than removing it. For one-off or exploratory prototypes outside the Canvas ecosystem, the overhead of context-specific variable accuracy simply does not apply.

    The Verdict: Who Should Choose What

    Canvas Builder is the right choice for developers and agencies who regularly ship production projects on the Canvas HTML Template and cannot afford time lost to debugging mismatched CSS variables, duplicate Bootstrap loading, or structurally incorrect section output. If your work is Canvas-specific and at any meaningful scale, the purpose-built accuracy described in this article compounds into real hours saved. If you are working outside the Canvas template — or only need HTML generation occasionally across varied stacks — a general-purpose AI coding assistant will serve you better without the specialisation you do not need.

  • How to Build an AI SaaS Landing Page with Canvas HTML Template

    How to Build an AI SaaS Landing Page with Canvas HTML Template

    The AI software market is growing faster than any niche in tech, and the landing pages selling those tools need to keep pace. A great AI SaaS landing page doesn’t just describe a product — it immediately signals intelligence, speed, and trust. The problem? Most teams reach for no-code builders and end up with something that looks like every other SaaS site on the internet.

    Canvas HTML Template gives you a different starting point. You get clean, production-ready Bootstrap 5 markup, deep customisation control, and a component library that maps almost perfectly onto what an AI product page actually needs: a punchy hero, a features grid, social proof, a pricing table, and a friction-free CTA. This guide walks you through the whole build, section by section, with real code you can copy straight into your project.

    ⚡ Key Takeaways

    • Canvas’s pre-built sections map directly onto a proven AI SaaS page structure.
    • Bootstrap 5 utility classes let you establish a dark, gradient-heavy AI aesthetic in minutes.
    • A minimal hero, feature grid, social proof strip, pricing table, and FAQ block are the five non-negotiable sections.
    • Gradient text, glassmorphism cards, and animated counters are easy wins for the “AI tool” look without third-party plugins.
    • Canvas’s pricing components handle the upgrade conversation so you don’t have to hard-code it.

    Why Canvas HTML Template Is a Smart Fit for AI Tool Website Design

    A lot of ai tool website design fails because the template wasn’t built with conversion in mind — it was built to look pretty in a Dribbble screenshot. Canvas is different. It ships with dozens of complete page demos (including SaaS and startup variants), a component hierarchy that follows real information architecture best practices, and Bootstrap 5 as its foundation, which means you already know the grid.

    Compared to subscription-based website builders, Canvas gives you file-level ownership. You export once, host anywhere, and every byte is yours. If you’re weighing that trade-off in detail, the comparison in Canvas Builder vs Webflow: The HTML Template Advantage is worth reading before you commit to a platform.

    For AI SaaS specifically, the practical benefits are:

    • Dark mode sections built in — no extra CSS gymnastics required.
    • Gradient utility classes for that signature “AI glow” look.
    • SVG icon packs and Lottie integration points for animated feature illustrations.
    • Flexible pricing table components that handle monthly/annual toggles natively.
    black flat screen computer monitor
    Photo by David Pupăză on Unsplash

    Building the Hero Section: The First 3 Seconds

    Your hero has one job: make someone who has never heard of your product understand exactly what it does and feel compelled to keep reading. For an AI SaaS product, that means a tight headline, a sub-headline that handles the “so what”, a primary CTA, and a visual that screams “this is software, not a brochure”.

    Here’s a Canvas-based hero you can drop straight in. It uses the dark section background, Bootstrap’s display heading classes, a gradient badge, and the two-column grid pattern Canvas uses across its SaaS demos:

    <!-- AI SaaS Hero Section -->
    <section class="bg-dark text-white py-6">
      <div class="container">
        <div class="row align-items-center gy-5">
    
          <!-- Left: Headline + CTA -->
          <div class="col-lg-6">
            <span class="badge rounded-pill px-3 py-2 mb-3"
                  style="background:linear-gradient(135deg,#6366f1,#8b5cf6);font-size:.75rem;">
              ✦ Now powered by GPT-4o
            </span>
            <h1 class="display-4 fw-extrabold lh-sm mb-3">
              Write better content<br>
              <span style="background:linear-gradient(90deg,#818cf8,#c084fc);
                           -webkit-background-clip:text;
                           -webkit-text-fill-color:transparent;">
                10× faster with AI
              </span>
            </h1>
            <p class="lead text-white-50 mb-4">
              Superscribe uses your brand voice to generate blog posts,
              ad copy, and emails — ready to publish in seconds.
            </p>
            <div class="d-flex flex-wrap gap-2">
              <a href="#pricing" class="btn btn-lg px-5"
                 style="background:linear-gradient(135deg,#6366f1,#8b5cf6);color:#fff;border:none;">
                Start Free Trial
              </a>
              <a href="#demo" class="btn btn-lg btn-outline-light px-4">
                Watch Demo ▶
              </a>
            </div>
            <p class="text-white-50 small mt-3">No credit card required · 14-day free trial</p>
          </div>
    
          <!-- Right: Product screenshot / illustration -->
          <div class="col-lg-6 text-center">
            <img src="img/ai-dashboard-mockup.png"
                 alt="AI content dashboard screenshot"
                 class="img-fluid rounded-4 shadow-lg">
          </div>
    
        </div>
      </div>
    </section>
    

    The gradient text trick (lines 14–19) is pure CSS — no plugin, no JavaScript. It works in every modern browser and is the single quickest way to give a heading that unmistakable AI-product energy.

    Structuring the Features Grid with Canvas Cards

    After the hero, visitors want proof. A well-structured features section answers “what does it actually do?” without reading like a spec sheet. Canvas’s card components make this fast — pick a card style, drop in an icon, write three lines of copy, repeat six times.

    For an AI SaaS landing page, glassmorphism-style cards on a dark background work beautifully. Here’s the pattern:

    <!-- Features Grid -->
    <section class="py-6 bg-dark text-white" id="features">
      <div class="container">
        <div class="text-center mb-5">
          <h2 class="display-6 fw-bold">Everything your content team needs</h2>
          <p class="text-white-50 lead">One platform. Infinite output.</p>
        </div>
    
        <div class="row g-4">
          <!-- Feature Card -->
          <div class="col-md-6 col-lg-4">
            <div class="h-100 p-4 rounded-4"
                 style="background:rgba(255,255,255,.06);
                        border:1px solid rgba(255,255,255,.1);
                        backdrop-filter:blur(12px);">
              <div class="mb-3 fs-2">⚡</div>
              <h5 class="fw-bold mb-2">Instant Drafts</h5>
              <p class="text-white-50 small mb-0">
                Generate a full 1,500-word blog post from a title
                in under 10 seconds. Seriously.
              </p>
            </div>
          </div>
          <!-- Repeat for additional features -->
        </div>
      </div>
    </section>
    

    The glassmorphism effect (the rgba background + backdrop-filter on lines 14–17) pairs well with Canvas’s existing dark section utilities. Keep your icon set consistent — either all emojis, all SVGs, or all from an icon font. Mixing them looks amateur.

    If you want to go deeper on Bootstrap 5 card patterns, the round-up in 8 Bootstrap 5 Card Components You Should Be Using Right Now covers the variants Canvas ships with and when to reach for each one.

    Adding Social Proof: Logos, Metrics, and Testimonials

    Nothing kills conversion on an AI SaaS landing page faster than looking unproven. Even if you’re pre-launch, you can use animated stat counters and a logo strip to manufacture authority fast. Canvas ships with both.

    A minimal stats strip between your features section and pricing table works as a trust anchor:

    <!-- Social Proof Stats Strip -->
    <section class="py-5" style="background:#0f0f1a;">
      <div class="container">
        <div class="row text-center text-white gy-4">
    
          <div class="col-6 col-md-3">
            <div class="display-5 fw-extrabold"
                 style="background:linear-gradient(135deg,#818cf8,#c084fc);
                        -webkit-background-clip:text;
                        -webkit-text-fill-color:transparent;">
              50K+
            </div>
            <p class="text-white-50 small mt-1 mb-0">Active users</p>
          </div>
    
          <div class="col-6 col-md-3">
            <div class="display-5 fw-extrabold"
                 style="background:linear-gradient(135deg,#818cf8,#c084fc);
                        -webkit-background-clip:text;
                        -webkit-text-fill-color:transparent;">
              2M+
            </div>
            <p class="text-white-50 small mt-1 mb-0">Documents generated</p>
          </div>
    
          <div class="col-6 col-md-3">
            <div class="display-5 fw-extrabold"
                 style="background:linear-gradient(135deg,#818cf8,#c084fc);
                        -webkit-background-clip:text;
                        -webkit-text-fill-color:transparent;">
              4.9★
            </div>
            <p class="text-white-50 small mt-1 mb-0">Average rating</p>
          </div>
    
          <div class="col-6 col-md-3">
            <div class="display-5 fw-extrabold"
                 style="background:linear-gradient(135deg,#818cf8,#c084fc);
                        -webkit-background-clip:text;
                        -webkit-text-fill-color:transparent;">
              99.9%
            </div>
            <p class="text-white-50 small mt-1 mb-0">Uptime SLA</p>
          </div>
    
        </div>
      </div>
    </section>
    

    For testimonials, Canvas’s card-with-quote variant slots in cleanly below the stats strip. Use real quotes — even a single genuine sentence from a beta user outperforms five manufactured blurbs.

    Pricing Table: Convert Visitors into Paying Users

    The pricing section is where all the earlier trust-building pays off. For an AI SaaS landing page, the standard three-tier structure (Free → Pro → Enterprise) still converts best because it anchors the middle tier as the obvious choice. Canvas’s pricing components handle this pattern with toggle switches, highlighted “popular” badges, and icon-prefixed feature lists — all without a single line of JavaScript for the layout.

    Here’s a trimmed but functional pricing card structure using Canvas conventions:

    <!-- Pricing Cards -->
    <section class="py-6 bg-dark text-white" id="pricing">
      <div class="container">
        <div class="text-center mb-5">
          <h2 class="display-6 fw-bold">Simple, transparent pricing</h2>
        </div>
    
        <div class="row justify-content-center g-4">
    
          <!-- Free Tier -->
          <div class="col-md-6 col-lg-4">
            <div class="p-4 rounded-4 h-100"
                 style="background:rgba(255,255,255,.05);border:1px solid rgba(255,255,255,.1);">
              <h5 class="fw-bold">Free</h5>
              <div class="display-5 fw-extrabold my-3">$0</div>
              <ul class="list-unstyled text-white-50 small mb-4">
                <li class="mb-2">✓ 5,000 words / month</li>
                <li class="mb-2">✓ 10 templates</li>
                <li class="mb-2">✗ API access</li>
              </ul>
              <a href="#" class="btn btn-outline-light w-100">Get started free</a>
            </div>
          </div>
    
          <!-- Pro Tier (highlighted) -->
          <div class="col-md-6 col-lg-4">
            <div class="p-4 rounded-4 h-100 position-relative"
                 style="background:linear-gradient(135deg,#4f46e5,#7c3aed);border:1px solid #818cf8;">
              <span class="badge bg-warning text-dark position-absolute top-0 end-0 m-3">
                Most Popular
              </span>
              <h5 class="fw-bold">Pro</h5>
              <div class="display-5 fw-extrabold my-3">$29<span class="fs-6 fw-normal">/mo</span></div>
              <ul class="list-unstyled small mb-4">
                <li class="mb-2">✓ Unlimited words</li>
                <li class="mb-2">✓ 50+ templates</li>
                <li class="mb-2">✓ API access</li>
                <li class="mb-2">✓ Priority support</li>
              </ul>
              <a href="#" class="btn btn-light w-100 fw-bold">Start 14-day trial</a>
            </div>
          </div>
    
        </div>
      </div>
    </section>
    

    If you want to see how Canvas handles the full range of pricing table variations — including comparison grids and feature matrices — the post on Canvas Pricing Tables: Design Options That Convert Visitors goes deep on each pattern and when to use it.

    FAQ Section and Final CTA: Closing the Loop

    The bottom of your ai saas landing page has two jobs: answer the last objections (FAQ) and make one more ask (CTA). Canvas’s Bootstrap accordion component handles the FAQ without any custom JavaScript — it ships as a pure Bootstrap 5 component. For the CTA, a full-width dark gradient band with a single button outperforms busy footer CTAs every time.

    Bootstrap 5 accordion for your FAQ:

    <!-- FAQ Accordion -->
    <section class="py-6 bg-dark text-white" id="faq">
      <div class="container">
        <div class="row justify-content-center">
          <div class="col-lg-8">
            <h2 class="display-6 fw-bold text-center mb-5">Frequently asked questions</h2>
    
            <div class="accordion accordion-flush" id="faqAccordion">
    
              <div class="accordion-item bg-transparent border-bottom border-white-10">
                <h3 class="accordion-header">
                  <button class="accordion-button collapsed bg-transparent text-white fw-semibold"
                          type="button" data-bs-toggle="collapse"
                          data-bs-target="#faq1">
                    Is there a free plan?
                  </button>
                </h3>
                <div id="faq1" class="accordion-collapse collapse" data-bs-parent="#faqAccordion">
                  <div class="accordion-body text-white-50">
                    Yes — our Free plan gives you 5,000 words per month and access to 10 templates,
                    no credit card required.
                  </div>
                </div>
              </div>
    
              <!-- Repeat pattern for additional FAQ items -->
    
            </div>
          </div>
        </div>
      </div>
    </section>
    
    <!-- Final CTA Band -->
    <section class="py-6 text-white text-center"
             style="background:linear-gradient(135deg,#4f46e5 0%,#7c3aed 50%,#a21caf 100%);">
      <div class="container">
        <h2 class="display-6 fw-bold mb-3">Ready to write faster with AI?</h2>
        <p class="lead text-white opacity-75 mb-4">
          Join 50,000+ teams already saving hours every week.
        </p>
        <a href="#" class="btn btn-light btn-lg fw-bold px-5">
          Start Your Free Trial — No Card Needed
        </a>
      </div>
    </section>
    

    Notice the accordion uses data-bs-toggle and data-bs-target — that’s native Bootstrap 5, no extra plugins. If you want to see more interactive patterns built this way, Bootstrap 5 Accordion and Tabs: Interactive Content Without JavaScript covers the full set of patterns Canvas supports out of the box.

    For the CTA copy specifically, the framing matters. “Start Your Free Trial — No Card Needed” works better than “Sign Up” because it pre-empts the two biggest objections (cost and commitment) in six words. If you’re building a dedicated free trial landing experience, the guide on Free Trial Landing Page: Copy and Design That Reduce Friction is a practical companion to this post.


    FAQ: Building an AI SaaS Landing Page with Canvas

    1. Do I need to know Bootstrap 5 to use Canvas for an AI SaaS page?

    A working knowledge of Bootstrap’s grid (rows, columns, utility classes) is helpful, but Canvas’s pre-built demos mean you can start by editing placeholder text and swapping images before touching any CSS. The code examples in this post are self-contained and copy-paste ready.

    2. Can Canvas HTML Template handle a monthly/annual pricing toggle?

    Yes. Canvas ships with a pricing toggle component that uses Bootstrap’s tab/pill pattern to switch between billing periods. You wire up two sets of price values in HTML and the toggle handles the show/hide logic without custom JavaScript.

    3. How do I make my AI SaaS landing page look different from generic SaaS templates?

    Three moves: use a dark background as your base (not white), apply gradient text to your primary headline, and invest in a custom product screenshot or animated demo GIF. These three choices visually separate your page from 90% of the SaaS template defaults.

    4. Is the glassmorphism card effect safe to use in production?

    backdrop-filter: blur() is supported in all modern browsers including Safari 9+. If you need to support older browsers, simply fall back to a solid semi-transparent background using a feature query: @supports not (backdrop-filter: blur(1px)) { .card { background: rgba(30,30,50,.9); } }.

    5. How many sections should an AI SaaS landing page have?

    For a cold-traffic landing page (ads, SEO), five focused sections — Hero, Features, Social Proof, Pricing, FAQ + CTA — convert better than longer pages with eight or more sections. Add sections like an integration grid or “How it works” only when your analytics show visitors are dropping off due to lack of information, not because you want to fill space.


    What’s included & where everything lands

    If you’re working with the Canvas HTML Template and want to generate production-ready layouts faster, try Canvas Builder free and see how much time you save on every project.