Category: Complete Guides

  • AI Web Design in 2026: Complete Guide for Freelancers

    AI Web Design in 2026: Complete Guide for Freelancers

    <!– BLOG POST: AI Web Design in 2026: The Complete Guide for Freelancers and Agencies –>


    Published: 2026 | Reading time: 9 min | Tags: AI Web Design, HTML Generator, Website Builder


    > Key Takeaways
    > – AI web design tools in 2026 can cut initial build time by 60–80%, but human expertise still determines quality outcomes.
    > – The best freelancers and agencies use AI as a force multiplier, not a replacement — handling the tedious scaffold so they can focus on strategy and customisation.
    > – An ai html generator produces cleaner, more semantic markup than it did even two years ago, but still requires review for accessibility and performance.
    > – Choosing the right ai website builder depends on your output format: SaaS platforms vs. raw HTML/CSS/Bootstrap exports are very different workflows.
    > – Client delivery, QA, and post-launch maintenance remain human responsibilities — and that’s where your premium billing lives.


    Why AI Web Design Matters in 2026

    The conversation has shifted. A year ago, freelancers were asking “will AI replace me?” In 2026, the professionals winning the most work are asking “how fast can I ship with AI, and how good can I make it?”

    This is the ai web design guide for that second group.

    AI tools have matured from novelty prompt toys into production-grade assistants. They generate usable HTML scaffolds, suggest responsive layouts, write CSS utility overrides, and even produce interactive Bootstrap components — all from a plain-English brief. That’s a genuine workflow shift, not hype.

    But here’s what hasn’t changed: clients still need someone to own the project. They need someone who asks the right questions, handles the edge cases, understands brand systems, and makes sure the thing actually works before it goes live. That’s you. The AI is your very fast intern.

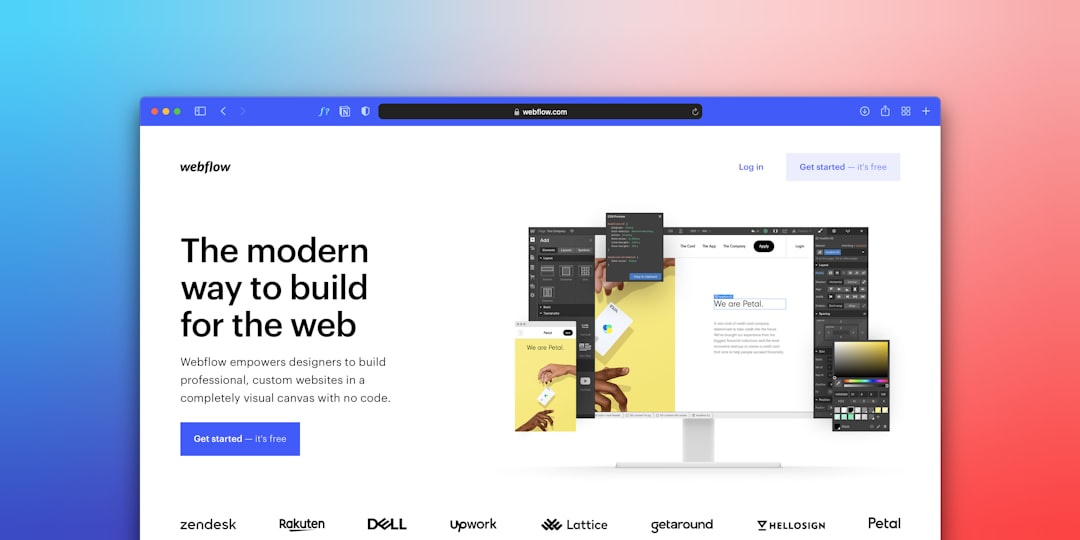
    computer screen displaying website home page
    Photo by Pankaj Patel on Unsplash

    The AI Web Design Stack in 2026

    The modern AI-augmented design workflow typically layers three categories of tool:

    1. AI Design Ideation (Wireframe & Concept Layer)
    Tools like Figma AI, Uizard, and Relume generate wireframes and site maps from briefs. You describe the client’s goal, and you get a clickable prototype in minutes — not hours.

    2. AI HTML/CSS Code Generators
    This is where the real time savings live. An ai html generator like GitHub Copilot, Cursor, or purpose-built web builders accepts your wireframe or description and outputs structured HTML with Bootstrap 5 classes, semantic tags, and ARIA attributes baked in.

    3. AI Content & Copy Assistants
    Integrated writing tools fill placeholder copy with on-brand text, generate alt attributes for images, and write meta descriptions — killing the “Lorem Ipsum” stage entirely.

    Used together, these three layers take a typical five-day solo build down to a one- or two-day sprint. The remaining time goes into what actually earns your rate: bespoke interaction design, client feedback loops, and QA.


    What a Real AI-Generated HTML Scaffold Looks Like

    Let’s be concrete. Here’s a typical hero section output from a modern ai html generator prompt like “Bootstrap 5 hero section for a SaaS startup, headline + sub-copy + two CTA buttons, dark background”:

    
    <!-- AI-Generated Hero Section — Bootstrap 5 -->
    <section class="hero bg-dark text-white py-6">
      <div class="container">
        <div class="row align-items-center min-vh-75">
          <div class="col-lg-7">
            <span class="badge bg-primary mb-3 text-uppercase ls-2">New in 2026</span>
            <h1 class="display-4 fw-bold lh-sm mb-4">
              Build Faster.<br>Ship Smarter.
            </h1>
            <p class="lead text-white-50 mb-5">
              The AI-powered platform that turns your brief into a live site
              — without sacrificing design quality.
            </p>
            <div class="d-flex flex-wrap gap-3">
              <a href="#get-started" class="btn btn-primary btn-lg px-5">
                Start Free Trial
              </a>
              <a href="#demo" class="btn btn-outline-light btn-lg px-5">
                Watch Demo
              </a>
            </div>
          </div>
          <div class="col-lg-5 d-none d-lg-block">
            <img src="assets/img/hero-illustration.svg"
                 alt="Dashboard preview of the AI web builder"
                 class="img-fluid"
                 width="560" height="480">
          </div>
        </div>
      </div>
    </section>
    

    Notice what’s already right: semantic <section>, proper alt text, responsive column classes, accessible button contrast. Notice what needs a human eye: the custom py-6 and min-vh-75 utilities won’t exist in a vanilla Bootstrap install — you need to define them or swap them. That’s the review step no AI skips for you.

    For a deep-dive on how responsive column decisions work, see our guide on Bootstrap 5 Breakpoints: How to Build Truly Responsive Layouts.
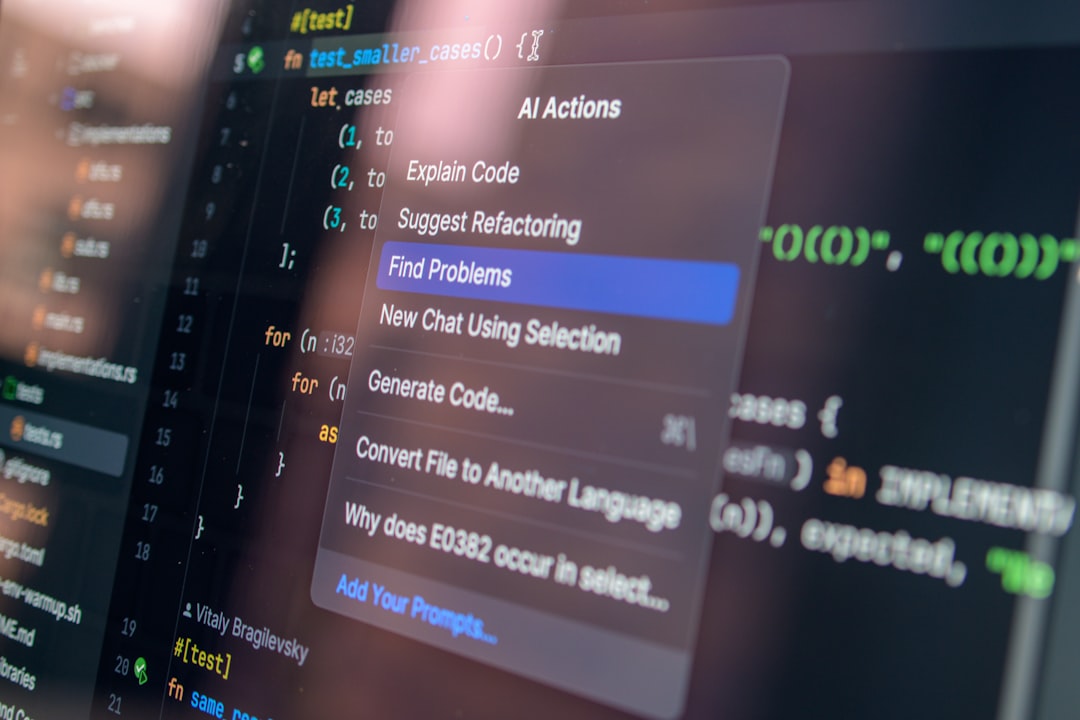

    Computer screen displaying code with a context menu.
    Photo by Daniil Komov on Unsplash

    AI Website Builder vs. AI HTML Generator: Know the Difference

    These two terms get used interchangeably, but they describe very different tools — and choosing wrong will cost you time.

    | | AI Website Builder | AI HTML Generator |
    |—|—|—|
    | Output | Hosted platform (Wix, Squarespace AI, etc.) | Raw HTML/CSS/JS files you own |
    | Best for | Small business clients who self-manage | Agencies and freelancers who deliver code |
    | Customisation | Limited to platform constraints | Unlimited — it’s just code |
    | Portability | Locked to platform | Host anywhere |
    | Price model | Subscription per client site | One-time or per-export |

    For freelancers delivering HTML templates or agency builds, an ai html generator that exports clean Bootstrap-based code is almost always the better choice. You stay in control of the output, you can hand off clean files to the client, and you’re not locking them into a SaaS subscription they’ll later resent.

    If portability and client ownership matter to your pitch, our Freelancer’s Guide to Delivering HTML Templates to Clients covers exactly how to structure that handoff.


    Prompting AI for Better Web Design Output

    The quality of your AI output is almost entirely determined by the quality of your prompt. Vague in, vague out.

    Weak prompt:
    > “Make a pricing table.”

    Strong prompt:
    > “Bootstrap 5 pricing section, three tiers (Starter / Pro / Enterprise), monthly/annual toggle using a Bootstrap switch, recommended plan highlighted with a primary colour card border and a ‘Most Popular’ badge, mobile-first layout that stacks to a single column below 768px, ARIA labels on toggle.”

    That second prompt gets you 80% of the way to production-ready. Here’s a snippet of the card markup a strong prompt typically returns:

    
    <!-- Pricing Card — "Most Popular" tier -->
    <div class="col-md-4">
      <div class="card border-primary shadow-lg h-100 position-relative">
        <span class="badge bg-primary position-absolute top-0 start-50 translate-middle px-3 py-2">
          Most Popular
        </span>
        <div class="card-body text-center pt-5 pb-4">
          <h3 class="card-title fw-bold">Pro</h3>
          <div class="display-5 fw-bold my-3">
            $49<small class="fs-6 text-muted fw-normal">/mo</small>
          </div>
          <ul class="list-unstyled text-start mb-4">
            <li class="mb-2">
              <i class="bi bi-check-circle-fill text-primary me-2" aria-hidden="true"></i>
              Unlimited projects
            </li>
            <li class="mb-2">
              <i class="bi bi-check-circle-fill text-primary me-2" aria-hidden="true"></i>
              AI HTML export
            </li>
            <li class="mb-2">
              <i class="bi bi-check-circle-fill text-primary me-2" aria-hidden="true"></i>
              Priority support
            </li>
          </ul>
          <a href="#" class="btn btn-primary w-100 py-3">Get Started</a>
        </div>
      </div>
    </div>
    

    The position-absolute / translate-middle badge trick is a Bootstrap 5 classic — and AI tools in 2026 reliably generate it correctly when you specify “badge overlapping top edge of card.”


    Quality Control: What AI Still Gets Wrong

    This is the section most AI-hype articles skip. Here’s your honest checklist of what to audit in every AI-generated page before it goes to a client:

    Accessibility gaps:

    • Missing aria-label on icon-only buttons
    • Form inputs without associated <label> elements
    • Images with generic or empty alt attributes
    • Insufficient colour contrast on AI-chosen palettes

    Performance issues:

    • Inline style attributes that should be classes
    • Duplicate CSS declarations across sections
    • Missing loading="lazy" on below-fold images
    • Oversized placeholder images left in the output

    Semantic structure:

    • Multiple <h1> tags on a single page
    • <div> soup where <nav>, <main>, <article>, <aside> belong
    • Missing <lang> attribute on <html>

    Bootstrap-specific:

    • Using deprecated Bootstrap 4 classes (AI sometimes regresses)
    • Missing data-bs-* attributes on interactive components
    • Forgetting to include Bootstrap JS bundle for dropdowns/modals

    Run your AI output through the 11 Things to Check Before Delivering an HTML Template to a Client checklist before every delivery. It was written for hand-coded templates, but every point applies equally to AI-generated ones.


    Pricing Your Work in an AI-Assisted World

    This is the elephant in the room for freelancers. If AI cuts your build time in half, do you halve your prices?

    No. Here’s why.

    Your client is paying for the outcome — a working, on-brand, performant website — not for the hours you log. AI reduces your cost of production; it doesn’t reduce the value you deliver. In fact, it arguably increases it: you can now offer faster turnaround, iterate more freely during the discovery phase, and take on more concurrent projects.

    Restructure how you quote:

    • Value-based pricing: Anchor to the client’s business outcome, not your hours. A site that converts leads is worth the same whether it took 10 hours or 40.
    • Retainers for AI-augmented iteration: Position monthly retainers as “continuous improvement” — AI makes it easy to test and ship small changes, and clients pay for that responsiveness.
    • Tiered deliverables: Offer a faster/cheaper “AI-scaffolded” tier and a premium “fully bespoke” tier. Let clients self-select.

    What AI can’t commoditise: discovery conversations, brand strategy, stakeholder management, and the judgment call that saves a project from going sideways. Sell those explicitly.


    The AI Web Design Workflow: End-to-End

    Here’s how a high-performing freelancer or small agency runs a project in 2026:

    Phase 1 — Discovery (Human-led, 2–4 hrs)
    Intake call, brand questionnaire, competitor review. No AI shortcuts here. This is where you earn the brief.

    Phase 2 — Wireframe & Architecture (AI-assisted, 1–2 hrs)
    Feed your brief into an AI wireframing tool. Get a site map and rough layout. Review and adjust before any code is written.

    Phase 3 — HTML Scaffold (AI-generated, 1–3 hrs)
    Use your AI HTML generator to produce section-by-section markup. Work page by page. Keep prompts specific (see above).

    Phase 4 — Design & Customisation (Human + AI, 3–6 hrs)
    Apply the brand system: typography scale, colour tokens, spacing. Fine-tune what AI couldn’t know — the client’s personality, their audience’s expectations.

    Phase 5 — QA & Accessibility Audit (Human, 2–3 hrs)
    Run the checklist. Test on real devices. Validate HTML. Check Lighthouse scores.

    Phase 6 — Client Review & Handoff (Human-led, 2–4 hrs)
    Walkthrough, revisions, final delivery. Document what you built and how to maintain it.

    Total: 11–22 hours for a multi-page site. Pre-AI, that same scope ran 30–50 hours. The savings are real — and they’re yours to reinvest.


    Future-Proofing Your Skills as AI Gets Smarter

    The freelancers who will be irrelevant in five years are the ones who only do things AI already does well: pixel-pushing, boilerplate coding, stock-layout assembly.

    The ones who’ll thrive are investing in:

    • Systems thinking — designing scalable component libraries, not one-off pages
    • Performance & Core Web Vitals — understanding what AI generates but can’t optimise autonomously
    • Client communication & strategy — the higher-margin work AI can’t touch
    • Niche domain expertise — knowing how to build for SaaS, real estate, or e-commerce better than a generalist tool ever will

    AI is a floor, not a ceiling. It raises the minimum quality bar for everyone. Your job is to build so far above that bar that the comparison isn’t even interesting.


    Frequently Asked Questions

    1. Can an AI website builder fully replace a freelance web designer in 2026?
    Not meaningfully. AI tools excel at generating structural scaffolds and boilerplate code, but they lack the brand intuition, client relationship skills, and strategic thinking that define quality web design. The best outcomes in 2026 come from humans directing AI tools — not AI working autonomously.

    2. What’s the best AI HTML generator for Bootstrap 5 projects?
    It depends on your workflow. GitHub Copilot and Cursor are excellent if you’re writing code in an IDE. Purpose-built platforms like Canvas offer pre-tested Bootstrap component libraries with AI-assisted customisation, which can be faster for template-based delivery workflows.

    3. Will clients pay less because AI made my work faster?
    Only if you let them. Clients pay for outcomes, not hours. The key is to reframe your value proposition around delivery speed, strategic input, and post-launch support — not raw build time. Many freelancers have increased their rates in the AI era by taking on more projects simultaneously.

    4. How do I make sure AI-generated code is accessible?
    Treat every AI output as a first draft. Run it through axe DevTools or WAVE, check colour contrast manually, and audit heading hierarchy and ARIA labels. Accessibility review is a non-negotiable human step — AI improves here every year, but it still misses context-dependent decisions.

    5. Should I tell clients I used AI to build their site?
    This is a business judgment call, but transparency is generally the right move. Framing it as “I use industry-leading AI tools to deliver faster and more cost-effectively” positions it as a professional advantage, not a shortcut. Most clients care about the quality of the result, not the tools in your toolkit.


    Ready to Build Smarter?

    The AI web design shift isn’t coming — it’s here. Freelancers and agencies who build an intentional AI workflow in 2026 will deliver better work, faster, at higher margins.

    Canvas is built for exactly this workflow: a premium Bootstrap 5 HTML template with a component library deep enough to serve as the foundation for any AI-assisted build. Start from a production-ready base, customise with AI, and deliver work that genuinely stands out.

    👉 Explore Canvas and start your next project →


    Found this guide useful? Share it with a fellow freelancer who’s still on the fence about AI tools. The gap between early adopters and late movers is only going to grow.

    If you’re working with the Canvas HTML Template and want to generate production-ready layouts faster, try Canvas Builder free and see how much time you save on every project.
  • Delivering HTML Templates to Clients: Freelancer Guide

    Delivering HTML Templates to Clients: Freelancer Guide

    Handing over a finished HTML template without a clear delivery process is one of the fastest ways to erode client trust — even when the design itself is flawless. A structured, professional delivery workflow separates the freelancers who get referrals from those who get revision emails at midnight.

    Key Takeaways

    • A repeatable delivery checklist reduces revision requests and protects your professional reputation on every freelance web design HTML project.
    • Organising your file structure, stripping unused assets, and validating your code before handoff signals quality and saves clients hours of confusion.
    • Clear documentation — even a simple README — dramatically reduces post-delivery support tickets.
    • Using a tool like Canvas Builder to generate layouts speeds up production without sacrificing the clean code clients expect.

    Why Your Delivery Process Is Part of the Product

    Most freelancers treat the handoff as an afterthought — a zip file dropped into an email with “Let me know if you have questions.” But for clients who are not developers, receiving a folder of HTML, CSS, and JavaScript files with no guidance is overwhelming. The delivery experience shapes how they perceive the entire project. A messy, undocumented handoff makes even beautiful work feel unfinished. A clean, well-documented delivery makes workmanlike code feel premium.

    In 2025, clients are more design-literate than ever, but rarely more code-literate. That gap is your opportunity. Build a repeatable html template client delivery process once, and every subsequent project benefits from it with almost no extra effort.

    a bottle of hand sanitizer next to a computer screen
    Photo by Budka Damdinsuren on Unsplash

    Organise Your Files Before You Touch the Zip Button

    The first thing a client or their in-house developer will do after receiving your files is open the folder and try to make sense of it. A logical, predictable file structure signals professionalism before a single line of code is read.

    A sensible baseline structure for any freelancer html templates project looks like this:

    project-name/
    ├── index.html
    ├── about.html
    ├── contact.html
    ├── assets/
    │   ├── css/
    │   │   ├── style.css
    │   │   └── custom.css
    │   ├── js/
    │   │   └── main.js
    │   ├── images/
    │   │   ├── hero-banner.webp
    │   │   └── logo.svg
    │   └── fonts/
    │       └── inter-variable.woff2
    ├── README.md
    └── CHANGELOG.md

    Keep the root clean. Every HTML page lives at the top level; all supporting assets live inside a clearly named assets/ directory. Separate CSS from JavaScript from images. If you’re using a framework like Bootstrap, keep vendor files in a vendor/ subfolder inside assets/ so your client’s team can distinguish your code from third-party libraries instantly.

    Delete anything that isn’t in the final deliverable. Unused page templates, placeholder images named image1_FINAL_v3.jpg, and commented-out test scripts all undermine confidence.

    Write Clean, Valid HTML the Client Can Actually Maintain

    Valid HTML isn’t just a pedantic checkbox — it directly affects how easily a client or their developer can make changes after handoff. Run your files through the W3C Markup Validator before delivery and fix all errors. Warnings about missing lang attributes or unlabelled form elements are worth addressing too: they affect accessibility compliance, which is increasingly a legal concern for businesses.

    A well-formed HTML5 page skeleton looks like this:

    <!DOCTYPE html>
    <html lang="en">
    <head>
      <meta charset="UTF-8">
      <meta name="viewport" content="width=device-width, initial-scale=1.0">
      <meta name="description" content="A brief, accurate page description for SEO.">
      <title>Page Title — Client Brand Name</title>
      <link rel="stylesheet" href="assets/css/style.css">
    </head>
    <body>
    
      <!-- Page content here -->
    
      <script src="assets/js/main.js" defer></script>
    </body>
    </html>

    Note the defer attribute on the script tag: scripts load after HTML parsing is complete, which improves perceived load speed and avoids rendering blocks. Small details like this demonstrate expertise. For deeper guidance on typography and visual hierarchy within your templates, the post on Bootstrap 5 Typography: Font Sizes, Weights, and Display Classes covers the specifics of Bootstrap’s type system in detail.

    graphical user interface, website
    Photo by 2H Media on Unsplash

    Test Responsiveness and Cross-Browser Compatibility

    A template that breaks on a client’s phone — or in their preferred browser — is a failed delivery, regardless of how it looks in your development environment. Before handoff, run through this minimum testing matrix:

    1. Mobile breakpoints: 375px (iPhone SE), 390px (iPhone 14), 414px (Android large)
    2. Tablet: 768px (iPad portrait), 1024px (iPad landscape)
    3. Desktop: 1280px, 1440px, 1920px
    4. Browsers: Chrome, Firefox, Safari (macOS/iOS), Edge

    If you’re building on Bootstrap 5, the grid system handles most responsiveness automatically — but custom CSS, absolute positioning, and fixed pixel values frequently break at unexpected viewport widths. Use browser DevTools to simulate devices, and pay special attention to navigation menus, hero sections, and any CSS Grid or Flexbox layouts you’ve hand-coded.

    For complex responsive layouts, the Flexbox Generator and the Bootstrap Grid Calculator can help you verify your column logic before locking in the final code.

    Optimise for Performance Before Handoff

    page speed is no longer a “nice to have” — it affects search rankings, conversion rates, and client satisfaction. A slow template reflects on you even after you’ve been paid. Run Lighthouse in Chrome DevTools on at least the homepage and one inner page. Target a performance score above 85 before delivering.

    The most impactful quick wins:

    • Images: Convert all images to WebP format. Use the loading="lazy" attribute on any image below the fold.
    • CSS: Remove unused styles. If you used a full Bootstrap CDN build, switch to a custom Sass build that only compiles the components you actually used.
    • JavaScript: Minify scripts. Use defer or async on non-critical scripts.
    • Fonts: Self-host variable fonts where possible. Use font-display: swap to prevent invisible text during font load.
    /* Recommended font-face setup for self-hosted variable fonts */
    @font-face {
      font-family: 'Inter';
      src: url('../fonts/inter-variable.woff2') format('woff2-variations');
      font-weight: 100 900;
      font-style: normal;
      font-display: swap;
    }

    If the template is built on the Canvas HTML Template, many of these optimisations are already baked into the base theme — but custom sections and images you’ve added still need checking.

    Write a README That Makes You Look Like a Pro

    Documentation is the single most underused tool in a freelancer’s delivery kit. A clear README takes 30 minutes to write and eliminates hours of support questions. At minimum, your README should cover:

    • Project overview: What was built, which pages are included, and which template or framework was used.
    • Setup instructions: How to open the project locally — even if it’s as simple as “open index.html in a browser”.
    • Editing guide: Where to change colours, fonts, and content. Reference your CSS custom properties or Sass variable file specifically.
    • Dependencies: List every plugin, library, and icon set used, with version numbers and licence notes.
    • Deployment notes: Any server requirements, redirect rules, or hosting considerations.
    <!-- In your README.md, reference where colours are defined like this: -->
    <!-- 
      CUSTOMISATION GUIDE
      ===================
      Brand colours are defined as CSS custom properties in assets/css/style.css
      
      :root {
        --color-primary:   #0d6efd;
        --color-secondary: #6c757d;
        --color-accent:    #f97316;
        --font-base:       'Inter', sans-serif;
      }
      
      Change these values to update colours site-wide without hunting through individual components.
    -->

    Including this level of detail in your documentation also protects you. When a client makes edits six months later and breaks something, a clear README means they can check their own changes before assuming it’s your fault. Before sending anything, run through the checklist at 11 Things to Check Before Delivering an HTML Template to a Client — it’s a concise pre-flight list that pairs directly with this workflow.

    Run a Walkthrough Call — Even a Short One

    Sending files without a walkthrough is a missed opportunity. A 20-minute screen-share call where you open the template and explain what was built, how it’s structured, and how to make basic edits does several things at once: it confirms the client understands what they’ve received, it surfaces any misalignments before they become complaints, and it positions you as a consultant rather than a vendor.

    During the call, cover:

    1. The folder structure and where each page lives
    2. How to update text, images, and contact form destinations
    3. Where CSS custom properties or variables are declared
    4. Any third-party services connected (analytics, form handlers, maps APIs)
    5. What falls inside scope if they need post-launch changes

    Record the call and share the recording. Clients often forget details, and a reference video saves you both time. It also demonstrates a level of care that most freelancers skip, which directly feeds word-of-mouth referrals.

    Define Post-Delivery Support Scope in Writing

    Scope creep doesn’t end at delivery — it continues as “quick questions” that consume hours of unpaid time. Before handing over files, define in writing exactly what post-delivery support you’re offering, for how long, and what constitutes a new paid request.

    A clear post-delivery clause in your project agreement might read:

    “This project includes 14 days of bug-fix support following delivery, covering issues directly attributable to the delivered code. Content changes, new sections, and integration of additional third-party services are scoped separately.”

    Send a follow-up email 48 hours after delivery that reiterates this scope, links to the README and walkthrough recording, and confirms the project is complete. This paper trail protects you and signals closure to the client — making it easier for both parties to move on, or to re-engage on paid next steps.

    Using Canvas Builder to Accelerate Delivery Without Cutting Corners

    The biggest bottleneck in most freelance HTML projects isn’t the design — it’s the production work of translating a design into clean, structured, cross-browser HTML. Canvas Builder accelerates this by generating layout structures based on Canvas Template components, so you spend more time on the parts clients actually value: customisation, content, and communication.

    By starting from a generated layout rather than a blank file, you inherit a consistent component architecture — clean IDs, sensible class naming, and Bootstrap grid compliance — that makes your final deliverable easier to document and easier for clients or their future developers to maintain. Combined with the section patterns and layout conventions covered in Canvas Template Section Patterns: Building Pages Like a Pro, this approach significantly compresses the time between brief and delivery without sacrificing quality.

    Frequently Asked Questions

    How should I deliver HTML template files to a client — as a zip, via GitHub, or another method?

    For most small clients, a well-organised zip file is the simplest and most accessible option. For clients with an in-house developer or ongoing maintenance needs, a private GitHub or GitLab repository is preferable — it gives them version history and makes future edits trackable. Whichever method you use, include a README so the file structure is self-explanatory on arrival.

    What should I include in a freelance HTML project README?

    At minimum: a project overview, setup instructions, an editing guide covering where colours and fonts are controlled, a list of all dependencies with version numbers, and any deployment notes. The goal is for a non-developer client or an unfamiliar developer to understand the project without needing to contact you.

    How many revisions should I include in a freelance HTML template project?

    Industry standard is two to three rounds of revisions, clearly defined in your contract before work begins. Specify what counts as a revision (e.g., changes to existing content or layout) versus a new scope item (e.g., adding a new page or section). This prevents revision creep and ensures your delivery timeline stays predictable.

    Should I validate HTML before delivering to a client?

    Yes, always. Run every page through the W3C Markup Validator and fix errors before handoff. Valid HTML improves browser compatibility, accessibility, and SEO — all things clients care about even if they can’t articulate why. It also removes any grounds for a client to question the quality of your code after delivery.

    How do I handle ongoing maintenance after delivering an HTML template?

    Define a clear post-delivery support window in your contract — typically 14 to 30 days covering bugs in the delivered code. After that window, offer a separate maintenance retainer or hourly rate for changes. Document this scope in your delivery email and point clients to the README for common self-service edits. Clear boundaries protect your time and train clients to respect it.

    A professional delivery process is as much a part of your service as the template itself. If you’re building on the Canvas HTML Template and want to generate clean, structured layouts faster, try Canvas Builder free and see how much time you can reclaim on the production side of every project.