
Tag: canvas css variables branding

  • Canvas Builder for Freelancers: How to Deliver Client Sites 10x Faster

    Canvas Builder for Freelancers: How to Deliver Client Sites 10x Faster

    Canvas Builder.

    Key Takeaways

    • The “10x” gain applies to the layout build stage, which is typically the biggest single block of billable-but-repeatable hours, not to the whole project.
    • Canvas gives you Bootstrap 5 components, a shared header system and a set of CSS variables, so brand customisation takes minutes instead of hours.
    • A fixed five-step workflow (brief, generate, refine, brand, QA) makes delivery predictable and quotes more accurate.
    • AI generation is a poor fit for web apps, heavy backend logic or CMS-driven builds. Know where to stop.

    Where Freelance Hours Actually Go

    Track a typical five-page brochure site and the time splits roughly like this: discovery and content chasing, layout build, brand styling, responsive fixes, and revisions. Layout build and responsive fixes are the parts that look nearly identical from client to client. A navbar that collapses properly, a hero with a call to action, a three-column feature grid, a testimonial strip and a footer with four link columns do not need to be invented again.

    That is the opportunity. Freelance web design rewards speed on the repeatable parts and attention on the parts clients actually notice: copy, imagery and conversion flow. For wider context on how generation changes this split, our look at how AI HTML generators are changing web design workflows covers it in more detail.

    Canvas Builder for Freelancers: How to Deliver Client Sites 10x Faster, abstract concept illustration

    How Canvas Builder Fits a Freelance Workflow

    The Canvas HTML Template is a large, Bootstrap 5 based library of components, headers, sections and niche demos. Canvas Builder is an AI HTML generator that outputs layouts using that template’s real structure and classes. What you receive is not generic markup you have to reconcile with a theme. It is already Canvas.

    Canvas Builder produces three output types, and choosing the right one matters:

    • single_page: one complete page with header, hero, sections and footer. Ideal for landing pages and one-page brochure sites.
    • block_section: a single reusable component such as a pricing table or FAQ. Use these to patch gaps in an existing build.
    • full_page_layout: a multi-page niche demo. Best when the client needs several connected pages in one consistent style.

    Because Canvas bundles Bootstrap 5, you never add a Bootstrap CDN link. Doing so is a common mistake that causes duplicate styles and unpredictable overrides.

    A Repeatable Five-Step Delivery Process

    Speed comes from removing decisions you make every single time. This sequence works well for small-business sites:

    1. Structured brief (15 to 20 minutes). Capture business type, audience, primary action, page list and tone. The AI Prompt Helper is useful for turning a rough client call into a precise generation prompt.
    2. Generate the layout. Pick single_page or full_page_layout based on scope, and generate with your real headings and offer, not lorem ipsum.
    3. Refine with plain-language edits. Swap sections, change emphasis, tighten copy. Our guide to AI Edit Mode and natural-language template changes shows how far this can go.
    4. Apply the brand. Override a handful of Canvas variables (next section) rather than hunting through selectors.
    5. QA on real devices. Test navigation, forms, tap targets and image weight before the client sees it.

    For larger sites, follow the same loop page by page. The multi-page website design process using AI and HTML templates walks through keeping navigation and styling consistent across pages.

    AI HTML generator, abstract technical diagram

    Branding a Client Site in Minutes With Canvas Variables

    This is where freelancers lose the most time on other templates: colour and font changes scattered across dozens of rules. Canvas centralises them. Set your overrides once, after style.css loads, and the whole site follows.

    <link rel="stylesheet" href="style.css">
    <link rel="stylesheet" href="css/font-icons.css">
    
    <style>
      :root {
        --cnvs-themecolor: #0f766e;
        --cnvs-themecolor-rgb: 15, 118, 110;
        --cnvs-primary-font: "Inter", sans-serif;
        --cnvs-secondary-font: "Playfair Display", serif;
        --cnvs-logo-height: 48px;
        --cnvs-logo-height-sticky: 36px;
        --cnvs-header-bg: #ffffff;
      }
    </style>

    Two details bite people here. First, --cnvs-themecolor-rgb must match your hex value, because Canvas uses it for translucent effects. Second, logo size is controlled by --cnvs-logo-height and --cnvs-logo-height-sticky. Do not write rules targeting #logo img, which fights the header system and breaks the sticky state.

    Scripts load at the end of the body, using only the two Canvas bundles:

    <script src="js/plugins.min.js"></script>
    <script src="js/functions.bundle.js"></script>

    Beyond branding, most client edits are plain Bootstrap 5. A services row needs nothing proprietary:

    <section class="py-5">
      <div class="container">
        <div class="row g-4">
          <div class="col-md-6 col-lg-4">
            <div class="card h-100 border-0 shadow-sm">
              <div class="card-body">
                <h3 class="h5">Brand Strategy</h3>
                <p class="mb-0">Positioning workshops and messaging for growing teams.</p>
              </div>
            </div>
          </div>
        </div>
      </div>
    </section>

    To go deeper on that card pattern, see Bootstrap 5 cards for flexible content containers. For column math, the Bootstrap Grid Calculator saves guesswork.

    What “10x Faster” Really Means (and Doesn’t)

    Hand-building a polished five-section responsive page can take a full working day or more. Generating, refining and branding the same page can take under an hour. That gap is real, and it sits entirely in the layout stage. Content gathering, client feedback rounds, hosting setup and launch checks remain human-paced. No tool changes that.

    Project stage Speed-up from AI generation
    Layout and section build Very high
    Brand styling via variables High
    Responsive fixes Moderate (Canvas is responsive by default)
    Copywriting and imagery Low, still needs your judgement
    Client revisions and approvals Unchanged

    The practical win is capacity. Finishing builds in days instead of weeks lets you take more projects, or reinvest saved hours in the conversion and content work clients value most. Build time also becomes predictable, which makes fixed-price quoting far less of a gamble.

    When This Approach Is the Wrong Choice

    Canvas and generated HTML are not the answer to everything. Choose a different path when:

    • The client needs a custom web application with authentication, dashboards or complex state. A framework and backend fit better.
    • Non-technical staff must edit content daily and a CMS is non-negotiable. You can integrate, but static HTML adds handover cost.
    • The brief demands a one-of-a-kind visual system with bespoke interactions, where a template’s conventions become a constraint.
    • Budget is zero and the site is trivial. Our comparison of free HTML templates vs premium helps you weigh that call.

    Also remember the Canvas HTML Template is a separate purchase from ThemeForest, so factor it into your tooling costs. Across several client sites a year it typically pays back quickly, but run that maths for your own volume.

    Frequently Asked Questions

    Is Canvas Builder suitable for freelance work?

    Yes, particularly for brochure sites, landing pages, portfolios and small-business sites where the layout is the main build task. It is less suited to app-style projects with heavy backend requirements.

    Can I use the generated HTML for paying clients?

    Yes, the output is standard HTML and Bootstrap 5 markup you can deliver as a static site. You do need a valid Canvas HTML Template licence covering your use, so check the Envato licence terms for client projects.

    How do I change brand colours and fonts quickly?

    Override Canvas variables in :root after style.css loads. The key ones are --cnvs-themecolor, --cnvs-themecolor-rgb, --cnvs-primary-font and --cnvs-secondary-font.

    Do I need to add Bootstrap separately?

    No. Canvas already includes Bootstrap 5. Adding a CDN copy causes duplicate CSS and conflicts. Load only style.css and css/font-icons.css, plus js/plugins.min.js and js/functions.bundle.js.

    Will AI-generated layouts look the same as every other site?

    Not if you feed in specific briefs, real copy and distinct brand variables. Generic prompts produce generic pages. The more concrete your audience, offer and tone, the more distinctive the result.

    If you’re working with the Canvas HTML Template and want to generate production-ready layouts faster, try Canvas Builder free and see how much time you save on every project.

  • Building a Micro-SaaS Landing Page with Bootstrap 5 and Canvas

    Building a Micro-SaaS Landing Page with Bootstrap 5 and Canvas

    Most micro-SaaS products solve a narrow problem exceptionally well — but their landing pages often fail to communicate that clarity, costing real trial signups before a single line of product code ever runs. Building your landing page with Bootstrap 5 and the Canvas HTML Template gives you a production-quality foundation without the overhead of a full framework or a bloated page builder.

    Key Takeaways

    • A micro-SaaS landing page needs five core sections: hero, problem/solution, features, social proof, and a single CTA — Canvas shortcodes speed up building every one of them.
    • Bootstrap 5’s grid and utility classes handle responsive layout without writing custom media queries, and Canvas bundles Bootstrap 5 natively so you never load it separately.
    • Canvas CSS variables (–cnvs-themecolor, –cnvs-primary-font) let you apply brand colours and typography globally in minutes.
    • Conversion-focused structure matters as much as visual design — leading with the exact outcome your product delivers is the single highest-impact change you can make.

    Why Canvas and Bootstrap 5 Are a Strong Fit for Micro-SaaS

    Micro-SaaS founders typically work with limited time and budget. The goal is to validate fast, look credible, and convert visitors into trial users. Canvas is built on Bootstrap 5, which means the grid system, flexbox utilities, and responsive breakpoints are all available immediately — no CDN link needed, no version conflicts. You get a polished UI component library layered on top of a mature CSS framework.

    Canvas also ships with pre-built section types (including block_section components) that map directly to the sections a SaaS landing page needs: hero blocks, pricing tables, testimonial carousels, and feature grids. Rather than building from scratch, you’re selecting and customising. For a deeper look at how Canvas’s shortcode system accelerates this kind of work, the post on Using Canvas Shortcodes to Build Feature-Rich Pages Faster covers the mechanics in detail.

    The practical advantage in 2025: you can ship a conversion-optimised page in a single focused session rather than across multiple days of layout troubleshooting.

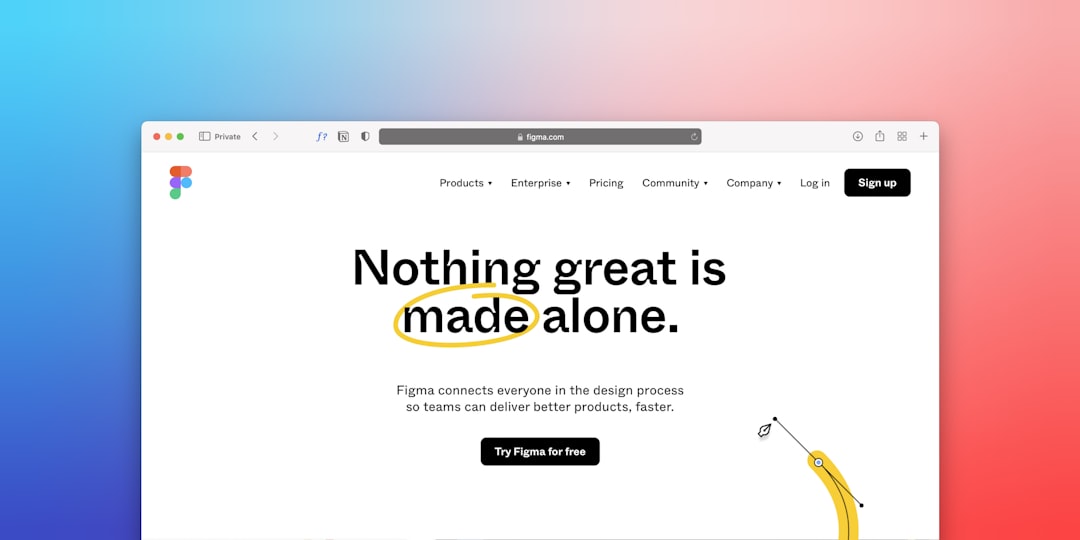
    a computer screen with the words nothing great is made alone
    Photo by Team Nocoloco on Unsplash

    Planning the Section Structure Before You Touch Code

    Before opening any file, map your five mandatory sections. Every micro-SaaS landing page that converts follows a consistent information hierarchy:

    1. Hero — one sentence outcome statement, one sub-headline clarifying who it’s for, and a single primary CTA button
    2. Problem/Solution — acknowledge the pain, position your product as the specific fix
    3. Features — three to five capabilities shown as icon + headline + short description
    4. Social Proof — two or three testimonials, or a simple logo bar if you have recognisable customers
    5. Pricing / CTA — one plan or a minimal two-tier table, closing with the trial signup

    This structure is deliberate. Visitors arriving from a paid ad or a Product Hunt listing are scanning quickly. Every section earns the scroll to the next one. For more on conversion-led page architecture, the SaaS Landing Page Design: The Blueprint That Converts Trials to Customers post goes deep on copy and hierarchy decisions.

    Building the Hero Section with Bootstrap 5 Grid

    The hero section uses a two-column Bootstrap grid: left column for the headline and CTA, right column for a product screenshot or illustration. Canvas’s section wrapper and spacing utilities handle the vertical rhythm without custom CSS.

    <section id="hero" class="py-6 py-md-7">
      <div class="container">
        <div class="row align-items-center g-5">
          <div class="col-lg-6">
            <span class="badge bg-color-themecolor text-white text-uppercase fw-semibold ls-1 mb-3 d-inline-block">Now in Beta</span>
            <h1 class="display-4 fw-bold lh-sm mb-3">
              Stop chasing invoice approvals. Get paid on time, automatically.
            </h1>
            <p class="lead text-muted mb-4">
              InvoicePilot syncs with your accounting tool, sends smart payment nudges, and flags at-risk invoices before they go overdue — so you spend less time chasing and more time closing.
            </p>
            <a href="#pricing" class="button button-xlarge button-rounded button-fill"
               style="background-color: var(--cnvs-themecolor); border-color: var(--cnvs-themecolor);">
              Start Free Trial
            </a>
            <p class="small text-muted mt-2">No credit card required. 14-day free trial.</p>
          </div>
          <div class="col-lg-6">
            <img src="images/product-screenshot.png" alt="InvoicePilot dashboard" class="img-fluid rounded-4 shadow-lg">
          </div>
        </div>
      </div>
    </section>

    Notice the CTA button uses var(–cnvs-themecolor) for background and border — this ensures it inherits whatever brand colour you have set globally, rather than hardcoding a hex value that breaks when you update your palette. The button-rounded and button-fill classes are Canvas-native button modifiers that apply the correct padding and border-radius without extra CSS.

    Feature Grid and Canvas Icon Integration

    A three-column feature grid is the most common micro-SaaS layout pattern. Bootstrap’s col-md-4 handles the responsive collapse automatically. Canvas ships with an icon font set loaded via css/font-icons.css — reference these icons with the i- prefix classes rather than importing a separate icon library.

    <section id="features" class="py-6 bg-color-light">
      <div class="container">
        <div class="row text-center mb-5">
          <div class="col-md-8 offset-md-2">
            <h2 class="fw-bold">Everything you need. Nothing you don't.</h2>
            <p class="text-muted">Built for solo founders and small finance teams who bill monthly retainers or project milestones.</p>
          </div>
        </div>
        <div class="row g-4">
          <div class="col-md-4">
            <div class="feature-box p-4 rounded-3 bg-white h-100">
              <i class="i-plain i-medium bi-clock-history color-themecolor mb-3 d-block"></i>
              <h5 class="fw-semibold">Automated Follow-Ups</h5>
              <p class="text-muted mb-0">Send personalised payment reminders on a schedule you control — no manual chasing required.</p>
            </div>
          </div>
          <div class="col-md-4">
            <div class="feature-box p-4 rounded-3 bg-white h-100">
              <i class="i-plain i-medium bi-graph-up-arrow color-themecolor mb-3 d-block"></i>
              <h5 class="fw-semibold">At-Risk Invoice Alerts</h5>
              <p class="text-muted mb-0">Our model flags invoices likely to go overdue based on client payment history, giving you time to act.</p>
            </div>
          </div>
          <div class="col-md-4">
            <div class="feature-box p-4 rounded-3 bg-white h-100">
              <i class="i-plain i-medium bi-plug color-themecolor mb-3 d-block"></i>
              <h5 class="fw-semibold">One-Click Integrations</h5>
              <p class="text-muted mb-0">Connects to QuickBooks, Xero, and FreshBooks in under two minutes — no developer needed.</p>
            </div>
          </div>
        </div>
      </div>
    </section>

    The h-100 utility ensures all three cards stretch to equal height regardless of content length — a small detail that significantly improves visual consistency across screen sizes. If you want to explore Bootstrap 5’s alignment and spacing utilities in more depth, Bootstrap 5 Utility Classes: Every Designer Should Know These is a solid reference.

    Applying Your Brand Colour Globally with Canvas CSS Variables

    One of the most time-saving aspects of Canvas is its CSS variable system. You define your brand colour once, and every Canvas component that references –cnvs-themecolor inherits it automatically — buttons, icon colours, active nav states, and accent lines all update in a single change.

    :root {
      --cnvs-themecolor: #5B4CF5;
      --cnvs-themecolor-rgb: 91, 76, 245;
      --cnvs-primary-font: 'Inter', sans-serif;
      --cnvs-secondary-font: 'Inter', sans-serif;
      --cnvs-logo-height: 36px;
      --cnvs-logo-height-sticky: 28px;
      --cnvs-header-bg: #ffffff;
      --cnvs-header-sticky-bg: rgba(255, 255, 255, 0.97);
      --cnvs-primary-menu-color: #1a1a2e;
      --cnvs-primary-menu-hover-color: #5B4CF5;
    }

    Place this block in a custom.css file loaded after style.css in your document head. The –cnvs-themecolor-rgb value is required separately because Canvas uses it in rgba() calculations for backgrounds and shadows — if you only update the hex variable, some tinted elements will not update correctly. For a complete walkthrough of customising Canvas at this level, the HTML Template Customisation: The Definitive Guide for Designers covers every layer of the override system.

    Correct File Setup and JS Loading Order

    A common mistake when adapting Canvas for a new project is loading Bootstrap from a CDN alongside Canvas’s bundled version, which causes JavaScript conflicts. Canvas includes Bootstrap 5 — you do not add it separately. Your script loading order at the bottom of body must follow this pattern:

    <!-- Canvas JS — load in this order only -->
    <script src="js/plugins.min.js"></script>
    <script src="js/functions.bundle.js"></script>

    Your CSS references in head follow an equally strict order:

    <link rel="stylesheet" href="style.css">
    <link rel="stylesheet" href="css/font-icons.css">
    <link rel="stylesheet" href="css/custom.css">

    The custom.css file must always load last so your variable overrides and component tweaks take precedence over Canvas defaults. This setup keeps your micro-SaaS page lightweight — typically under 200 KB of CSS before images — which directly supports Core Web Vitals scores that affect paid acquisition costs in 2025 and beyond.

    If you want to accelerate the entire layout generation process — producing the hero, feature grid, and pricing sections with correct Canvas markup — Canvas Builder lets you describe your page sections and outputs production-ready Canvas HTML you can drop directly into your project.

    Frequently Asked Questions

    Do I need to know Bootstrap 5 deeply to build a micro-SaaS landing page with Canvas?

    A working knowledge of Bootstrap’s grid (rows, columns, breakpoints) is enough to get started. Canvas layers its own component classes on top, so many layout decisions are handled by Canvas shortcode classes like button-rounded or feature-box. You rarely need to write custom media queries.

    Can I use a Canvas blocksection as a standalone landing page without a full site?

    Yes. A blocksection in Canvas is a self-contained HTML file with its own header reference and section markup. For a micro-SaaS validation page you could use a single-page layout type instead, which gives you the full header, hero, sections, and footer in one file — ideal for a product launch or waitlist page.

    How do I change the primary brand colour across the entire Canvas page?

    Set –cnvs-themecolor and –cnvs-themecolor-rgb in your :root block inside a custom CSS file loaded after style.css. Every Canvas button, icon accent, and active state reads from these variables, so a single change propagates globally without hunting through component-level CSS.

    Should I add Bootstrap from a CDN in addition to Canvas’s bundled files?

    No — this is a critical mistake. Canvas bundles Bootstrap 5 inside js/plugins.min.js. Loading Bootstrap separately from a CDN creates duplicate instances that break Canvas’s JavaScript components, including sticky headers, carousels, and modal triggers.

    What is the minimum number of sections a micro-SaaS landing page needs to convert visitors?

    Five focused sections consistently outperform longer pages for micro-SaaS products: a clear hero with one CTA, a problem/solution block, a three-feature grid, two or three testimonials, and a pricing or trial CTA section. Adding more sections without a clear conversion reason typically increases bounce rate rather than improving it.

    If you’re working with the Canvas HTML Template and want to generate production-ready layouts faster, try Canvas Builder free and see how much time you save on every project.