Blog

  • Building a Healthcare Website with Canvas HTML Template

    Building a Healthcare Website with Canvas HTML Template

    Healthcare websites carry a weight that most other web projects do not — patients and practitioners alike expect clarity, trust, and accessibility before they read a single word of body copy. The Canvas HTML Template gives you a production-quality foundation to build exactly that — without starting from scratch.

    Why Canvas Works So Well for Healthcare Projects

    Healthcare clients need a codebase that a developer can audit and a designer can brand without fighting the framework. Canvas delivers both. Because it is built on Bootstrap 5, the grid system, spacing utilities, and responsive Bootstrap breakpoint tester are already battle-tested. You are not bolting accessibility or mobile responsiveness on after the fact — they come with the template by default.

    The template also ships with enough section variety to cover every part of a typical clinic or hospital site: hero areas, feature grids, icon boxes, testimonials, pricing tables, team cards, and contact forms. If you want to see how those sections combine in practice, the post on 10 Canvas HTML Template Sections Every Landing Page Needs is a useful reference for prioritising what goes above the fold.

    Perhaps most importantly for healthcare, Canvas does not load any third-party Bootstrap CDN — the Bootstrap 5 bundle is included inside js/plugins.min.js and js/functions.bundle.js. That means no third-party network dependency at runtime, which matters when your client’s hospital IT team reviews the CSP policy.

    Setting a Clinical Colour Palette with Canvas Variables

    Colour is one of the fastest trust signals on a healthcare site. Blues and teals read as calm and clinical; greens suggest health and recovery; white space signals hygiene and order. Canvas makes global colour changes trivial because everything branches from –cnvs-themecolor.

    Add the following block to the <head> of your page (or to a custom style.css override) to switch the entire template to a healthcare-appropriate palette without touching the source files:

    :root {
      --cnvs-themecolor: #1a7abf;        / primary clinical blue /
      --cnvs-themecolor-rgb: 26, 122, 191;
      --cnvs-primary-font: 'Inter', sans-serif;
      --cnvs-secondary-font: 'Merriweather', serif;
      --cnvs-header-bg: #ffffff;
      --cnvs-header-sticky-bg: #ffffff;
      --cnvs-primary-menu-color: #2c3e50;
      --cnvs-primary-menu-hover-color: #1a7abf;
      --cnvs-logo-height: 48px;
      --cnvs-logo-height-sticky: 36px;
    }

    With those ten lines, every button, link underline, icon accent, and hover state updates to match your healthcare brand. You never need to hunt through component stylesheets or override specificity chains.

    Building the Hero Section for a Clinic or Hospital

    The hero on a healthcare site should answer three questions instantly: what service is offered, who it is for, and how to book or contact. Avoid decorative stock photography of smiling doctors — use real imagery where possible, and keep the headline direct.

    Here is a practical Canvas hero structure using Bootstrap 5 utilities and Canvas section classes:

    Expert Care, Closer to Home

    Compassionate, evidence-based treatment from board-certified physicians across 12 specialities. Same-week appointments available.

    Book an Appointment Call Us: 01234 567 890
    Friendly clinic reception team

    Notice the telephone link alongside the CTA button — on mobile, this renders as a tappable call link, which is critical for healthcare where urgency often drives the visit.

    Trust Signals: Physician Profiles and Certifications

    Nothing reduces patient anxiety faster than seeing a real doctor’s face and credentials. Canvas’s team card pattern adapts cleanly for physician profiles. Use Bootstrap’s card grid with a consistent four-column layout on desktop, collapsing to two on tablet and one on mobile:

    Meet Our Specialists

    Board-certified physicians dedicated to your long-term health.

    Dr Anita Patel, Cardiologist
    Dr Anita Patel

    Cardiologist — MRCP, FRCP

    15 years of experience in interventional cardiology at NHS Trust level.

    Repeat the inner .col-sm-6.col-lg-3 block for each physician. Keep the credential line (MRCP, FRCP, etc.) visible — it is the signal patients scan for before they read the bio. If your project covers multiple service pages rather than a single-scroll layout, review the guidance in One-Page vs Multi-Page Websites: When to Use Each before committing to a structure.

    Services Grid and Accessibility Considerations

    A healthcare site typically lists six to twelve services — GP consultations, diagnostics, physiotherapy, mental health, and so on. An icon-box grid works well here: scannable, recognisable, and easy to extend. Use Canvas’s icon box pattern with Bootstrap’s utility classes:

    Cardiology

    ECG, echocardiograms, and follow-up care for heart conditions.

    Note the aria-hidden=”true” on the icon element. Decorative icons should be hidden from screen readers so that assistive technology reads the heading and description rather than announcing an icon name. This is a small change with a significant impact on WCAG 2.1 compliance — a baseline requirement for any 2025 healthcare web project. For box shadow polish on the service cards, the CSS Box Shadow Generator can help you craft subtle, accessible shadows without guesswork.

    Contact and Appointment Booking Section

    The contact form on a healthcare site is functionally a conversion form — it is where the relationship starts. Keep it short: name, email or phone, preferred appointment date, and a service dropdown. Canvas’s built-in form styles apply automatically when you use standard Bootstrap form classes:

    Book an Appointment

    Select a service... General Practice Cardiology Physiotherapy Mental Health

    Using type="tel" on the phone field triggers the numeric keypad on mobile, reducing friction for older patients who are a significant demographic for most clinics. Pair this with a clear privacy notice beneath the submit button — a single sentence referencing your data processing policy is sufficient and expected by patients.

    Frequently Asked Questions

    Which Canvas demo layout is the best starting point for a healthcare website?

    Canvas’s fullpagelayout demos that follow a service-company structure — with a sticky header, multi-section scroll, and contact form — translate most directly to healthcare. Look for demos with icon service grids and team sections. You can then swap the colour variables and copy to match your clinic’s brand without rebuilding the layout.

    Do I need to load Bootstrap separately for a Canvas healthcare site?

    No. Canvas bundles Bootstrap 5 inside its own compiled JS and CSS files. Loading Bootstrap from a CDN on top of Canvas will create conflicts and duplicate styles. Always rely on js/plugins.min.js, js/functions.bundle.js, and style.css as your asset stack.

    How do I change the primary colour across a Canvas healthcare site quickly?

    Override –cnvs-themecolor and –cnvs-themecolor-rgb in a :root block inside your custom stylesheet. Every component that uses the theme colour will update immediately. For a clinical blue, a hex value in the #1a7abf range works well and maintains sufficient contrast against white backgrounds for WCAG AA compliance.

    Is Canvas HTML Template suitable for a multi-page hospital website or only single-page clinics?

    Canvas supports both formats. A small GP surgery might suit a single-page layout with anchor navigation, while a hospital with dozens of departments needs a multi-page structure with consistent shared components (header, footer, breadcrumbs). Canvas’s modular HTML files make it practical to build either format from the same template base.

    What accessibility features should I prioritise on a healthcare Canvas site in 2025?

    Focus on four areas: sufficient colour contrast (4.5:1 minimum for body text), descriptive alt attributes on all clinical imagery, aria-hidden="true" on decorative icons, and visible focus states for keyboard navigation. Canvas’s Bootstrap 5 foundation handles most focus states natively, but you should audit contrast ratios after applying your custom palette.

    If you’re working with the Canvas HTML Template and want to generate production-ready layouts faster, try Canvas Builder free and see how much time you save on every project.


  • 10 Canvas HTML Template Sections Every Landing Page Needs

    10 Canvas HTML Template Sections Every Landing Page Needs

    Why Section Order Matters on a Landing Page

    A landing page is not a homepage. It has one job: move a specific visitor toward a specific action. That means every canvas html section you include must earn its place, and the sequence must mirror the psychological journey from curiosity to confidence to commitment. The ten sections below represent the minimum viable structure for a landing page that converts in 2025, each mapped to a Canvas component you can drop in and customise.

    If you want a broader introduction to what Canvas can do before diving into individual sections, the Complete Guide to Canvas HTML Template is a useful starting point.

    text
    Photo by Árpád Czapp on Unsplash

    1. The Hero Section

    The hero is the first thing a visitor sees, and it must communicate your value proposition in under five seconds. In Canvas, the hero is typically built inside a section element with a full-height or large-padding container, a headline, a subheadline, and a primary call-to-action button. Canvas uses Bootstrap 5’s grid, so a two-column hero — text left, image right — is straightforward.

    <section id="hero" class="py-6">
      <div class="container">
        <div class="row align-items-center">
          <div class="col-lg-6">
            <h2 class="display-4 fw-bold">Launch Faster with Structured Layouts</h2>
            <p class="lead mt-3">Everything you need to build a high-converting landing page — already inside Canvas.</p>
            <a href="#pricing" class="button button-large button-rounded mt-4" style="background-color: var(--cnvs-themecolor); color: #fff;">Get Started Free</a>
          </div>
          <div class="col-lg-6">
            <img src="images/hero-illustration.svg" alt="Product illustration" class="img-fluid">
          </div>
        </div>
      </div>
    </section>

    Note the use of var(--cnvs-themecolor) for the button background — this keeps your brand colour consistent across every section without hardcoding hex values.

    2. Social Proof and Trust Bar

    Immediately below the hero, a trust bar neutralises scepticism before it forms. This is a strip of recognisable logos, a star rating, or a simple stat row (“Trusted by 12,000+ teams”). In Canvas, this is a section with a light background using Bootstrap’s bg-light utility and a flex row of logo images.

    <section id="trust-bar" class="py-4 bg-light">
      <div class="container text-center">
        <p class="text-muted mb-3">Trusted by teams at</p>
        <div class="d-flex flex-wrap justify-content-center align-items-center gap-4">
          <img src="images/logo-acme.svg" alt="Acme" height="28">
          <img src="images/logo-verve.svg" alt="Verve" height="28">
          <img src="images/logo-stackio.svg" alt="Stackio" height="28">
        </div>
      </div>
    </section>
    smartphone screenshots illustration
    Photo by Hal Gatewood on Unsplash

    3. Features and Benefits Section

    Visitors need to understand what your product does and why it matters to them. This section uses a three or four-column grid of icon cards. Canvas ships with the font-icons.css file, giving you access to a large icon set without additional imports. Keep each card to one sentence of benefit copy — features tell, benefits sell.

    <section id="features" class="py-6">
      <div class="container">
        <div class="row g-4">
          <div class="col-md-4 text-center">
            <i class="icon-line-speedometer fs-2 mb-3" style="color: var(--cnvs-themecolor);"></i>
            <h3 class="h5 fw-semibold">Faster Builds</h3>
            <p class="text-muted">Go from blank file to live layout in a fraction of the usual time.</p>
          </div>
          <div class="col-md-4 text-center">
            <i class="icon-line-layers fs-2 mb-3" style="color: var(--cnvs-themecolor);"></i>
            <h3 class="h5 fw-semibold">Reusable Sections</h3>
            <p class="text-muted">Every block section is self-contained and portable across projects.</p>
          </div>
          <div class="col-md-4 text-center">
            <i class="icon-line-genius fs-2 mb-3" style="color: var(--cnvs-themecolor);"></i>
            <h3 class="h5 fw-semibold">Clean Code Output</h3>
            <p class="text-muted">Production-ready HTML that follows Canvas conventions throughout.</p>
          </div>
        </div>
      </div>
    </section>

    4. How It Works

    A numbered process strip removes friction by answering the implicit question: “What do I actually have to do?” Three or four steps, each with a number, a short title, and one sentence of explanation. Keep this section visually minimal — it should feel effortless to read. Canvas’s process component or a simple numbered flex row both work well here.

    5. Testimonials, Pricing, and Primary CTA

    These three html landing page components are grouped here because together they form the conversion engine of your page. Position them in this order for maximum effect.

    testimonials should appear before pricing. A quote from a recognisable customer or a specific result (“Reduced our build time by 60%”) is worth more than any copy you write yourself. In Canvas, a card-based testimonial grid or a full-width quote block with a dark background both perform well.

    Pricing needs to be transparent. Visitors who have to hunt for a price leave. Use Canvas’s pricing table component with clearly differentiated tiers, highlight the recommended plan with var(--cnvs-themecolor) as the border or badge colour, and include a per-tier feature list. If you are building a SaaS landing page, a three-tier model with a monthly/annual toggle is the standard that visitors expect.

    The primary CTA section is a full-width band — often with a contrasting background — that repeats your main action. Place it after pricing so visitors who are ready can act immediately without scrolling back up. One button, one line of supporting copy, no distractions.

    <section id="cta-band" class="py-6 text-center text-white" style="background-color: var(--cnvs-themecolor);">
      <div class="container">
        <h2 class="fw-bold mb-3">Ready to build your landing page?</h2>
        <p class="mb-4 opacity-75">Join thousands of developers already using Canvas Builder.</p>
        <a href="/signup" class="button button-large button-rounded button-light">Start for Free</a>
      </div>
    </section>

    A well-written FAQ section handles objections that would otherwise kill conversions silently. Five to eight questions drawn from real sales conversations are more valuable than a generic list. In Canvas, an Bootstrap accordion component keeps the section compact without hiding important information. The footer itself should be minimal on a dedicated landing page — a logo, a copyright line, and links to Privacy Policy and Terms are sufficient. Avoid a full multi-column footer that encourages visitors to wander away from your conversion goal.

    For agencies building multiple client landing pages, the workflows described in Canvas HTML Template for Agencies show how to systematise section reuse across projects so you are not rebuilding these components from scratch every time.

    If you are deciding whether a landing page should be a single-page layout or part of a larger multi-page site, the comparison in One-Page vs Multi-Page Websites lays out the decision criteria clearly.

    Frequently Asked Questions

    What is the difference between a Canvas blocksection and a fullpagelayout?

    A blocksection is a single, self-contained component — a hero, a pricing table, a testimonial strip — that can be embedded into any page. A fullpagelayout is a complete multi-page niche demo with its own header, navigation, and footer structure. For a landing page, you will typically assemble individual block sections inside a single_page layout type.

    Do I need to load Bootstrap 5 separately when building with Canvas?

    No. Canvas bundles Bootstrap 5 internally. Loading Bootstrap from a CDN alongside Canvas will cause conflicts. All Bootstrap 5 utilities, grid classes, and components are available as soon as you include Canvas’s style.css and the two JS files: js/plugins.min.js and js/functions.bundle.js.

    How do I change the accent colour across all landing page sections at once?

    Set --cnvs-themecolor in your root CSS. Every Canvas component that references this variable — buttons, icon colours, borders, badges — will update automatically. You do not need to hunt through individual section stylesheets.

    Which section should contain the primary call-to-action button?

    Your primary CTA button belongs in the hero section so it is visible without scrolling, and it should be repeated in a dedicated CTA band after your pricing section. Visitors who are convinced early can convert immediately; visitors who need more persuasion will reach the second CTA after testimonials and pricing have done their work.

    How many sections is too many for a landing page?

    There is no hard maximum, but every section must serve the conversion goal. The ten sections in this post represent a complete, proven structure. Adding sections beyond this — a blog preview, a news strip, a secondary navigation — dilutes focus. If you find yourself adding sections to fill space rather than to answer a visitor objection, cut them.

    If you’re working with the Canvas HTML Template and want to generate production-ready layouts faster, try Canvas Builder free and see how much time you save on every project.
  • Build a Complete Business Website with Canvas HTML Template

    Build a Complete Business Website with Canvas HTML Template

    Most business websites take weeks to build from scratch — but with the right business website HTML template, you can compress that timeline to days without sacrificing quality, performance, or professionalism. The Canvas HTML Template gives you a production-ready foundation — hundreds of components, a clean Bootstrap 5 grid, and a customisation system built around CSS variables — so your focus stays on the business, not on reinventing the wheel.

    Choosing the Right Canvas Layout Type for a Business Site

    Before writing a single line of code, you need to decide on your site architecture. Canvas offers three distinct section types that serve different project needs. For most business websites, you will be working with either a singlepage layout (a complete one-page site with header, hero, content sections, and footer) or a fullpagelayout (a multi-page niche demo with separate HTML files for each page). A blocksection is a single reusable component — useful for building individual pieces like a pricing block or a testimonials row.

    A typical small business site — a consultancy, agency, or service provider — is well served by a single_page structure for the homepage, supported by a handful of linked inner pages (about, services, contact). For a deeper look at how these formats compare, the guide on Canvas One Page Demo vs Multi-Page covers the trade-offs in detail. Once you have settled on your architecture, you can begin assembling the five core sections every business site needs.

    black flat screen computer monitor
    Photo by Tech Daily on Unsplash

    Setting Up Your Canvas File Structure

    A clean Canvas project has a predictable structure. Your HTML files sit at the root. All stylesheets are loaded from style.css and css/font-icons.css. Your JavaScript is loaded from js/plugins.min.js and js/functions.bundle.js — in that order, at the bottom of the body. Never load Bootstrap from a CDN; Canvas bundles Bootstrap 5 internally.

    A minimal Canvas business page shell looks like this:

    <!DOCTYPE html>
    <html dir="ltr" lang="en">
    <head>
      <meta charset="utf-8">
      <meta name="viewport" content="width=device-width, initial-scale=1">
      <title>Acme Consulting — Business Solutions</title>
      <link rel="stylesheet" href="style.css">
      <link rel="stylesheet" href="css/font-icons.css">
      <style>
        :root {
          --cnvs-themecolor: #1a56db;
          --cnvs-primary-font: 'Inter', sans-serif;
          --cnvs-secondary-font: 'Playfair Display', serif;
          --cnvs-logo-height: 40px;
          --cnvs-logo-height-sticky: 32px;
          --cnvs-header-bg: #ffffff;
          --cnvs-header-sticky-bg: #ffffff;
        }
      </style>
    </head>
    <body class="stretched">
    
      <div id="wrapper">
        <!-- Header, sections, footer go here -->
      </div>
    
      <script src="js/plugins.min.js"></script>
      <script src="js/functions.bundle.js"></script>
    </body>
    </html>

    Setting your brand variables in :root at the top of the document means every Canvas component that references –cnvs-themecolor will automatically adopt your brand colour. This single change cascades through buttons, links, borders, and accent elements across the entire page.

    Building the Header and Navigation

    Canvas navigation is driven by the #header element with the class sticky-header. The primary menu is rendered as a nested <ul> inside a .primary-menu-wrap container. Logo sizing is controlled exclusively by –cnvs-logo-height and –cnvs-logo-height-sticky — never by targeting #logo img directly with pixel dimensions in your custom CSS.

    <header id="header" class="full-header sticky-header">
      <div id="header-wrap">
        <div class="container">
          <div class="header-row">
    
            <div id="logo">
              <a href="index.html">
                <img src="images/logo.svg" alt="Acme Consulting">
              </a>
            </div>
    
            <div class="primary-menu-wrap">
              <nav class="primary-menu">
                <ul class="menu-container">
                  <li class="menu-item"><a href="#services"><div>Services</div></a></li>
                  <li class="menu-item"><a href="#about"><div>About</div></a></li>
                  <li class="menu-item"><a href="#testimonials"><div>Testimonials</div></a></li>
                  <li class="menu-item"><a href="contact.html"><div>Contact</div></a></li>
                </ul>
              </nav>
            </div>
    
          </div>
        </div>
      </div>
    </header>

    For a business site, keep the primary navigation to four or five items maximum. Complexity in the navigation is the fastest way to increase bounce rate on a first visit.

    A MacBook with lines of code on its screen on a busy desk
    Photo by Christopher Gower on Unsplash

    Crafting a Hero Section That Converts

    The hero is where a visitor decides whether to stay or leave. For a canvas html business site, your hero needs three things: a direct value proposition headline, a supporting subheadline that clarifies who you help, and a primary call-to-action button. Canvas provides a full-screen slider system, but for most business sites a static, content-first hero performs better for conversions.

    <section id="slider" class="slider-element min-vh-60 include-header">
      <div class="slider-inner">
        <div class="vertical-middle">
          <div class="container">
            <div class="row align-items-center">
    
              <div class="col-lg-6">
                <h2 class="display-4 fw-bold mb-3">
                  Business Growth Starts with the Right Strategy
                </h2>
                <p class="lead mb-4 text-muted">
                  We help mid-market companies scale revenue, reduce operational waste,
                  and build sustainable competitive advantage.
                </p>
                <a href="#contact" class="button button-large button-rounded"
                   style="background-color: var(--cnvs-themecolor); border-color: var(--cnvs-themecolor);">
                  Book a Free Consultation
                </a>
              </div>
    
              <div class="col-lg-6 mt-5 mt-lg-0">
                <img src="images/hero-illustration.svg" alt="Business growth illustration"
                     class="img-fluid">
              </div>
    
            </div>
          </div>
        </div>
      </div>
    </section>

    Notice the button background uses var(--cnvs-themecolor) directly. This means if you later update your brand colour in :root, the button colour updates automatically — no hunting through your CSS for hardcoded hex values.

    Building the Services and Features Section

    The services section is the core content block of any html template business website. Canvas’s Bootstrap 5 grid makes it straightforward to build a responsive three-column services layout. Pair each service with an icon from the bundled font-icons library to add visual hierarchy without requiring image assets.

    <section id="services" class="section mb-0 py-6">
      <div class="container">
    
        <div class="row justify-content-center mb-5">
          <div class="col-lg-6 text-center">
            <h2 class="fw-bold">What We Do</h2>
            <p class="text-muted">End-to-end consulting services tailored to your growth stage.</p>
          </div>
        </div>
    
        <div class="row g-4">
    
          <div class="col-md-4">
            <div class="card border-0 shadow-sm h-100 p-4">
              <i class="bi bi-graph-up-arrow fs-2 mb-3" style="color: var(--cnvs-themecolor);"></i>
              <h5 class="fw-semibold">Revenue Strategy</h5>
              <p class="text-muted mb-0">
                Identify untapped revenue streams and build scalable sales processes
                that grow with your team.
              </p>
            </div>
          </div>
    
          <div class="col-md-4">
            <div class="card border-0 shadow-sm h-100 p-4">
              <i class="bi bi-people fs-2 mb-3" style="color: var(--cnvs-themecolor);"></i>
              <h5 class="fw-semibold">Team Development</h5>
              <p class="text-muted mb-0">
                Leadership coaching, hiring frameworks, and organisational design
                for high-performance culture.
              </p>
            </div>
          </div>
    
          <div class="col-md-4">
            <div class="card border-0 shadow-sm h-100 p-4">
              <i class="bi bi-bar-chart-line fs-2 mb-3" style="color: var(--cnvs-themecolor);"></i>
              <h5 class="fw-semibold">Operations & Efficiency</h5>
              <p class="text-muted mb-0">
                Process audits, automation planning, and cost reduction strategies
                with measurable ROI.
              </p>
            </div>
          </div>
    
        </div>
      </div>
    </section>

    For generating more complex service grids or multi-column card layouts quickly, the Bootstrap Grid Calculator is a practical tool to get your column ratios right before writing markup.

    Adding Social Proof and Testimonials

    Business buyers are risk-averse. Social proof — client testimonials, logos, case study stats — is the fastest way to reduce purchase anxiety. Canvas includes testimonial slider components out of the box, but a static testimonials grid is often more readable and avoids the engagement drop that comes with auto-advancing carousels.

    A strong testimonials section combines a short quote, the client’s name and title, and ideally their company logo or headshot. Keep each quote to two or three sentences — long testimonials rarely get read in full. If you want to display client logos beneath the testimonials as a trust signal, Canvas’s logo-list component renders them in a clean horizontal row with consistent spacing.

    For a complete picture of what makes social proof effective in layout terms, the post on Agency Portfolio Landing Page: Showcase Your Work to Win Clients covers proof-led layout strategies that apply equally well to business sites.

    Pricing Tables and Mid-Page CTA Sections

    If your business offers defined service tiers or packages, a pricing table is one of the highest-converting sections you can include. Canvas provides flexible pricing table components that support monthly/annual toggles, feature lists, and highlighted recommended-plan styling. Every pricing column’s accent colour inherits from –cnvs-themecolor, so visual consistency is automatic.

    For a thorough breakdown of Canvas pricing table design options and which layouts convert best, the dedicated post on Canvas Pricing Tables: Design Options That Convert Visitors is worth reading before you build this section.

    Between your services section and your pricing table, add a mid-page CTA strip. This is a full-width, brand-coloured band with a single headline and one button. It re-engages visitors who have scrolled past the hero without converting, and it breaks up the visual rhythm of the page.

    <section class="section mb-0 py-5" style="background-color: var(--cnvs-themecolor);">
      <div class="container text-center">
        <h3 class="text-white fw-bold mb-3">
          Ready to accelerate your business growth?
        </h3>
        <a href="contact.html"
           class="button button-large button-rounded button-light">
          Schedule a Call Today
        </a>
      </div>
    </section>

    Every business site needs a clear, friction-free contact section. Canvas works well with any HTML form library, but keep the form itself minimal: name, email, message, and submit. Every additional field reduces completion rates. Place your phone number and email address alongside the form as plain text — some visitors will always prefer direct contact over a form.

    The Canvas footer should carry your logo, a condensed navigation, social links, and your copyright line. Use the –cnvs-header-bg variable logic in reverse — set a dark background on the footer using a utility class (bg-dark text-white from Bootstrap 5) and let the footer content inherit contrast colours. Never duplicate your main navigation in full inside the footer — use a simplified four-item link list instead.

    Performance and SEO Fundamentals Before Launch

    A business website that loads slowly loses clients before they have read a word. Canvas ships with minified JavaScript and CSS, which covers most of the baseline. Before launch, run through this checklist:

    1. Compress all images — use WebP format where possible; Canvas has no image optimisation built in, so this is your responsibility.
    2. Add meta descriptions and Open Graph tags to every page, particularly the homepage and any service detail pages.
    3. Verify your canonical URLs — if you have both www and non-www versions, pick one and redirect the other.
    4. Test on mobile — Canvas is responsive by default, but verify your hero text does not overflow on small screens and your CTA buttons remain easily tappable.
    5. Check colour contrast — particularly if you have customised –cnvs-themecolor to a lighter shade, ensure text on coloured backgrounds meets WCAG AA contrast ratios.

    For a broader look at Canvas best practices, the Complete Guide to Canvas HTML Template covers these topics with additional depth, including how to manage the template’s component library efficiently across larger projects.

    Frequently Asked Questions

    Do I need to know Bootstrap 5 to build a business site with Canvas HTML Template?

    A working knowledge of Bootstrap 5’s grid system and utility classes is genuinely useful, but not strictly required. Canvas wraps Bootstrap 5 internally, and many of its layout patterns follow predictable Bootstrap conventions. If you understand how col-md-4 and container work, you have enough to assemble most Canvas business site sections without referencing Bootstrap documentation constantly.

    How do I change the brand colour across the entire Canvas site at once?

    Update the –cnvs-themecolor CSS variables generator in your :root block. Canvas components reference this variable throughout the stylesheet, so a single change cascades to buttons, links, borders, icon accents, and section backgrounds. Also update –cnvs-themecolor-rgb with the RGB equivalent of your new colour if you use any rgba() opacity effects.

    Should I build my business site as a single page or multiple pages?

    Most small business sites benefit from a homepage built as a single_page Canvas layout (hero, services, testimonials, CTA, footer) with separate pages for About, Services detail, and Contact. A purely single-page structure works for very simple offerings, but separate pages allow better SEO targeting and cleaner analytics. The decision depends largely on how many distinct services or audiences you are addressing.

    Can I use Canvas HTML Template for a client project and hand it over?

    Yes — Canvas is licensed per end product, so you can build a client’s business website using Canvas and deliver the static HTML files to them. You will need a separate Canvas licence for each end project. The client does not need their own licence to use the delivered site, but you cannot resell Canvas itself or redistribute it as a template.

    What is the fastest way to generate a complete business site layout with Canvas?

    Using an AI layout generator like Canvas Builder removes the manual work of selecting and connecting individual Canvas components. You describe the business type, desired sections, and colour preferences, and the tool outputs a complete, Canvas-compatible HTML file ready for customisation. This approach is particularly effective when you need to prototype a business site quickly for client approval before investing time in copy and imagery.

    If you’re working with the Canvas HTML Template and want to generate production-ready layouts faster, try Canvas Builder free and see how much time you save on every project.

  • Agency Portfolio Landing Page: Showcase Your Work to Win Clients

    Agency Portfolio Landing Page: Showcase Your Work to Win Clients

    Your agency portfolio page is often the first — and sometimes only — chance you get to convert a prospective client into a paying one, which means a poorly structured landing page costs you real revenue, not just impressions.

    Why Most Agency Portfolio Pages Fail to Win Clients

    The typical agency portfolio page fails not because the work is weak, but because the page treats the work as self-explanatory. Visitors land on a grid of project screenshots, find no narrative, and leave without understanding what the agency actually solves. A portfolio landing page that converts has a fundamentally different logic: it guides the prospect through a story that ends with them believing you are the right choice for their specific problem.

    The sections below outline exactly how to build that story using clean, maintainable HTML with the Canvas template structure. If you want broader context on how Canvas handles layout types and page formats before diving in, the guide on Canvas One Page Demo vs Multi-Page is worth reviewing first.

    a row of folded brochures on a white background
    Photo by Mockup Free on Unsplash

    Building a Hero Section That States Your Value Immediately

    The hero section must answer three questions within three seconds: who you help, what you do, and why a prospect should keep scrolling. Avoid abstract positioning like “creative solutions for forward-thinking brands.” Instead, lead with specificity — the industries you serve, the outcomes you create, or the scale of work you handle.

    In Canvas, a full-viewport hero with a strong headline and a single CTA button can be assembled with the following Bootstrap 5 structure inside a Canvas section block:

    <section id="slider" class="slider-element min-vh-100 d-flex align-items-center dark"
      style="background-color: var(--cnvs-themecolor);">
      <div class="container">
        <div class="row justify-content-center text-center">
          <div class="col-lg-8">
            <h1 class="display-3 fw-bold text-white mb-4">
              We Build Digital Products That Drive Revenue
            </h1>
            <p class="lead text-white-50 mb-5">
              Award-winning design and development for SaaS, e-commerce, and professional services.
            </p>
            <a href="#portfolio" class="button button-large button-light button-rounded">
              View Our Work
            </a>
          </div>
        </div>
      </div>
    </section>

    Note the use of var(–cnvs-themecolor) for the background — this respects Canvas’s theme variable system and keeps your colour consistent across components without hardcoding hex values.

    Structuring the Selected Work Section for Maximum Impact

    A curated selection of three to five case studies outperforms a scrollable grid of twenty thumbnails every time. Clients do not want volume — they want evidence that you understand problems like theirs. For each piece of selected work, show: the client type or industry, the problem solved, the outcome achieved, and a project image.

    Use Bootstrap 5’s grid inside a Canvas portfolio section to create a clean, responsive two-column layout with hover overlays:

    <section id="portfolio" class="section mb-0">
      <div class="container">
        <div class="row g-4">
    
          <div class="col-md-6">
            <div class="position-relative overflow-hidden rounded-4">
              <img src="demos/images/project-saas.jpg" class="img-fluid w-100" alt="SaaS Dashboard Redesign">
              <div class="position-absolute bottom-0 start-0 p-4 text-white"
                style="background: linear-gradient(to top, rgba(0,0,0,0.75), transparent);">
                <span class="text-uppercase small fw-semibold" style="color: var(--cnvs-themecolor);">SaaS / Product</span>
                <h3 class="h5 mb-1 mt-1">Dashboard Redesign — 38% Retention Lift</h3>
                <a href="case-study-saas.html" class="stretched-link text-white text-decoration-none small">View Case Study →</a>
              </div>
            </div>
          </div>
    
          <div class="col-md-6">
            <div class="position-relative overflow-hidden rounded-4">
              <img src="demos/images/project-ecom.jpg" class="img-fluid w-100" alt="E-commerce Conversion Project">
              <div class="position-absolute bottom-0 start-0 p-4 text-white"
                style="background: linear-gradient(to top, rgba(0,0,0,0.75), transparent);">
                <span class="text-uppercase small fw-semibold" style="color: var(--cnvs-themecolor);">E-Commerce</span>
                <h3 class="h5 mb-1 mt-1">Checkout Overhaul — Conversion Up 52%</h3>
                <a href="case-study-ecom.html" class="stretched-link text-white text-decoration-none small">View Case Study →</a>
              </div>
            </div>
          </div>
    
        </div>
      </div>
    </section>

    Each card links to a dedicated case study page rather than a lightbox — this is intentional. Lightboxes interrupt the narrative; a full case study page deepens trust and adds another indexed URL to your site.

    A man sitting in front of a laptop computer
    Photo by SumUp on Unsplash

    Agency Process and Social Proof: The Trust Layer

    After seeing your work, a prospect’s next question is: “What is it like to work with you?” A brief, numbered process section answers this directly. Three to four steps — Discovery, Strategy, Execution, Delivery — make your workflow feel systematic rather than arbitrary. Keep each step to two sentences maximum.

    Directly below the process block, place your testimonials. The most effective testimonials for an agency portfolio landing page are specific and outcome-focused. A quote like “They redesigned our onboarding flow and our trial-to-paid conversion went from 4% to 11%” is worth ten times more than “Great team, loved working with them.”

    For the social proof layout, a horizontal scrollable strip or a two-column card grid both work well in Canvas. Pay attention to whitespace between sections — intentional spacing signals confidence and professionalism. The post on whitespace in web design covers why this matters more than most agencies realise.

    Services Summary and the Conversion CTA

    A concise services block — positioned after social proof, not before it — gives prospects the vocabulary to brief you. List only the services you want to be hired for. If you offer ten services but your most profitable work is in three, list three.

    The closing CTA section should remove every remaining barrier: make it easy to start a conversation, not fill out a long form. A single email link or a “Book a 30-minute call” button with a calendar embed converts better than a multi-field contact form on a portfolio page. Style the CTA section with your theme colour to create a strong visual full-stop:

    :root {
      --cnvs-themecolor: #5e3bea;
      --cnvs-themecolor-rgb: 94, 59, 234;
    }
    
    #cta-section {
      background-color: var(--cnvs-themecolor);
      padding: 100px 0;
      text-align: center;
      color: #fff;
    }

    For agencies building multiple client sites or internal pitch assets, the post on Canvas HTML Template for Agencies: Workflows, Prompts, and Best Practices covers repeatable approaches that scale beyond a single portfolio page.

    Performance, File References, and Technical Checklist

    A visually strong portfolio page that loads slowly undermines everything. In Canvas, ensure you are loading only what is necessary. Your core file references should look like this in the <head> and before the closing </body> tag:

    <!-- In <head> -->
    <link rel="stylesheet" href="style.css">
    <link rel="stylesheet" href="css/font-icons.css">
    
    <!-- Before </body> -->
    <script src="js/plugins.min.js"></script>
    <script src="js/functions.bundle.js"></script>

    Never load Bootstrap from a CDN separately — Canvas bundles Bootstrap 5 within js/plugins.min.js and style.css already. Loading it twice causes style conflicts and adds unnecessary weight to your page.

    Beyond file loading, run your agency portfolio page through a technical checklist before launch:

    1. All project images are compressed and served at appropriate dimensions — no full-resolution raw exports.
    2. Meta title and description are set for the page’s primary keyword cluster.
    3. The page passes Core Web Vitals thresholds, particularly Largest Contentful Paint on mobile.
    4. All case study links resolve correctly and open to complete, finished pages — not placeholders.
    5. The contact CTA has been tested across devices and the calendar or email link is fully functional.

    Frequently Asked Questions

    How many projects should an agency portfolio landing page show?

    Three to five is the optimal range for a landing page context. More than five dilutes the impact of each project and increases scroll fatigue. If you have a large body of work, curate your strongest and most relevant projects for the landing page, then link to a separate full portfolio archive.

    Should an agency portfolio be a one-page or multi-page site?

    For initial prospecting and paid traffic destinations, a single focused landing page tends to convert better because it controls the narrative from top to bottom. A multi-page structure works well when you want each service or industry vertical to have its own indexed page for organic search. The decision depends on your primary acquisition channel.

    Can I use Canvas HTML Template for an agency portfolio without a backend?

    Yes. Canvas produces fully static HTML files that can be hosted on any web server, CDN, or static hosting platform. For the contact form, you can use a third-party form service such as Formspree or Netlify Forms to handle submissions without any server-side code.

    What Canvas section type should I use for a portfolio landing page?

    Use the singlepage section type, which generates a complete page with header, hero, content sections, and footer in one document. This is the correct format for a standalone agency portfolio landing page, as opposed to blocksection which outputs a single reusable component only.

    How do I customise the theme colour for my agency brand in Canvas?

    Override the CSS variables generator –cnvs-themecolor in your custom stylesheet or within a <style> block targeting :root. Set both –cnvs-themecolor and –cnvs-themecolor-rgb (the RGB equivalent without the hash) so that Canvas components that use alpha transparency continue to render correctly.

    If you’re working with the Canvas HTML Template and want to generate production-ready layouts faster, try Canvas Builder free and see how much time you save on every project.

  • Canvas HTML Template: Features, Tips, and Best Practices

    Canvas HTML Template: Features, Tips, and Best Practices

    If you’ve purchased the Canvas HTML Template and feel like you’re only scratching the surface of what it can do, this guide is for you — covering everything from initial setup and layout choices to CSS variable customisation and workflow best practices.

    What Is the Canvas HTML Template?

    Canvas is one of the most enduring and consistently updated HTML templates on ThemeForest, with well over 70,000 sales since its launch. It is a multi-purpose HTML5 template built on Bootstrap 5, designed to give developers and agencies a comprehensive starting point for almost any type of website — from SaaS landing pages and agency portfolios to subscription boxes and co-working spaces. If you want to explore use cases before committing, the post on 12 niche website ideas you can build with Canvas HTML is a useful starting point.

    The template ships with hundreds of pre-built demo pages, a rich component library, and a clean, documented file structure. Rather than being a drag-and-drop page builder, Canvas is a code-first template — which gives you full control but requires understanding how its architecture works.

    a computer screen with a cartoon character on it
    Photo by Team Nocoloco on Unsplash

    Understanding the File Structure and Core Assets

    Before editing anything, familiarise yourself with Canvas’s asset structure. The two CSS files you will work with most are style.css (the main stylesheet) and css/font-icons.css (icon font definitions). Do not attempt to load Bootstrap from a CDN — it is already bundled.

    For JavaScript, Canvas relies on two files:

    • js/plugins.min.js — all third-party plugin dependencies, minified together
    • js/functions.bundle.js — Canvas’s core initialisation and component logic

    A standard Canvas page head looks like this:

    <!-- Canvas Core CSS -->
    <link rel="stylesheet" href="css/font-icons.css">
    <link rel="stylesheet" href="style.css">
    
    <!-- Canvas Core JS (bottom of body) -->
    <script src="js/plugins.min.js"></script>
    <script src="js/functions.bundle.js"></script>

    Keep your custom styles in a separate custom.css file loaded after style.css. This keeps your modifications upgrade-safe and avoids editing the core stylesheet directly.

    The Three Canvas Layout Types Explained

    Canvas provides three distinct layout types. Picking the wrong one early is a common mistake that leads to unnecessary restructuring later.

    • single_page — A complete standalone page with a header, hero section, content sections, and footer. Use this for homepages, landing pages, and any page visitors land on directly.
    • block_section — A single reusable component or section, designed to be included or embedded within a larger layout. Think testimonial blocks, pricing rows, or feature grids.
    • fullpagelayout — A multi-page niche demo that demonstrates a complete website concept (e.g. a restaurant site, a SaaS product page, a fitness studio). These are best used as references or starting frameworks for client projects.

    For a deeper discussion on when to use one-page versus multi-page formats in Canvas, the post on Canvas one-page demo vs multi-page covers the trade-offs clearly.

    four assorted-color paintings
    Photo by Pierre Bamin on Unsplash

    Customising Canvas with CSS Variables

    Canvas uses its own set of CSS custom properties — not Bootstrap’s. The most important ones to know are:

    • –cnvs-themecolor — the primary brand/accent colour used throughout the template
    • –cnvs-themecolor-rgb — the RGB equivalent, used for rgba() utilities
    • –cnvs-primary-font — the main body typeface
    • –cnvs-secondary-font — the heading/display typeface
    • –cnvs-header-bg — background colour of the site header
    • –cnvs-header-sticky-bg — background colour when the header becomes sticky on scroll
    • –cnvs-primary-menu-color — navigation link colour in the default state
    • –cnvs-primary-menu-hover-color — navigation link colour on hover
    • –cnvs-logo-height — controls the logo’s height in the normal header state
    • –cnvs-logo-height-sticky — controls the logo’s height when the header is sticky

    Override these in your custom.css file by targeting the :root selector:

    :root {
      --cnvs-themecolor: #e63946;
      --cnvs-themecolor-rgb: 230, 57, 70;
      --cnvs-primary-font: 'Inter', sans-serif;
      --cnvs-secondary-font: 'Playfair Display', serif;
      --cnvs-logo-height: 48px;
      --cnvs-logo-height-sticky: 36px;
      --cnvs-header-bg: #ffffff;
      --cnvs-header-sticky-bg: #ffffff;
      --cnvs-primary-menu-color: #1d1d1d;
      --cnvs-primary-menu-hover-color: #e63946;
    }

    This single block replaces what previously required hunting through hundreds of CSS rules. Never use –bs-primary or –color-primary — those are not Canvas variables and will have no effect on the template’s components.

    Working with Bootstrap 5 Inside Canvas

    Because Canvas bundles Bootstrap 5, you have full access to the Bootstrap grid, utilities, and components — no configuration required. A standard two-column section using Bootstrap’s grid inside a Canvas page structure looks like this:

    <section id="content">
      <div class="content-wrap">
        <div class="container">
          <div class="row align-items-center gx-5">
            <div class="col-lg-6">
              <h2 class="display-5 fw-bold">Your Heading Here</h2>
              <p class="lead">Supporting paragraph copy that explains the value proposition clearly.</p>
              <a href="#" class="btn btn-lg text-white" style="background-color: var(--cnvs-themecolor);">Get Started</a>
            </div>
            <div class="col-lg-6">
              <img src="images/feature.jpg" alt="Feature image" class="img-fluid rounded">
            </div>
          </div>
        </div>
      </div>
    </section>

    Notice the use of var(–cnvs-themecolor) on the button’s background — this keeps your interactive elements consistent with whatever brand colour you’ve defined in your CSS variables. You can use the Bootstrap Grid Calculator to plan column structures before writing markup.

    Typography, Spacing, and Visual Hierarchy Tips

    Canvas ships with extensive typographic utilities. For headers and display text, lean on Bootstrap 5’s display-1 through display-6 classes, combined with fw-bold or fw-semibold for weight. For body copy, lead adds a larger, more readable font size that works well in hero sections and introductory paragraphs.

    Spacing in Canvas follows Bootstrap 5’s spacing scale (margin and padding utilities from m-0 to m-5 and py-6 extended utilities Canvas adds). For converting pixel values from a design file into rem-based spacing, the px to rem converter is a practical tool to keep open during development.

    One principle worth internalising early: Canvas sections breathe best when given generous vertical padding. Crowded sections undermine the premium feel the template is capable of delivering. The post on whitespace in web design explains why this matters from a conversion perspective, not just an aesthetic one.

    Essential Canvas Components Every Developer Should Know

    Beyond the grid, Canvas includes dozens of ready-made components that save hours of development time. The ones with the highest practical value across most project types are:

    • Slider / Hero sections — Canvas includes multiple slider plugins pre-configured. Choose the slider type in the demo that matches your performance requirements and copy its markup directly.
    • Sticky header variants — Canvas supports transparent headers that become solid on scroll, controlled via data attributes rather than custom JavaScript.
    • Pricing tables — Canvas’s pricing table components are well-structured for conversion-focused layouts. For a breakdown of the design options, see Canvas pricing tables: design options that convert visitors.
    • Portfolio and filterable grids — Built-in Isotope-powered grids handle filtering without extra plugin setup.
    • Counters, progress bars, and animated elements — These are initialised automatically by functions.bundle.js when the relevant data attributes are present on elements.
    • Modal popups — Powered by Bootstrap 5’s modal component. No additional JavaScript is needed beyond what Canvas already loads.

    Workflow Best Practices for Canvas Projects in 2025

    Experienced Canvas developers follow a few practices that significantly reduce build time and client revision cycles.

    1. Start from the closest demo, not a blank file. Canvas’s demo library is extensive — find the demo that most closely matches your project type and use it as your base. Replacing content is faster than building structure from scratch.
    2. Define your CSS variables first. Set all :root variable overrides in custom.css before writing any page-specific styles. This ensures colour and font consistency from the first page you build.
    3. Use block_section files as a component library. Canvas’s individual block sections are designed to be copied and pasted between pages. Treat them as a modular system rather than standalone files.
    4. Validate your Bootstrap grid structure. Nesting grid columns incorrectly is the most common source of layout bugs. Each row must live inside a container or container-fluid, and col-* classes must be direct children of row.
    5. Test sticky header behaviour early. Changes to –cnvs-logo-height-sticky and header background variables affect how the page feels on scroll — test this in the browser as soon as your header is built, not at the end of the project.

    For agencies managing multiple Canvas projects simultaneously, the post on Canvas HTML Template for agencies: workflows, prompts, and best practices goes into depth on team-scale processes.

    Accelerating Canvas Builds with AI-Generated Layouts

    One of the most significant time-savers for Canvas developers in 2025 is using Canvas Builder to generate production-ready HTML sections and full page layouts. Rather than manually assembling Canvas markup from demo files, Canvas Builder outputs correctly structured HTML that uses Canvas’s component classes, Bootstrap 5 grid, and the correct CSS variable references — ready to paste directly into your project.

    This is particularly valuable when a client brief requires a layout type that doesn’t map neatly to an existing Canvas demo. Instead of adapting a loosely related demo and fighting with inherited styles, you generate a precise starting point and customise from there. For a direct comparison of the time cost between AI-generated layouts and manual coding, the post on AI HTML generators compared: Canvas Builder vs manual coding provides a detailed breakdown.

    Frequently Asked Questions

    Do I need to know Bootstrap 5 to use the Canvas HTML Template?

    A working knowledge of Bootstrap 5’s grid system and utility classes is strongly recommended. Canvas is built on Bootstrap 5, and understanding how containers, rows, and columns work will help you modify layouts and troubleshoot alignment issues much more efficiently than working by trial and error.

    Can I load Bootstrap 5 from a CDN alongside Canvas?

    No — and doing so will cause conflicts. Canvas bundles Bootstrap 5 inside js/plugins.min.js and compiles it into the core stylesheets. Loading Bootstrap again from a CDN will result in duplicate styles and unpredictable component behaviour. Use only the asset files Canvas provides.

    How do I change the primary brand colour in Canvas?

    Override –cnvs-themecolor and –cnvs-themecolor-rgb in your custom CSS file targeting the :root selector. Canvas uses these variables throughout its component styles, so a single override updates buttons, links, highlights, and accents across the entire template. Never use –bs-primary — that is a Bootstrap variable and does not control Canvas’s theming layer.

    What is the difference between singlepage and fullpagelayout in Canvas?

    A singlepage layout is a self-contained page with a header, content sections, and footer — suitable for homepages or landing pages. A fullpagelayout is a complete multi-page niche demo representing an entire website concept, such as a restaurant, agency, or SaaS product. Use fullpagelayout files as reference frameworks or starting bases for client projects rather than editing them directly.

    How is logo size controlled in Canvas?

    Logo sizing is controlled exclusively through the CSS variables –cnvs-logo-height (for the default header state) and –cnvs-logo-height-sticky (for the sticky/scrolled state). Do not write CSS rules targeting #logo img directly — this bypasses Canvas’s responsive header logic and can produce inconsistent results across Bootstrap breakpoint tester.

    If you’re working with the Canvas HTML Template and want to generate production-ready layouts faster, try Canvas Builder free and see how much time you save on every project.

  • 12 Niche Website Ideas You Can Build with Canvas HTML Today

    12 Niche Website Ideas You Can Build with Canvas HTML Today

    Most HTML templates get used for the same three website types — agency portfolio, SaaS landing page, corporate brochure — while dozens of profitable niches go untouched simply because developers haven’t mapped the template’s components to the opportunity. The Canvas HTML Template ships with enough section variety, Bootstrap 5 grid flexibility, and CSS variable control that you can go from blank file to production-ready niche site in a single focused session.

    Key Takeaways

    • Canvas’s modular section system makes it practical to target narrow niches without building from scratch each time.
    • Choosing a singlepage or fullpage_layout section type up front saves significant rework when the niche demands a specific content structure.
    • Small CSS variable overrides — especially –cnvs-themecolor — are enough to make Canvas feel purpose-built for any vertical.
    • Twelve underserved niches are mapped out below with layout guidance and copy-ready code snippets you can use immediately.

    Why Niche Sites Outperform Generic Ones in 2025

    A generic “we build websites” homepage competes with millions of similar pages. A site built specifically for, say, independent physiotherapy clinics or artisan coffee roasters immediately signals relevance to its target audience and to search engines. Niche specificity increases conversion rates, reduces bounce, and lets you charge more as a freelancer or agency because the perceived customisation is higher — even when you’re reusing the same base template.

    Canvas accelerates this because you’re not fighting the template’s defaults; you’re steering them. Override –cnvs-themecolor once and every button, link, and accent across the layout inherits the brand colour instantly. The structural work is already done.

    a laptop computer sitting on top of a desk
    Photo by Bernd 📷 Dittrich on Unsplash

    The 12 Niche Website Ideas

    1. Independent Physiotherapy Clinic

    Use a single_page layout with a hero section, service cards, a booking CTA, and a testimonials row. Calm blues or teals via –cnvs-themecolor signal trust. Add a Bootstrap 5 Bootstrap accordion for FAQs about treatment types — no custom JavaScript needed.

    2. Artisan Coffee Roaster

    Dark roast aesthetics translate directly to a dark-background Canvas layout. Set –cnvs-header-bg to a near-black tone and use warm amber as the theme colour. A shop-style grid of product cards using Bootstrap’s col-lg-4 columns works perfectly for showcasing single-origin bags.

    3. Meal Kit Subscription Box

    This niche has proven demand and a clear conversion funnel: hero with value proposition, how-it-works steps, pricing table, and social proof. For a detailed walkthrough of this layout pattern, the post on designing a meal kit subscription website with Canvas covers every section in depth.

    4. Co-Working Space

    Availability calendars, amenity icons, floor plan imagery, and a membership pricing table are the core components. Canvas’s full-width section containers handle large photography beautifully. See the dedicated guide on building a co-working space website with Canvas for the exact block sequence to use.

    5. Mental Health Platform

    Soft gradients, generous whitespace, and a reassuring typographic hierarchy matter enormously in this niche. Override the secondary font via –cnvs-secondary-font to a humanist sans-serif, and keep section padding generous. Best practices for this vertical are covered in the mental health platform website design guide.

    6. Pet Subscription Box

    Playful colours, product unboxing imagery, and a clear recurring-billing value proposition. Use bright theme colour overrides and a sticky header with a contrasting CTA button. The Bootstrap 5 grid handles a three-column “what’s in the box” layout cleanly.

    7. AI SaaS Landing Page

    Feature comparison tables, animated stat counters, and a sticky pricing table are the conversion workhorses here. Canvas’s fullpagelayout type suits multi-feature SaaS products that need dedicated sub-pages for docs and pricing.

    8. Fitness Studio or Trainer

    Dark mode aesthetics with high-contrast typography are dominant in this space in 2026. Set a dark –cnvs-header-bg, use bold white type, and add a class schedule presented in a Bootstrap table. The dark mode fitness design trends post covers this aesthetic in detail.

    9. Independent Bookshop

    Warm, editorial typography and a curated grid of book covers. Canvas’s masonry-style grid sections are ideal. Use –cnvs-primary-font to load a serif typeface via Google Fonts for immediate differentiation from tech-adjacent templates.

    10. Local Law Firm

    Authority signals matter: professional headshots, practice area cards, a credentials bar, and a contact form above the fold. A single_page layout keeps the structure clean and fast-loading — important for local SEO performance.

    11. Web3 or Crypto Project

    Dark backgrounds, gradient accent colours, animated tokenomics sections, and a roadmap timeline. Canvas handles all of these with standard section components. The post on what separates good from great Web3 website design in 2026 is worth reading before you start.

    12. Boutique Wedding Venue

    Full-bleed photography sections, an enquiry form, and a gallery grid are the structural requirements. Canvas’s parallax-ready hero section makes the photography do the selling. Keep body copy minimal — whitespace is the design tool in this niche.

    CSS Customisation That Makes Canvas Feel Purpose-Built

    A handful of CSS variables generator overrides applied in a custom stylesheet are enough to transform the template’s visual identity for any niche. Load your overrides after style.css in the document <head> — never modify the core file.

    :root {
      --cnvs-themecolor: #4a7c59;          / forest green for eco/wellness niches /
      --cnvs-themecolor-rgb: 74, 124, 89;
      --cnvs-primary-font: 'DM Sans', sans-serif;
      --cnvs-secondary-font: 'Lora', serif;
      --cnvs-logo-height: 48px;
      --cnvs-logo-height-sticky: 36px;
      --cnvs-header-bg: #ffffff;
      --cnvs-header-sticky-bg: #ffffff;
      --cnvs-primary-menu-color: #1a1a1a;
      --cnvs-primary-menu-hover-color: #4a7c59;
    }

    Swap the hex values for each niche project. No other CSS is needed to establish a completely different brand feel.

    turned on flat screen monitor
    Photo by Pankaj Patel on Unsplash

    Choosing the Right Layout Structure for Each Niche

    Not every niche suits the same Canvas section type. Use this as a quick reference:

    Niche Type Recommended Canvas Type Reason
    Local service (clinic, law firm) single_page One scroll tells the full story; fast to load
    Subscription product (meal kit, pet box) single_page Linear funnel from hero to checkout CTA
    SaaS or AI platform fullpagelayout Separate pages for features, pricing, docs
    Co-working or venue fullpagelayout Gallery, availability, and contact need own pages
    Reusable section component block_section Ideal for pricing tables or testimonial blocks reused across projects

    If you’re still weighing up single-page versus multi-page for a client project, the post on one-page vs multi-page websites explains when each format earns its keep.

    A Reusable Hero Section You Can Adapt Per Niche

    The hero is the most niche-sensitive section on any site. Here is a clean Bootstrap 5 hero structure using Canvas classes that you can drop into any of the twelve niches above and customise with a single colour override and a headline swap.

    <section id="hero" class="page-section bg-transparent center">
      <div class="container">
        <div class="row justify-content-center text-center">
          <div class="col-lg-8">
            <h1 class="display-3 fw-bold mb-3">
              Your Niche-Specific Headline Here
            </h1>
            <p class="lead text-muted mb-5">
              One or two sentences that speak directly to this audience's primary problem or desire.
            </p>
            <a href="#contact" class="btn btn-lg text-white px-5 py-3"
               style="background-color: var(--cnvs-themecolor);">
              Get Started Today
            </a>
          </div>
        </div>
      </div>
    </section>

    Because the button background references –cnvs-themecolor, changing the CSS variable in your override sheet is all it takes to re-brand this hero for a new project.

    Frequently Asked Questions

    Do I need a different Canvas licence for each niche site I build?

    Canvas HTML Template licences on ThemeForest are per end product. If you are building sites for multiple clients or publishing multiple distinct websites, you need a licence for each end product. An Extended Licence covers use cases where end users are charged for access.

    Can I load a custom Google Font to match a niche’s brand?

    Yes. Add the Google Fonts <link> tag in the document <head> before your custom stylesheet, then set –cnvs-primary-font or –cnvs-secondary-font in your CSS variable overrides. The font will cascade through all Canvas typography elements automatically.

    Which of these niches is most profitable for freelancers in 2025?

    Service-based local businesses — clinics, law firms, co-working spaces — tend to have the highest willingness to pay for a professional site and the least technical knowledge to build one themselves. Subscription product brands are also strong because ongoing conversion optimisation creates recurring work.

    How many of these niche sites can Canvas Builder generate for me automatically?

    Canvas Builder generates production-ready Canvas HTML layouts based on your prompt input, so you can describe any of these niches and receive a structured layout with the correct section order, placeholder content, and CSS variable setup ready to customise.

    Should I use a singlepage or fullpage_layout type for a boutique wedding venue?

    A fullpagelayout is usually the better choice for venues because separate pages for gallery, packages, testimonials, and an enquiry form give each section room to breathe and allow for better individual page SEO. A single_page works if the client’s goal is purely enquiry capture rather than organic search traffic.

    If you’re working with the Canvas HTML Template and want to generate production-ready layouts faster, try Canvas Builder free and see how much time you save on every project.
  • How to Design a Meal Kit Subscription Website with Canvas

    How to Design a Meal Kit Subscription Website with Canvas

    Meal kit subscription services live or die on their first impression online — a cluttered, slow, or unconvincing website sends potential subscribers straight to a competitor. The Canvas HTML Template gives you a production-ready foundation to build a high-converting food subscription website without starting from scratch.

    Key Takeaways

    • A meal kit subscription website needs a clear hero, a visible subscription CTA, and a trust-building section — Canvas provides all the layout components to assemble these quickly.
    • Canvas’s Bootstrap 5 grid and pre-built section components make it straightforward to build responsive meal plan cards, pricing tables, and ingredient showcase sections.
    • Use –cnvs-themecolor to apply your brand’s food-focused colour palette consistently across all components without overriding individual selectors.
    • Choosing between a single-page and multi-page structure depends on the complexity of your offering — simpler subscription tiers suit a focused one-page layout.

    Planning Your Layout Structure Before You Write a Line of Code

    Before touching any HTML, map out the customer journey. A visitor landing on a meal kit website typically needs to understand three things within the first few seconds: what the service delivers, how much it costs, and why they should trust you. Every layout decision should serve those three goals.

    For most meal kit brands launching in 2025, a single-page layout is the right starting point. It keeps the subscriber funnel tight, reduces bounce opportunities between pages, and performs well for paid traffic campaigns. If your product has multiple meal plan tiers, a family range, or a corporate catering offering, a multi-page structure makes more sense. The post on one-page vs multi-page websites covers this decision in detail. In Canvas terms, this maps directly to either the singlepage section type or a fullpage_layout depending on your scope.

    turned-on MacBook Pro on table
    Photo by Annie Spratt on Unsplash

    Building the Hero Section That Converts Visitors Immediately

    Your hero is doing the heaviest lifting on the entire page. For a food subscription website, it must communicate appetite appeal and a clear call to action — typically “Start Your First Box” or “Choose Your Plan.” Canvas gives you full-width section components with overlay support, so you can place a high-quality food photograph as the background with a legible headline on top.

    Here is a practical Canvas-compatible hero structure using Bootstrap 5 grid and Canvas section markup:

    <section id="slider" class="slider-element min-vh-60 include-header" style="background: url('images/meal-hero.jpg') center/cover no-repeat;">
      <div class="slider-inner">
        <div class="vertical-middle">
          <div class="container">
            <div class="row justify-content-center text-center">
              <div class="col-xl-7 col-lg-9">
                <h2 class="display-3 fw-bold text-white ls-n-1 mb-3">Fresh Ingredients. Zero Effort.</h2>
                <p class="lead text-white op-08 mb-4">Chef-designed meal kits delivered to your door every week.</p>
                <a href="#plans" class="button button-large button-rounded m-0" style="background-color: var(--cnvs-themecolor);">See This Week's Menu</a>
              </div>
            </div>
          </div>
        </div>
      </div>
    </section>

    Keep the overlay semi-transparent rather than fully opaque. The food photograph should remain visible — it is doing persuasive work even beneath the text. Applying –cnvs-themecolor to the CTA button ensures your brand colour carries through without scattered inline colour values.

    Designing Meal Plan Cards and Pricing Sections

    Subscription tiers need to feel easy to compare. Canvas’s Bootstrap 5 grid lets you build a clean three-column card layout for plans like “Solo Chef,” “Couple’s Kitchen,” and “Family Feast.” Pair this with Canvas’s built-in pricing table components to show per-serving costs, weekly totals, and a highlighted recommended plan.

    Here is a minimal meal plan card example using Bootstrap 5 columns inside a Canvas content section:

    <section id="plans" class="section mb-0 py-6 bg-light">
      <div class="container">
        <div class="row justify-content-center text-center mb-5">
          <div class="col-lg-6">
            <h2 class="fw-bold">Choose Your Plan</h2>
            <p class="text-muted">All plans include free delivery and flexible pause options.</p>
          </div>
        </div>
        <div class="row g-4">
          <div class="col-md-4">
            <div class="card h-100 border-0 shadow-sm rounded-4 p-4 text-center">
              <h4 class="fw-bold">Solo Chef</h4>
              <p class="text-muted">2 meals per week for 1 person</p>
              <div class="display-5 fw-bold mb-3" style="color: var(--cnvs-themecolor);">$8.99 <small class="fs-6 text-muted fw-normal">/ serving</small></div>
              <a href="#signup" class="button button-rounded button-border w-100">Get Started</a>
            </div>
          </div>
          <div class="col-md-4">
            <div class="card h-100 border-0 shadow-sm rounded-4 p-4 text-center" style="border-top: 4px solid var(--cnvs-themecolor) !important;">
              <span class="badge mb-2" style="background-color: var(--cnvs-themecolor);">Most Popular</span>
              <h4 class="fw-bold">Couple's Kitchen</h4>
              <p class="text-muted">3 meals per week for 2 people</p>
              <div class="display-5 fw-bold mb-3" style="color: var(--cnvs-themecolor);">$7.49 <small class="fs-6 text-muted fw-normal">/ serving</small></div>
              <a href="#signup" class="button button-rounded w-100">Get Started</a>
            </div>
          </div>
          <div class="col-md-4">
            <div class="card h-100 border-0 shadow-sm rounded-4 p-4 text-center">
              <h4 class="fw-bold">Family Feast</h4>
              <p class="text-muted">4 meals per week for 4 people</p>
              <div class="display-5 fw-bold mb-3" style="color: var(--cnvs-themecolor);">$6.25 <small class="fs-6 text-muted fw-normal">/ serving</small></div>
              <a href="#signup" class="button button-rounded button-border w-100">Get Started</a>
            </div>
          </div>
        </div>
      </div>
    </section>

    For more advanced Canvas pricing table patterns that drive conversions, the post on Canvas pricing tables: design options that convert visitors walks through additional layout variations worth considering.

    a bowl of food
    Photo by Hey Beauti Magazine on Unsplash

    Using Food Photography and Whitespace to Build Appetite Appeal

    Food subscription websites depend on visual hunger — the design must make the food look irresistible. Resist the temptation to fill every section with text. Generous whitespace around ingredient photography signals quality and premium positioning, which directly supports higher average subscription values.

    Canvas’s section padding utilities make this straightforward. Use py-6 or py-7 on content sections to create breathing room, and let a full-bleed image section separate your pricing area from the testimonials block. The post on whitespace in web design explains why restraint consistently outperforms density for premium brands.

    For the ingredient showcase, a block_section with an alternating two-column layout — image left, text right, then text left, image right — works well and is a pattern Canvas supports natively through Bootstrap’s order utility classes.

    Adding Trust Signals That Reduce Subscription Hesitation

    Subscription hesitation is real: visitors worry about being locked in, about food quality, about cancellation. Your design needs to proactively answer those objections. Canvas gives you icon feature blocks, testimonials sliders, and logo strips — all of which are useful here.

    A four-column icon block beneath the hero covering “Free Delivery,” “Skip Any Week,” “Fresh Guaranteed,” and “Cancel Anytime” removes the four most common objections before visitors even reach the pricing section. Below that, a testimonial section with real subscriber photos builds credibility. For food-specific design decisions around trust, the post on food tech website design trends for 2026 covers current patterns in detail.

    Apply the following CSS in your style.css to keep your brand colour consistent across icon elements:

    :root {
      --cnvs-themecolor: #e8563a;
      --cnvs-themecolor-rgb: 232, 86, 58;
    }
    
    .feature-icon i {
      color: var(--cnvs-themecolor);
    }
    
    .button:not(.button-border) {
      background-color: var(--cnvs-themecolor);
      border-color: var(--cnvs-themecolor);
    }

    Speeding Up Production with Canvas Builder

    Assembling all these sections manually — hero, features, meal cards, testimonials, FAQ, footer — is time-consuming even with Canvas’s component library. Canvas Builder accelerates this by generating complete, Canvas-compatible HTML layouts from a structured prompt. You describe the page type, section order, colour variables, and content requirements, and it outputs production-ready markup that uses the correct Canvas classes, Bootstrap 5 grid, and CSS variables rather than generic boilerplate.

    For a meal kit project, that means you can generate the full single-page layout in one pass, then refine individual sections rather than building from an empty file. When you load the output into your Canvas project, the JS files — js/plugins.min.js and js/functions.bundle.js — handle animations, sticky headers, and smooth scroll without any additional configuration.

    Frequently Asked Questions

    Should a meal kit website use a single-page or multi-page layout?

    For a straightforward subscription offering with two to four plan tiers, a single-page layout keeps the funnel focused and reduces drop-off points. If you have separate meal ranges, a blog, or a corporate offering, a multi-page structure built with Canvas’s fullpagelayout approach gives you the space to present each without crowding.

    Which Canvas CSS variable controls the brand colour for buttons and icons?

    The correct variable is –cnvs-themecolor. Set it once in your style.css root block and it cascades through buttons, icon colours, and any element you reference with var(–cnvs-themecolor). Do not use –bs-primary or –color-primary, which are not Canvas variables.

    How do I make the meal plan cards responsive on mobile?

    Use Bootstrap 5’s column classes — col-md-4 for the three-column desktop layout automatically collapses to a stacked single column on smaller screens. Canvas bundles Bootstrap 5 natively, so there is no need to load the Bootstrap CDN separately.

    What food photography size works best for Canvas hero sections?

    A minimum of 1920 x 900 pixels at 72 DPI works well for full-width hero backgrounds in Canvas. Optimise the file to under 200KB using WebP format to maintain fast load times, which directly affects both user experience and search ranking.

    Can Canvas Builder generate a full meal kit page layout automatically?

    Yes. Canvas Builder accepts structured prompts that describe your section order, colour variables, plan names, and content blocks, and outputs complete Canvas-compatible HTML. This is especially useful for agency workflows where multiple similar subscription landing pages need to be produced quickly across different food brands.

    If you’re working with the Canvas HTML Template and want to generate production-ready layouts faster, try Canvas Builder free and see how much time you save on every project.
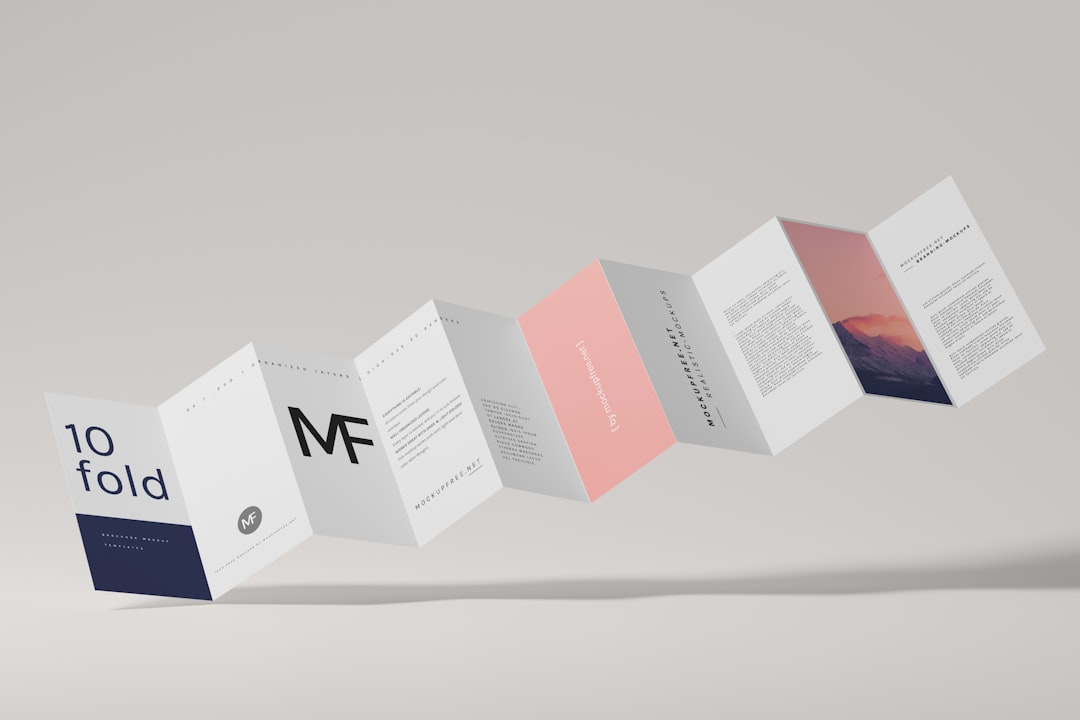
  • Whitespace in Web Design: Why Less Content Means More Impact

    Whitespace in Web Design: Why Less Content Means More Impact

    Most designers know they should use whitespace, but few treat it as a deliberate design decision — and that gap is exactly where layouts start to feel cluttered, hard to read, and unconvincing. Negative space is not empty space; it is the structural element that makes everything else work.

    Key Takeaways

    • Whitespace improves readability, visual hierarchy, and conversion rates — it is an active design tool, not wasted space.
    • Micro-whitespace (spacing between lines, letters, and small elements) is just as important as macro-whitespace (padding between sections).
    • Bootstrap 5 spacing utilities and CSS custom properties make implementing consistent negative space straightforward in any Canvas-based project.
    • Reducing content density on a page almost always increases user engagement and the perceived quality of a brand.

    What Whitespace Actually Means in Web Design

    Whitespace — also called negative space — is any area of a layout that is not occupied by text, images, icons, or interactive elements. It does not have to be white; it is simply the breathing room between things. In web design, it appears at two scales:

    • Macro-whitespace: the generous padding around sections, between columns, and in full-width hero areas.
    • Micro-whitespace: line-height, letter-spacing, margins between a heading and its paragraph, and the padding inside a button.

    Both scales are equally important. A page can have dramatic hero sections with plenty of macro-whitespace while still feeling cramped if the body text runs at 1.2 line-height and the labels sit too close to the form fields. Effective whitespace web design treats every gap in a layout as a deliberate choice, not a default.

    person in black and white t-shirt using computer
    Photo by Fikret tozak on Unsplash

    Why Negative Space Improves Readability and Trust

    Research into reading behaviour consistently shows that increasing line-height and paragraph spacing improves reading speed and comprehension. But whitespace does more than aid legibility — it signals intent. A layout with considered negative space communicates that the brand is confident, premium, and focused. Compare any luxury product site with a discount retail site: the luxury brand uses restraint; the discount retailer fills every pixel.

    From a conversion standpoint, reducing visual noise around a call-to-action increases its click-through rate. When a button is surrounded by competing elements — badge icons, supporting copy, social proof widgets — the user’s eye has no clear landing point. Isolate that button with whitespace, and the hierarchy becomes obvious.

    This principle applies directly to niche layouts. Posts covering areas such as mental health platform website design emphasise calm, uncluttered layouts specifically because the audience’s emotional state demands it — whitespace there is not just aesthetic, it is functional.

    Applying Micro-Whitespace in HTML and CSS

    Micro-whitespace is where most implementation errors happen. Designers set generous section padding but forget that the text inside still feels dense. The following CSS establishes a solid baseline for readable body copy in any project built on Bootstrap 5 or the Canvas HTML Template:

    :root {
      --body-line-height: 1.8;
      --paragraph-spacing: 1.25rem;
      --heading-letter-spacing: -0.02em;
    }
    
    body {
      line-height: var(--body-line-height);
    }
    
    p + p {
      margin-top: var(--paragraph-spacing);
    }
    
    h1, h2, h3 {
      letter-spacing: var(--heading-letter-spacing);
    }
    

    Notice the use of CSS custom properties — this makes it straightforward to adjust spacing globally without hunting through stylesheets. In Canvas specifically, pair these with –cnvs-primary-font and –cnvs-secondary-font to keep typography settings consistent with the theme’s variable system.

    white and purple flowers in black background
    Photo by Annie Spratt on Unsplash

    Using Bootstrap 5 Spacing Utilities for Macro-Whitespace

    Bootstrap 5’s spacing scale (from p-0 to p-5, plus custom values via py-6 and beyond when extended) gives you a reliable, consistent system for section-level whitespace. Rather than writing arbitrary padding values in custom CSS, use utilities to build visual rhythm:

    <section class="py-6 py-lg-7">
      <div class="container">
        <div class="row justify-content-center">
          <div class="col-lg-7 text-center">
            <h2 class="mb-3">A Focused Section Headline</h2>
            <p class="lead mb-5">One clear idea per section. No sidebars, no competing calls to action. The whitespace around this content tells the reader it matters.</p>
            <a href="#" class="btn btn-primary btn-lg px-5">Take Action</a>
          </div>
        </div>
      </div>
    </section>
    

    A few things to notice in this snippet. The column is constrained to col-lg-7 and centred — leaving significant horizontal whitespace on both sides. The button has extra horizontal padding (px-5) so it feels substantial rather than cramped. And there is only one call-to-action, surrounded by breathing room. This is macro-whitespace web design done properly.

    If you want to go further with layout precision, a Bootstrap Grid calculator can help you visualise column widths and gutters before you commit to a structure.

    Common Whitespace Mistakes That Undermine Layouts

    Even designers who understand the theory of negative space make predictable errors in execution. These are the most damaging ones to watch for in 2025 and 2026 projects:

    1. Inconsistent vertical rhythm: Some sections use py-5, others use arbitrary inline styles like padding: 60px 0. The result is a layout that feels unplanned even if individual sections look fine.
    2. Tight line-height on display headings: Large headings at 1.1 or 1.2 line-height look intentional; body text at the same ratio looks like a typesetting error.
    3. Padding that disappears on mobile: A section with py-7 on desktop may need py-5 on mobile — not because whitespace is less important, but because proportions change at smaller viewports.
    4. Adding content to fill space: When a section feels “empty,” the instinct is to add another bullet point or a stock photo. Usually the right answer is to tighten the copy and let the whitespace remain.
    5. Ignoring form field spacing: Input fields, labels, and helper text are notorious for micro-whitespace neglect. A 4px gap between a label and its field reads as an afterthought.

    These same principles apply across very different project types. Whether you are reading about food tech website design trends or a minimalist SaaS landing page, consistent spacing discipline separates polished work from rough layouts.

    Implementing Whitespace Thoughtfully in Canvas Template Layouts

    When building with the Canvas HTML Template, the section structure gives you natural opportunities to apply whitespace intentionally. Canvas sections typically carry utility classes for padding, and the template’s CSS variables generator system means you can define spacing tokens once and propagate them across the entire layout.

    Here is a practical pattern for a content section that uses Canvas’s variable system alongside Bootstrap spacing to create a consistently airy layout:

    :root {
      --cnvs-section-padding: 7rem;
      --cnvs-section-padding-sm: 4rem;
    }
    
    .section {
      padding-top: var(--cnvs-section-padding);
      padding-bottom: var(--cnvs-section-padding);
    }
    
    @media (max-width: 767.98px) {
      .section {
        padding-top: var(--cnvs-section-padding-sm);
        padding-bottom: var(--cnvs-section-padding-sm);
      }
    }
    

    Defining these values as variables means a single edit updates every section simultaneously. Combined with the column-width restraint shown in the earlier Bootstrap example, this approach produces layouts where whitespace feels architectural rather than accidental. For agencies managing multiple Canvas-based builds, Canvas HTML Template agency workflows often standardise these spacing tokens across a shared base file so every project starts from the same typographic and spatial foundation.

    When generating new sections with Canvas Builder, the AI-generated output follows spacing conventions that respect these principles — which means less time correcting padding values manually and more time refining the content itself.

    Frequently Asked Questions

    Is whitespace really worth the sacrifice in content space?

    Yes. Studies consistently show that users read and retain information better when it is presented with adequate spacing. More importantly, whitespace increases perceived brand quality and makes calls-to-action more prominent — both of which directly affect conversions. You are not sacrificing space; you are investing it.

    How much padding should sections have on desktop?

    A common baseline is between 5rem and 8rem of vertical padding per section on desktop, scaling down to 3rem–5rem on mobile. The exact values matter less than consistency — define spacing tokens as CSS custom properties and reuse them throughout the layout rather than setting arbitrary values per section.

    Does whitespace affect page SEO?

    Whitespace itself does not directly affect search rankings, but it strongly influences user behaviour signals that do — such as time on page, scroll depth, and bounce rate. A layout that is easier to read and navigate will typically outperform a dense, cluttered one in those engagement metrics over time.

    How do I use Bootstrap 5 spacing utilities for consistent whitespace?

    Bootstrap 5’s built-in spacing scale uses classes like py-5 for vertical padding and mb-4 for bottom margin. You can extend the scale in your Sass configuration or override values in a custom CSS file. The key is to pick a small set of values (for example, 3, 5, and 7) and use only those across all sections so the rhythm feels intentional.

    Does Canvas HTML Template support easy spacing customisation?

    Yes. Canvas uses CSS custom properties throughout its stylesheet, and you can override section padding globally by redefining variables in your own CSS file. Combined with Bootstrap 5’s utility classes, which Canvas bundles natively, you can control whitespace at both the section and component level without modifying the core template files.

    If you’re working with the Canvas HTML Template and want to generate production-ready layouts faster, try Canvas Builder free and see how much time you save on every project.

  • One-Page vs Multi-Page Websites: When to Use Each

    One-Page vs Multi-Page Websites: When to Use Each

    Choosing between a one-page and a multi-page structure is one of the earliest and most consequential decisions in any web project — get it wrong, and you are fighting the architecture for the rest of the build.

    Key Takeaways

    • Single-page websites work best for focused campaigns, simple offerings, and conversion-led goals where a linear narrative guides the visitor.
    • Multi-page websites suit complex products, content-rich businesses, and any project that depends on organic search traffic across multiple topics.
    • The decision is driven by content volume, SEO strategy, and user intent — not personal preference or design trends.
    • The Canvas HTML Template supports both formats natively, so the structural choice does not constrain your design options.

    Defining the Two Formats Clearly

    A single-page website presents all content within one scrollable HTML document. Navigation anchors link to sections within that document rather than loading new pages. The visitor’s entire journey — from first impression to call to action — happens in a single continuous scroll.

    A multi-page website distributes content across separate HTML files or routes. Each page has its own URL, its own <title> and meta description, and its own entry point from search engines or direct links. Navigation loads new pages rather than scrolling to anchors.

    Both are legitimate, production-ready approaches in 2025. The problem arises when developers default to one format without evaluating whether it serves the specific project at hand. Understanding the strengths of each format makes that evaluation straightforward.

    Browser showing facebook.com in the address bar.
    Photo by Zulfugar Karimov on Unsplash

    When a Single-Page Website Is the Right Choice

    A single-page structure performs well in specific, well-defined scenarios. The common thread across all of them is a focused, linear user journey with a small, cohesive content set.

    Use a single-page website when:

    • The product or service can be explained in five to seven logical sections without requiring deep sub-categories.
    • The primary goal is a single conversion action — a form submission, a booking, a product purchase, or an email sign-up.
    • The project is a campaign landing page with a defined lifespan rather than an evergreen business site.
    • The target audience arrives primarily from a paid channel, a QR code, or a direct link rather than from organic search.
    • The brand story benefits from an immersive, scroll-driven narrative that would be disrupted by page loads.

    Portfolio sites for individual creatives, event pages, product launch pages, and SaaS trial landing pages are all classic single-page use cases. If you are building an AI SaaS landing page, for instance, the entire value proposition — problem, solution, features, social proof, pricing, and CTA — can flow naturally in one document. For a detailed walkthrough of that kind of build, see how to build an AI SaaS landing page with Canvas HTML Template.

    The single-page format also reduces development overhead. There is one file to maintain, one navigation structure to manage, and one set of global styles to keep consistent. freelancers delivering fast-turnaround projects, that simplicity has real commercial value.

    When a Multi-Page Website Is the Right Choice

    Multi-page architecture becomes necessary — not just preferable — once content volume and SEO requirements exceed what a single document can serve effectively.

    Use a multi-page website when:

    • The business offers multiple distinct services, products, or categories that each deserve their own indexed URL.
    • Organic search is a significant acquisition channel and the site needs to rank for multiple keywords across different intent stages.
    • The site includes a blog, resource library, case studies, or any content type that grows over time.
    • Different audience segments need separate entry points — for example, a co-working space targeting both individual freelancers and corporate teams.
    • The project involves e-commerce, client portals, or any feature requiring authenticated pages.

    A business with ten service lines cannot rank for all of them on a single URL. Each service page needs its own optimised title tag, heading structure, and body copy. Trying to compress that content into anchor sections on one page produces thin, unfocused copy that serves neither users nor search engines. For projects like co-working space websites — which typically need dedicated pages for membership plans, event spaces, locations, and blog content — a multi-page structure is the only sensible choice. The guide on building a co-working space website with Canvas HTML Template demonstrates how that architecture comes together in practice.

    A laptop computer sitting on top of a wooden desk
    Photo by Swello on Unsplash

    SEO Implications: The Deciding Factor for Many Projects

    Search engine optimisation is where the one-page vs multi-page decision becomes most consequential. A single-page site has exactly one URL to rank. Every piece of content on that page competes for the same ranking signals. You cannot target “brand identity designer London” and “logo design for startups” on the same URL without diluting both.

    Multi-page sites distribute keyword targeting across dedicated URLs. Each page can be optimised for a specific search intent, have its own internal link equity, and appear independently in search results. For any business that depends on organic traffic, this is not a minor advantage — it is architecturally fundamental.

    That said, single-page sites are not invisible to search engines. Google indexes single-page HTML documents and can rank them for their primary keyword. The limitation is breadth, not visibility. If the project’s keyword universe is narrow — for example, a local tradesperson targeting one service in one city — a well-optimised single-page site can compete effectively.

    The practical test: list every keyword the business needs to rank for. If they all share the same search intent and can be addressed in one piece of content, a single page is viable. If the list contains keywords across different intents, topics, or funnel stages, multi-page is necessary.

    How Canvas Handles Both Formats

    Canvas supports both structures through its built-in section types. The singlepage section type produces a complete one-page layout with a header, hero, content sections, and footer in a single document. The fullpage_layout section type outputs multi-page niche demos with separate files for each page, consistent global navigation, and proper inter-page linking.

    Both formats use the same Canvas CSS variables generator, the same style.css and css/font-icons.css stylesheets, and the same JavaScript files — js/plugins.min.js and js/functions.bundle.js. Switching between formats does not require a different toolchain or a different design system. The Canvas variable set, including --cnvs-themecolor, --cnvs-primary-font, and --cnvs-header-bg, applies consistently across both.

    For a more detailed comparison of how Canvas’s own demo library handles these two formats, the post on Canvas one-page vs multi-page demo formats covers the structural differences and when each demo type is the better starting point.

    Canvas Builder generates layouts in either format based on your project brief, so you are not locked into a structure at the prompt stage — the output adapts to the site type you specify.

    A Practical Decision Framework

    Rather than defaulting to a format based on aesthetics or familiarity, run through these four questions before starting any project:

    1. How much content does the site need? If the answer is more than eight to ten distinct topics, multi-page is almost always the right call.
    2. What is the primary traffic source? Paid and referral traffic suit single-page well. Organic search almost always demands multi-page.
    3. Is there one clear conversion goal or several? A single goal with a linear funnel favours one page. Multiple goals for different audience segments require separate pages.
    4. Will the site grow? If the client plans to add blog posts, case studies, or new service pages within twelve months, build multi-page from the start. Retrofitting a single-page site into a multi-page structure mid-project is disruptive and time-consuming.

    Applying this framework consistently eliminates most ambiguity before a line of HTML is written.

    Frequently Asked Questions

    Is a single-page website bad for SEO?

    Not inherently, but it is limited. A single-page site can rank well for one primary keyword or a tight cluster of closely related terms. It becomes a liability when the business needs to rank for multiple distinct topics or keywords with different search intents, because all content must share a single URL and compete for the same ranking signals.

    Can I convert a single-page Canvas site to multi-page later?

    Technically yes, but it requires splitting content into separate HTML files, updating all navigation links, and creating individual meta data for each new page. It is significantly less effort to choose the correct format upfront. If there is any expectation of content growth, start with a multi-page structure.

    Do single-page websites load faster than multi-page websites?

    Single-page sites load all content in one request, which can feel fast on first load but may transfer more data upfront than a user needs. Multi-page sites load only the content for the current page, which is more efficient for large sites. With proper lazy loading and asset optimisation, both formats can achieve strong Core Web Vitals scores.

    What types of businesses should always use multi-page websites?

    Any business with multiple service lines, a product catalogue, a blog or resource section, multiple target audience segments, or a dependence on organic search traffic should use a multi-page structure. E-commerce sites, agencies, SaaS platforms with multiple features, and local businesses targeting several service keywords all fall into this category.

    Does Canvas Builder support generating multi-page layouts as well as single-page?

    Yes. Canvas Builder generates layouts using Canvas’s native section types, which include both single-page and full multi-page formats. You specify the site type in your prompt and the generated output reflects the appropriate structure, including separate page files and navigation for multi-page projects.

    If you’re working with the Canvas HTML Template and want to generate production-ready layouts faster, try Canvas Builder free and see how much time you save on every project.
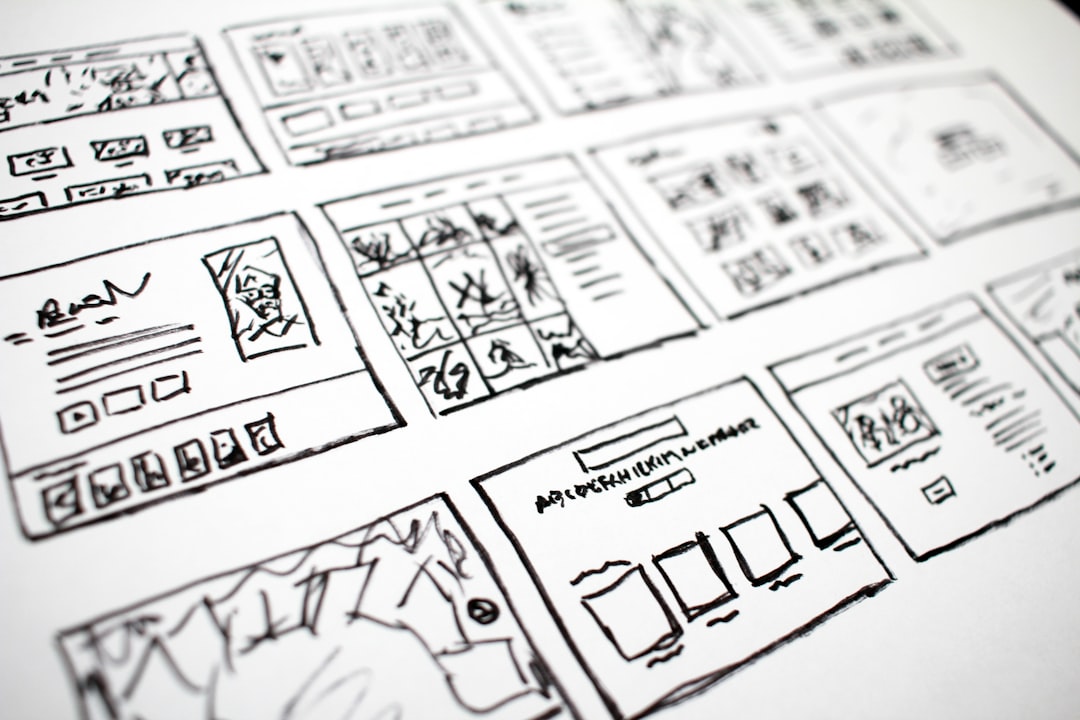
    Where the Alternatives Win

    A multi-page structure is the clear winner for any project that depends on organic search traffic, and Canvas Builder does not change that reality. Businesses targeting multiple keywords across different search intents, running e-commerce, or publishing growing content libraries like blogs and case studies will find a single-page approach architecturally inadequate — no tool or template overcomes the fundamental limitation of having only one URL to rank. Similarly, sites serving distinct audience segments, such as a co-working space addressing both freelancers and corporate clients, require separate entry points that only a multi-page structure can provide.

    The Verdict: Who Should Choose What

    Canvas Builder is a strong fit for developers and freelancers building focused, conversion-led projects — campaign landing pages, product launches, SaaS trial pages, or individual portfolios — where a linear narrative and a single call to action are all the site needs. If your project requires ranking for multiple keywords, hosting a blog, separating service lines into indexed URLs, or supporting authenticated user areas, a multi-page architecture is not optional, and you should plan your build around that structure from the start regardless of which tool you use.

  • How to Build a Co-Working Space Website with Canvas HTML Template

    How to Build a Co-Working Space Website with Canvas HTML Template

    Co-working spaces compete on atmosphere, community, and flexibility — and a prospective member’s first impression almost always happens online. If your website doesn’t communicate the energy and professionalism of your space within seconds, you’re losing leads before anyone walks through the door.

    Why Canvas Suits a Co-Working Website Project

    Co-working websites have a recognisable structure: a bold hero with a CTA, a features or amenities grid, a membership pricing table, a gallery or virtual tour section, and a contact or booking form. Canvas ships with all of these as ready-to-use block sections, which means you’re assembling and customising rather than building from scratch.

    Because Canvas is built on Bootstrap 5, its grid system handles responsive layouts across mobile, tablet, and desktop without extra effort. If you’ve previously weighed your options, the post on Canvas HTML Template vs ThemeForest Competitors covers exactly why Canvas tends to win for complex, content-rich builds like this one.

    For a co-working project, the most practical Canvas section types to reach for are:

    • fullpagelayout — for operators with multiple locations, membership tiers, or blog content
    • single_page — for boutique spaces that want one scrollable experience with a strong narrative
    • block_section — for individual reusable components like a pricing table or amenities grid

    If you’re unsure which format fits your client’s brief, the comparison at Canvas One Page Demo vs Multi-Page: When to Use Each Format is worth reading before you start.

    a tablet sitting on top of a wooden table next to a cup of coffee
    Photo by Rodeo Project Management Software on Unsplash

    Setting Up the Hero Section

    The hero is the highest-impact section on any co-working website. It needs a strong headline, a clear value proposition, and a single primary CTA — typically “Book a Tour” or “View Memberships”. Canvas’s full-width section classes handle the background image and overlay without any custom CSS.

    <section id="slider" class="slider-element min-vh-60 include-header" style="background: url('images/coworking-hero.jpg') center center / cover no-repeat;">
      <div class="slider-inner">
        <div class="vertical-middle">
          <div class="container">
            <div class="row justify-content-center text-center">
              <div class="col-lg-8">
                <div class="emphasis-title">
                  <h2 class="text-white fw-bold ls-0">Work Differently. Thrive Together.</h2>
                  <p class="lead text-white op-07 mb-4">Flexible desks, private offices, and meeting rooms in the heart of the city.</p>
                  <a href="#memberships" class="button button-large button-rounded m-0">View Memberships</a>
                </div>
              </div>
            </div>
          </div>
        </div>
      </div>
    </section>

    Note the include-header class, which pulls the section under the transparent Canvas header so the hero bleeds to the top of the viewport — a detail many first-time Canvas users miss.

    Building the Amenities and Features Grid

    After the hero, visitors want to understand what the space offers. An icon-driven features grid answers this quickly. Canvas’s feature-box components work well here, and Bootstrap 5’s column classes give you flexible Bootstrap breakpoint tester across device sizes.

    <section id="amenities" class="section my-0 py-6 bg-light">
      <div class="container">
        <div class="row text-center mb-5">
          <div class="col-12">
            <h2 class="fw-bold ls-0">Everything You Need to Do Your Best Work</h2>
            <p class="lead op-07">High-speed internet, 24/7 access, and a community that gets things done.</p>
          </div>
        </div>
        <div class="row g-4">
          <div class="col-md-4">
            <div class="feature-box fbox-center fbox-light fbox-rounded px-4 py-5">
              <div class="fbox-icon mb-3">
                <i class="bi-wifi h2"></i>
              </div>
              <h3 class="nott fw-semibold">1 Gbps Wi-Fi</h3>
              <p class="op-07">Dedicated fibre connection with failover, so you never miss a deadline.</p>
            </div>
          </div>
          <div class="col-md-4">
            <div class="feature-box fbox-center fbox-light fbox-rounded px-4 py-5">
              <div class="fbox-icon mb-3">
                <i class="bi-door-open h2"></i>
              </div>
              <h3 class="nott fw-semibold">24/7 Access</h3>
              <p class="op-07">Key fob entry means you work on your schedule, not ours.</p>
            </div>
          </div>
          <div class="col-md-4">
            <div class="feature-box fbox-center fbox-light fbox-rounded px-4 py-5">
              <div class="fbox-icon mb-3">
                <i class="bi-camera-video h2"></i>
              </div>
              <h3 class="nott fw-semibold">Video-Ready Meeting Rooms</h3>
              <p class="op-07">Bookable rooms with 4K displays and professional audio setups.</p>
            </div>
          </div>
        </div>
      </div>
    </section>

    If your client wants to extend this section into a tab-based layout separating “Hot Desking”, “Private Offices”, and “Meeting Rooms”, the approach in Bootstrap 5 Accordion and Tabs: Interactive Content Without JavaScript covers the exact pattern using Bootstrap 5’s built-in tab component.

    MacBook Pro turned-on on brown wooden surface
    Photo by Rumman Amin on Unsplash

    Adding a Membership Pricing Section

    Pricing transparency is a conversion driver for co-working spaces. Visitors who can’t find pricing quickly will simply look at a competitor. Canvas includes several pricing table styles out of the box. The key is keeping the structure to three tiers maximum — Hot Desk, Dedicated Desk, and Private Office — and highlighting the recommended plan with a visual accent.

    Apply your brand colour through the Canvas variable rather than hardcoded hex values:

    :root {
      --cnvs-themecolor: #2563eb;
      --cnvs-themecolor-rgb: 37, 99, 235;
    }

    This ensures that any Canvas component that references –cnvs-themecolor — buttons, active states, icon colours — updates globally from a single declaration. For a deeper look at pricing table layout options specific to Canvas, the post on Canvas Pricing Tables: Design Options That Convert Visitors is directly relevant here.

    Booking and Contact Form Integration

    A co-working website’s primary conversion goal is booking a tour or enquiry. Canvas’s contact section components provide a clean starting point, and because Canvas is static HTML, you’ll need a form backend. Common choices in 2025 include Formspree, Netlify Forms, or a lightweight PHP mailer if the site is hosted on a server.

    Here’s a minimal, accessible enquiry form using Bootstrap 5’s form classes as Canvas uses them:

    <section id="contact" class="section my-0 py-6">
      <div class="container">
        <div class="row justify-content-center">
          <div class="col-lg-7 text-center mb-5">
            <h2 class="fw-bold ls-0">Book a Tour</h2>
            <p class="lead op-07">Come and see the space in person. We'll show you around and answer every question.</p>
          </div>
          <div class="col-lg-8">
            <form action="https://formspree.io/f/your-form-id" method="POST" class="row g-3">
              <div class="col-md-6">
                <label for="name" class="form-label">Full Name</label>
                <input type="text" id="name" name="name" class="form-control form-control-lg" required>
              </div>
              <div class="col-md-6">
                <label for="email" class="form-label">Email Address</label>
                <input type="email" id="email" name="email" class="form-control form-control-lg" required>
              </div>
              <div class="col-12">
                <label for="plan" class="form-label">Interested In</label>
                <select id="plan" name="plan" class="form-select form-select-lg">
                  <option value="hot-desk">Hot Desk</option>
                  <option value="dedicated-desk">Dedicated Desk</option>
                  <option value="private-office">Private Office</option>
                </select>
              </div>
              <div class="col-12">
                <button type="submit" class="button button-large button-rounded m-0">Request a Tour</button>
              </div>
            </form>
          </div>
        </div>
      </div>
    </section>

    Keep the form short. Name, email, and the membership tier of interest is enough to qualify a lead without creating friction.

    Performance, File Structure, and Delivering to Clients

    A co-working website build is often handed off to a non-technical client or property manager who needs to update opening hours and pricing. Before delivery, establish a clean file structure and document which sections contain editable content. Canvas’s required files are style.css, css/font-icons.css, js/plugins.min.js, and js/functions.bundle.js — keep these untouched and place any overrides in a separate custom.css file.

    Never load a separate Bootstrap CDN link. Canvas bundles Bootstrap 5 internally, and loading it twice causes style conflicts that are difficult to debug under deadline pressure.

    For broader guidance on structuring a smooth handoff, the Freelancer’s Guide to Delivering HTML Templates to Clients covers documentation, file naming, and client communication in practical detail.

    Frequently Asked Questions

    Does Canvas HTML Template include a co-working demo layout?

    Canvas does not ship a dedicated co-working niche demo, but its block sections — hero, features grid, pricing tables, gallery, and contact — cover every component a co-working website requires. The template’s flexibility means you assemble these blocks for your specific layout rather than being locked into a pre-made design.

    Should I build the co-working site as a single page or multi-page layout?

    For a single-location boutique co-working space, a single-page layout with smooth scrolling sections works well and keeps the user journey linear. Multi-page structures are better suited to operators with multiple locations, separate blog content, or a member portal. The decision ultimately depends on how much content the client needs to communicate.

    How do I apply the brand colour consistently across the Canvas layout?

    Set –cnvs-themecolor in your :root declaration inside a custom CSS file. Canvas components reference this variable internally, so updating it once cascades through buttons, active states, and icon accents across the entire layout without touching individual elements.

    Can I add a booking system or membership portal to a Canvas HTML site?

    Canvas is a static HTML template, so booking and membership functionality requires a third-party integration. Common approaches include embedding a tool like Calendly or Acuity for tour bookings, and using a SaaS platform like Cobot or Nexudus for member management. These are typically embedded via iframe or JavaScript snippet into the relevant Canvas page section.

    How can Canvas Builder speed up a co-working website build?

    Canvas Builder generates production-ready Canvas HTML sections based on a prompt describing your layout requirements. For a co-working project, you can generate a hero, amenities grid, and pricing section in minutes rather than manually referencing the Canvas documentation and assembling markup by hand — particularly useful when working to a tight client deadline.

    If you’re working with the Canvas HTML Template and want to generate production-ready layouts faster, try Canvas Builder free and see how much time you save on every project.